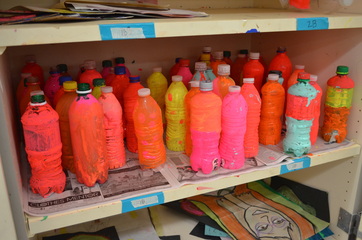
 Our painted bottles waiting to dry Our painted bottles waiting to dry I have seen many art teachers attempt a Chihuly-inspired sculpture. This was a quick two-day project that had great results! We collected over 350 plastic bottles from students, parents, and staff over the semester. As a quick project before winter break, we made four Chihuly sculptures. Day One Students were introduced to the artist Dale Chihuly. We talked about the principles of design of form and movement. We looked at the Mayo Clinic's collection of Chihuly's art in the Gonda Building. Many students were excited about this because they had seen these in real life. We also talked about abstract art and what this meant. We had a short discussion about Chihuly and his team. I asked students if they thought Chihuly was a real artist if he has other people make his work. This created a great discussion/debate about the difference between an artist and a designer. Students then took a plastic bottle (some chose the same one from their drawing). I told students to choose a bottle that wasn't too thick. The really thin and cheap water bottles worked best. AVOID the gatorade, ICE, and thicker milk/juice bottles. I had students write their name on some masking tape and stick it to the bottom of their bottles. Students then used coarse sand paper to sand their bottles down. This helps the paint stick better. I used elmer's glue, neon paint, and a small bit of water to create the paint mixture. After students sanded, they immediately painted their bottles. I allowed students to use more than one color and they could also do a design like stripes or polka dots. I told students that it was okay if the paint was thicker in some places than others. Once they were painted, we left them standing up right in the cupboard to dry. Day Two We reviewed form, movement, and abstract art. I did a quick demo on how to the cut the bottle in either a spiral or flower design. I numbered students off 1-2. #1 did a spiral. #2 did a flower. Students cut the bottoms of their bottles off and then cut their design. I created wire cages with christmas lights in advance. I used string to hang the wire cage from the ceiling. We attached the bottles by tying with string/wire at the opening of the bottle and attaching to the wire cage. I did most of the tying to the cage as it got too chaotic to have all the students at once trying to attach their bottles. Some of the paint flaked off a bit, so we did quite a bit of sweeping. Students who finished early were required to clean up and help students who might have been a bit behind. Once we had them all attached, we lit it up and turned the lights off....there were A LOT of "oooohs" and "aaaaahs". The last part of class we watched a 15-minute Video on Chihuly Chandelier's and Towers and how the glass is blown. There were four chandelier's total (2 classes for each chandelier). I plan on giving one of the chandeliers to another interested art teacher and keeping one. The other two I am hoping we can raffle off at our end of the semester "classroom art show". I can just see these hanging up in a kid's room or outside on a deck (they are completely outdoors-proof). This was a lesson that EVERY student seemed to enjoy and was capable of doing. 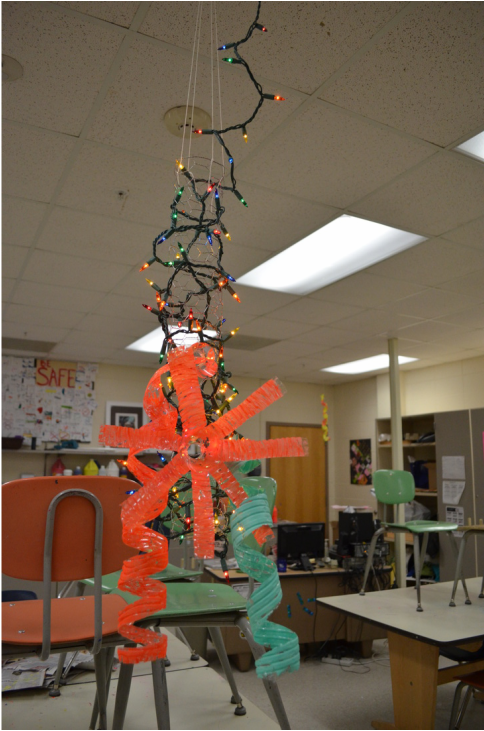 The wire cage exposed with my three example bottles - two spirals & one flower.  We ended up keeping most of the flower designs at the top and the spirals on the bottom so they could hang down. 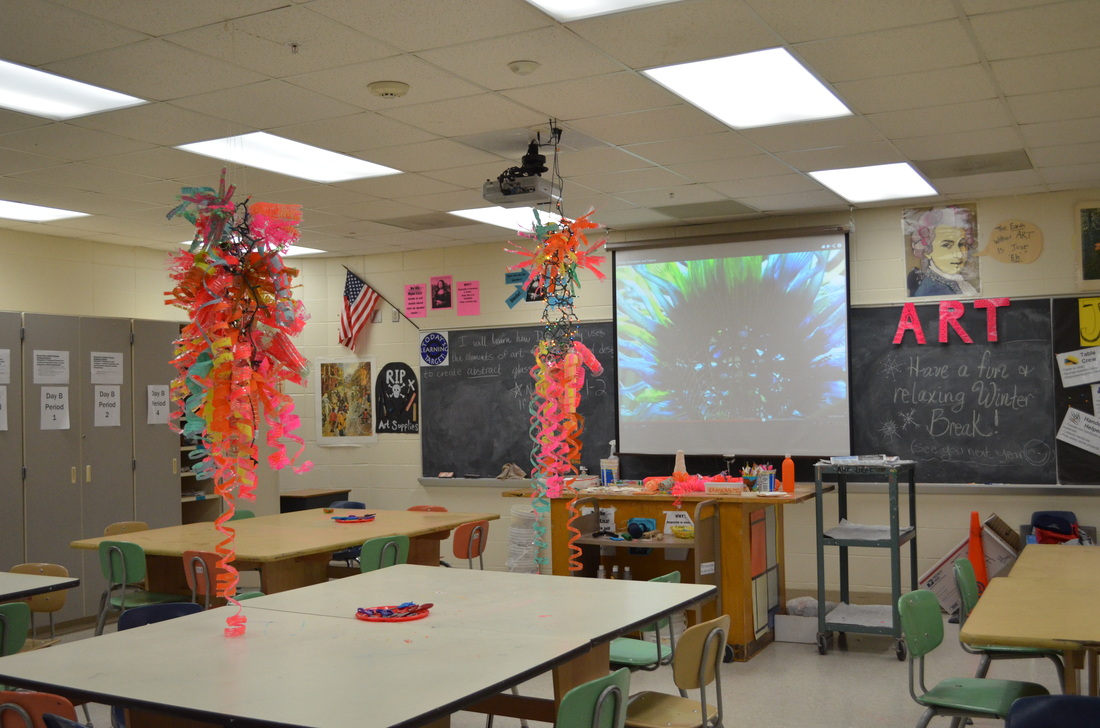 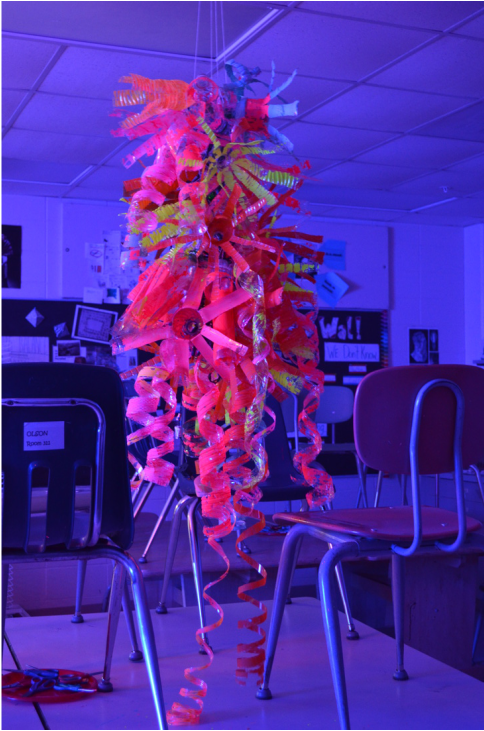 Did I mention they also glow in black light? :) 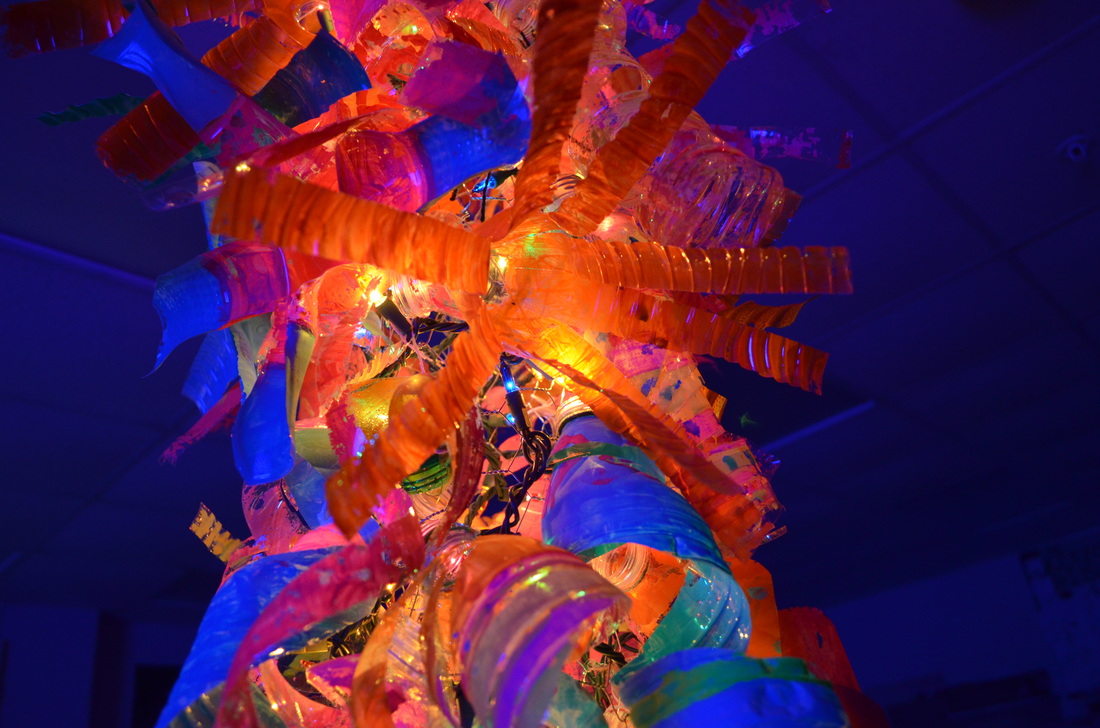 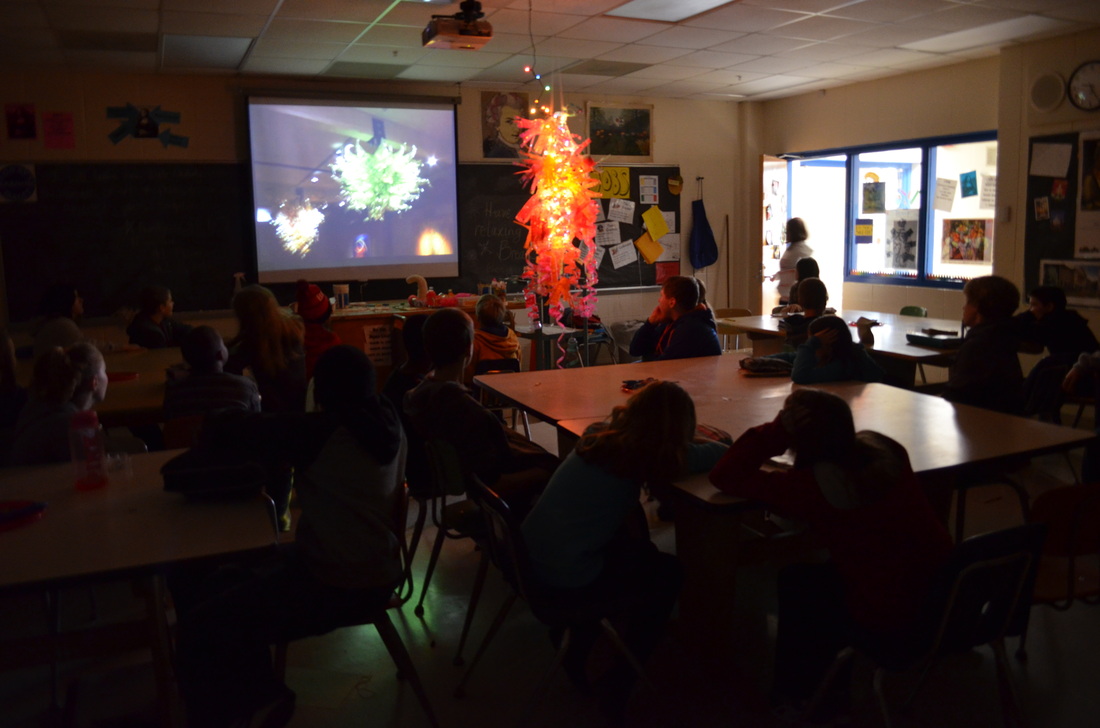
8 Comments
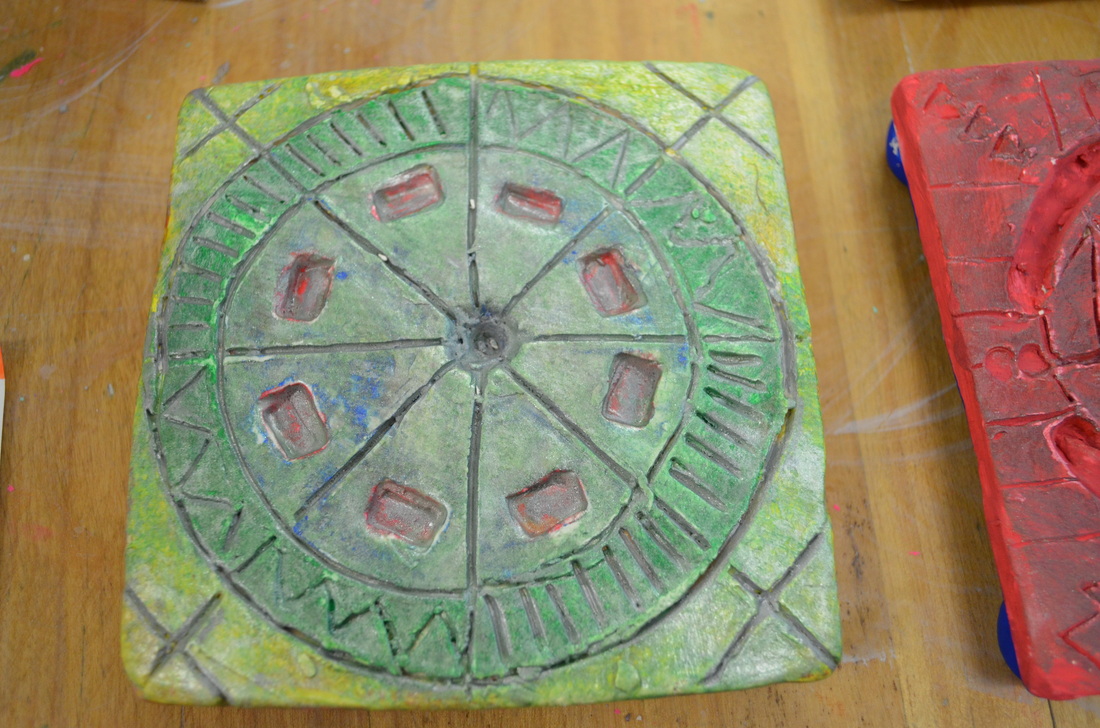
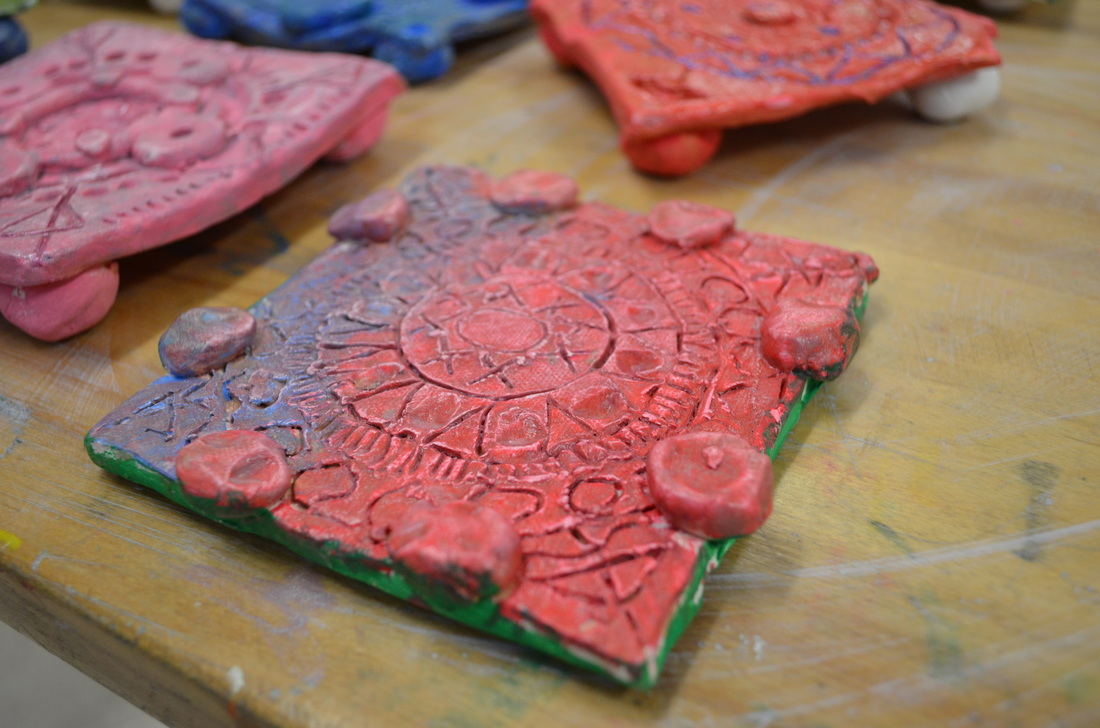
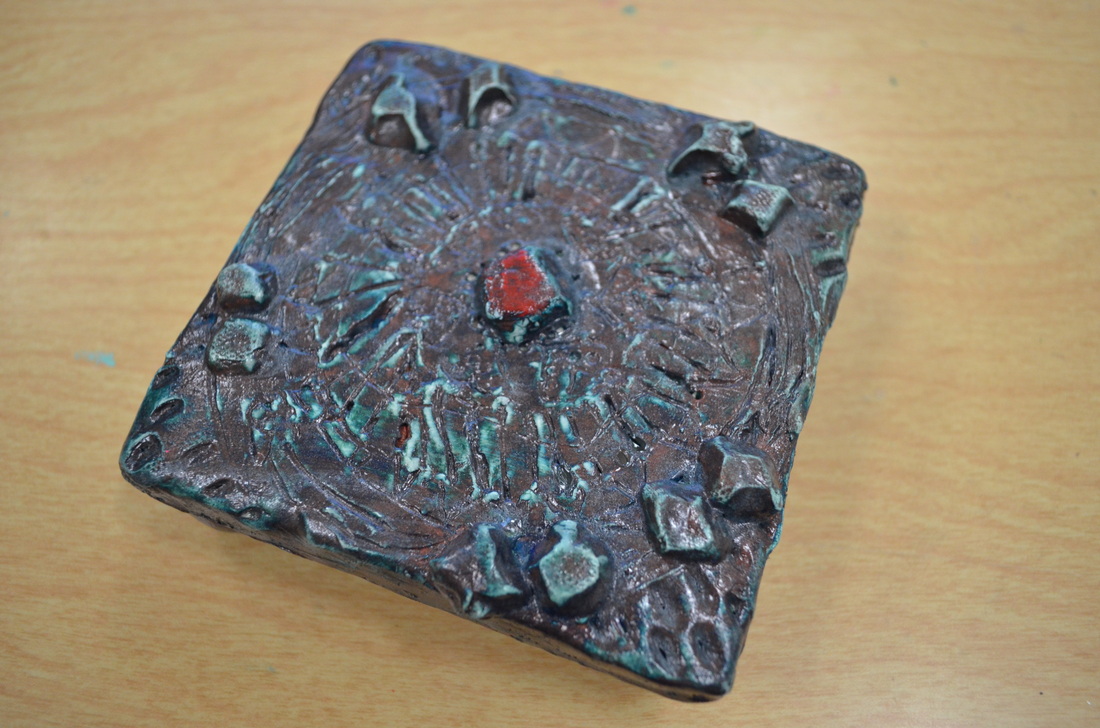
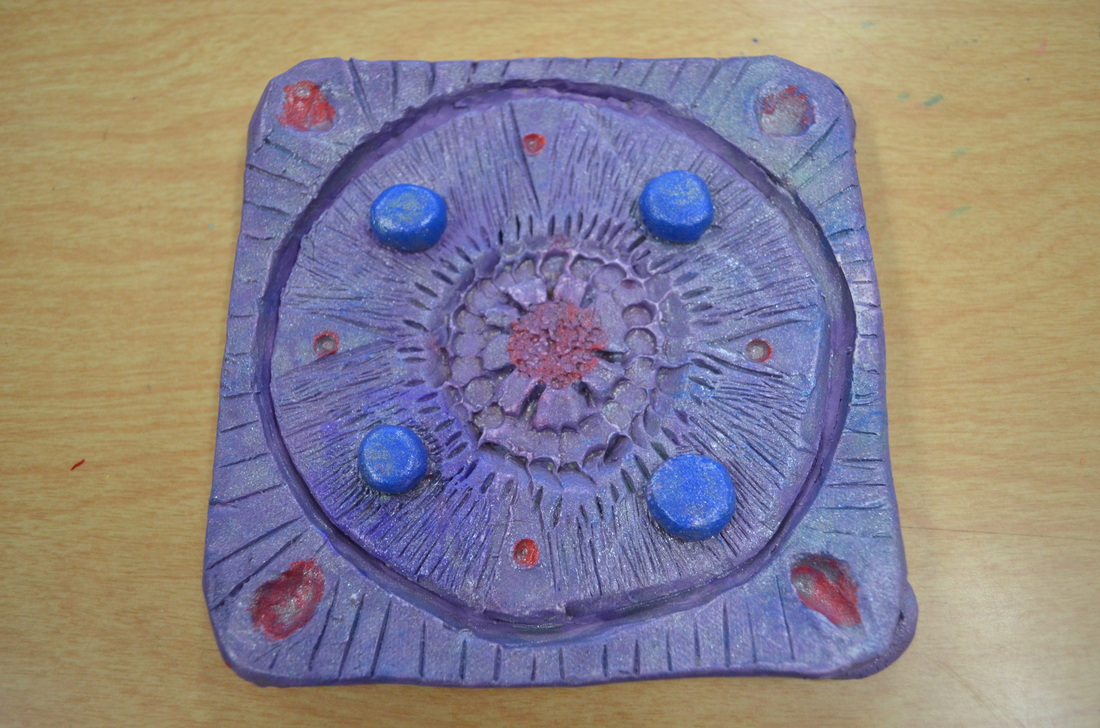
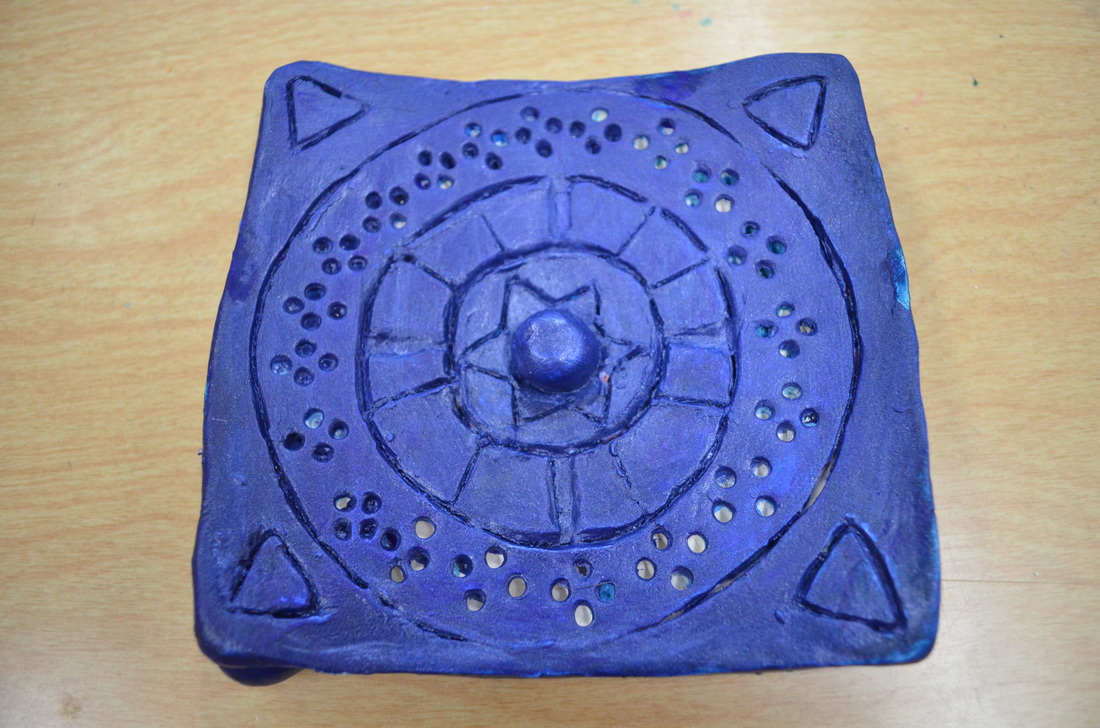
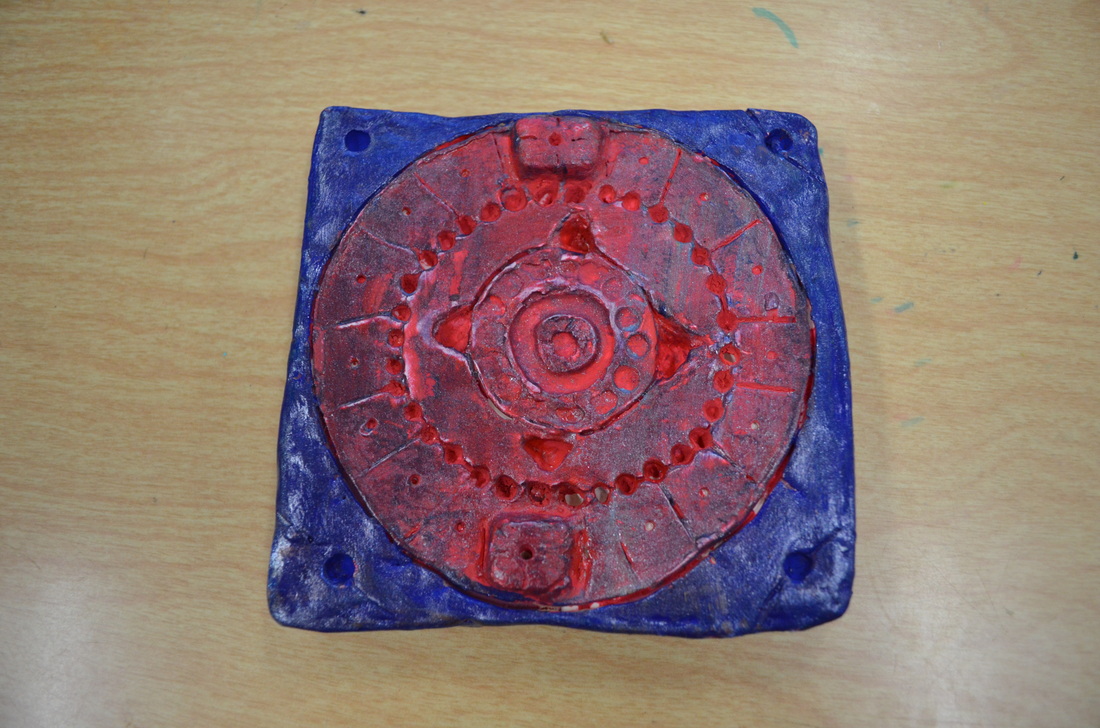
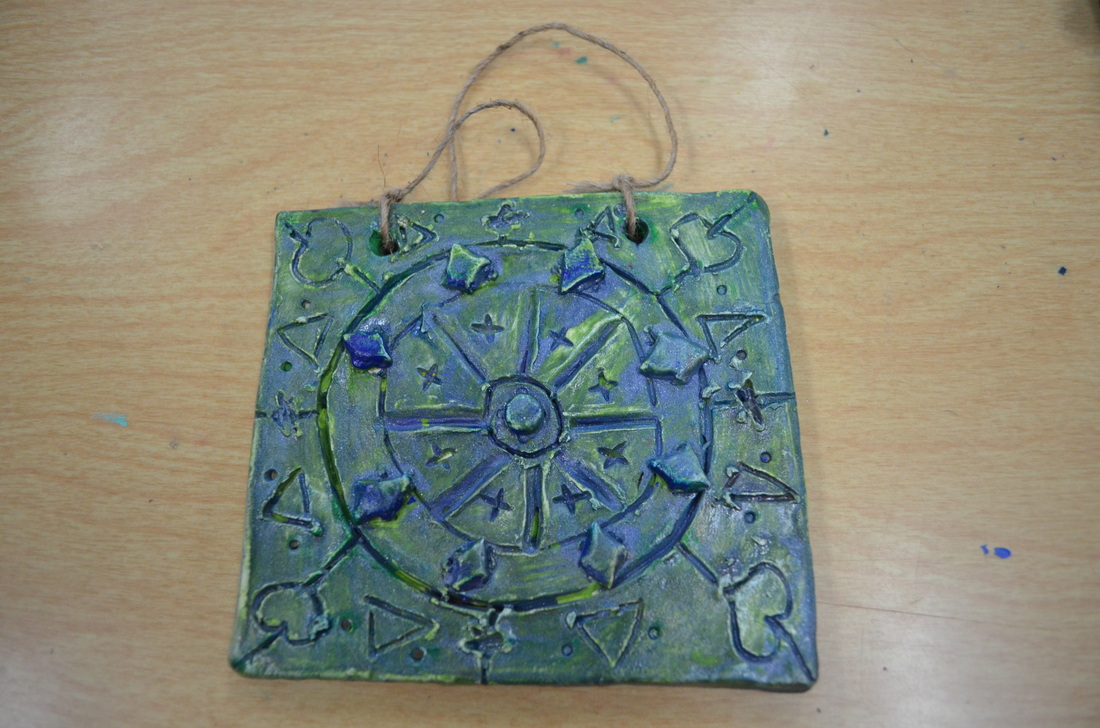
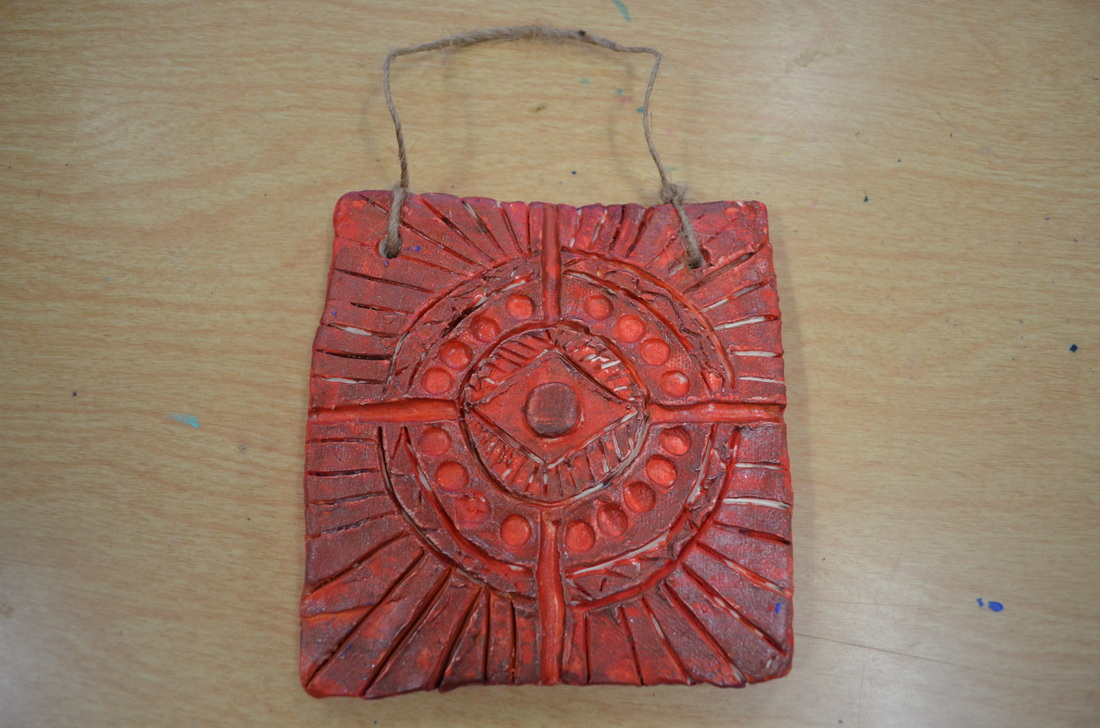
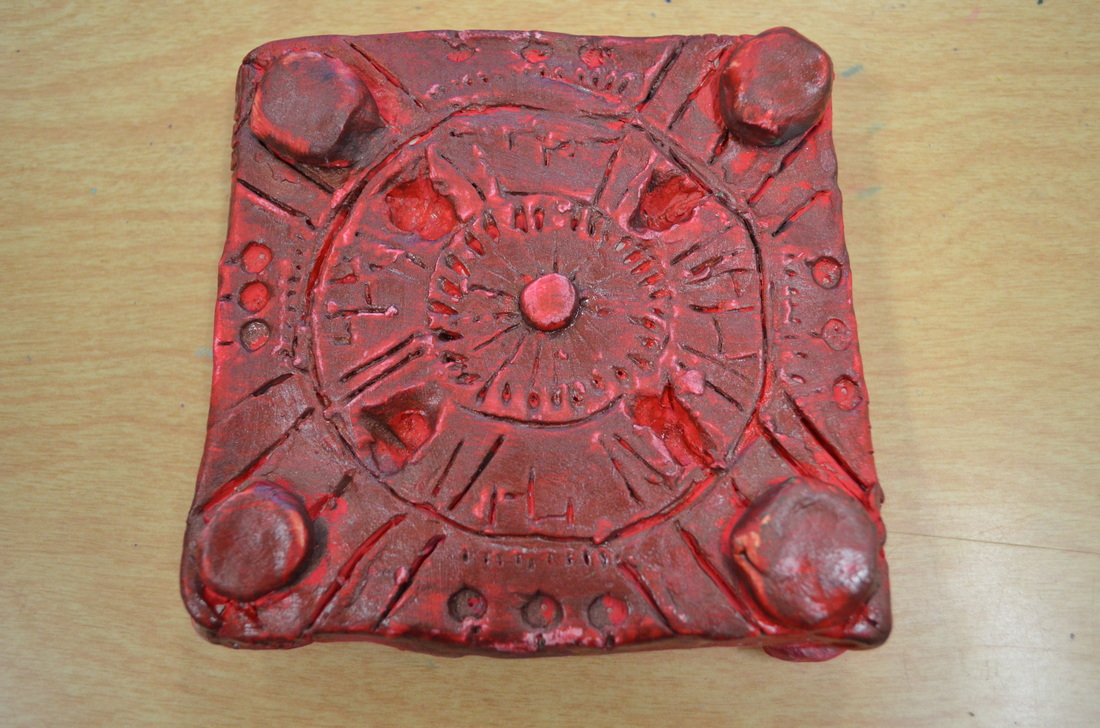
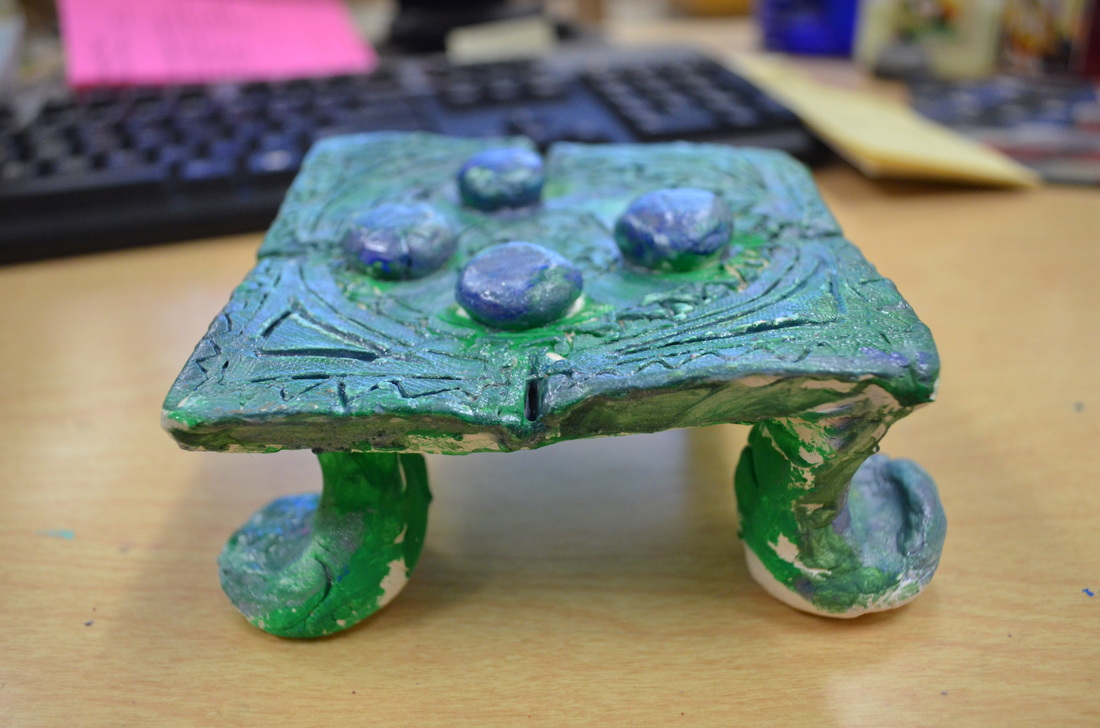
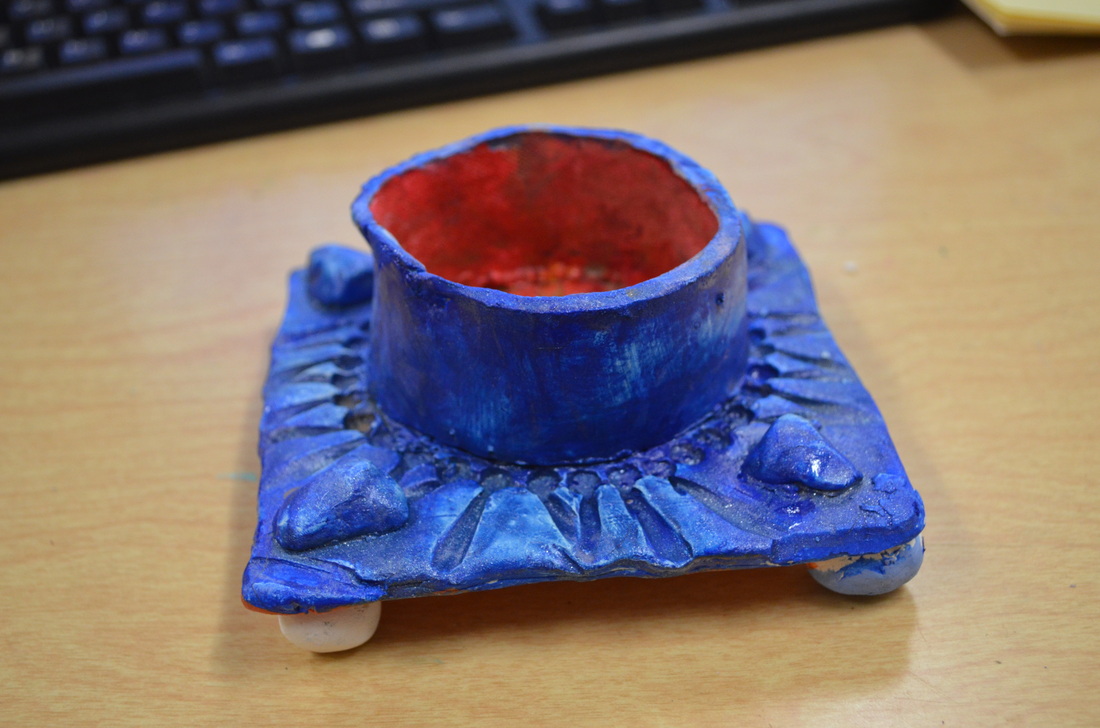
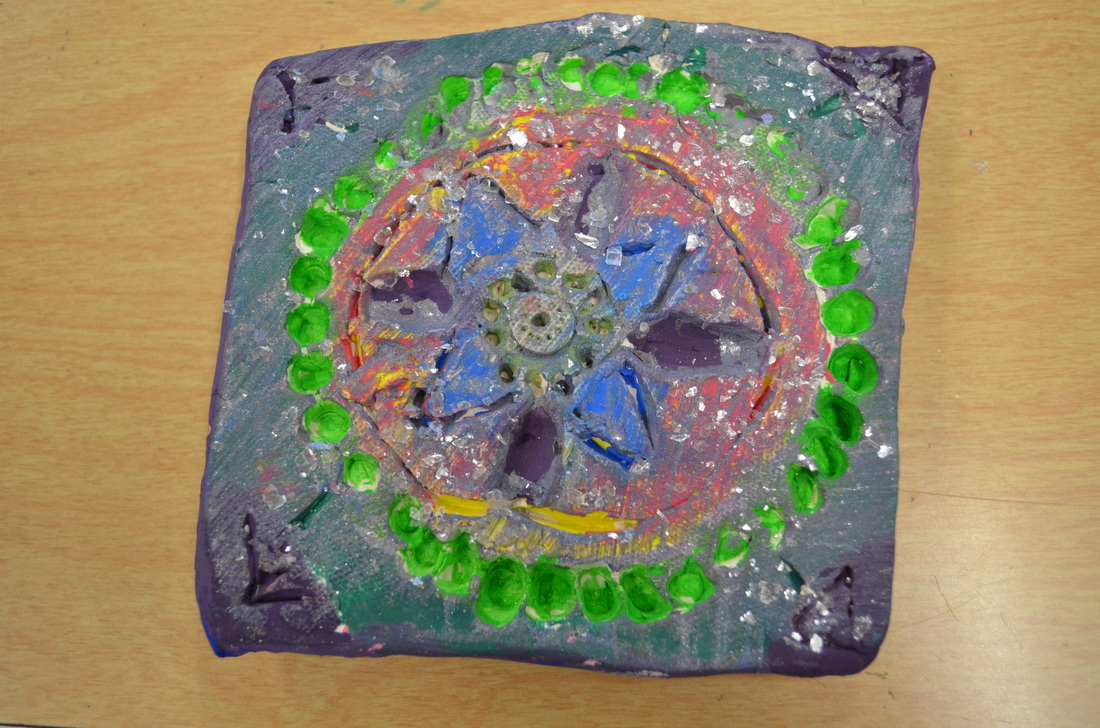
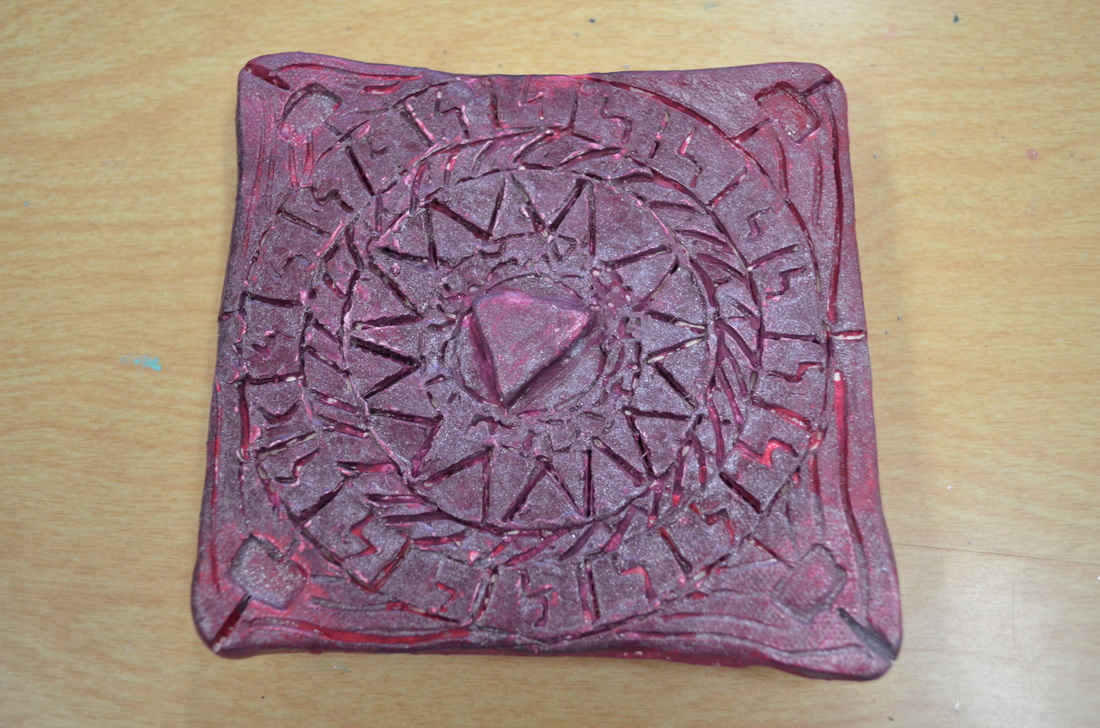
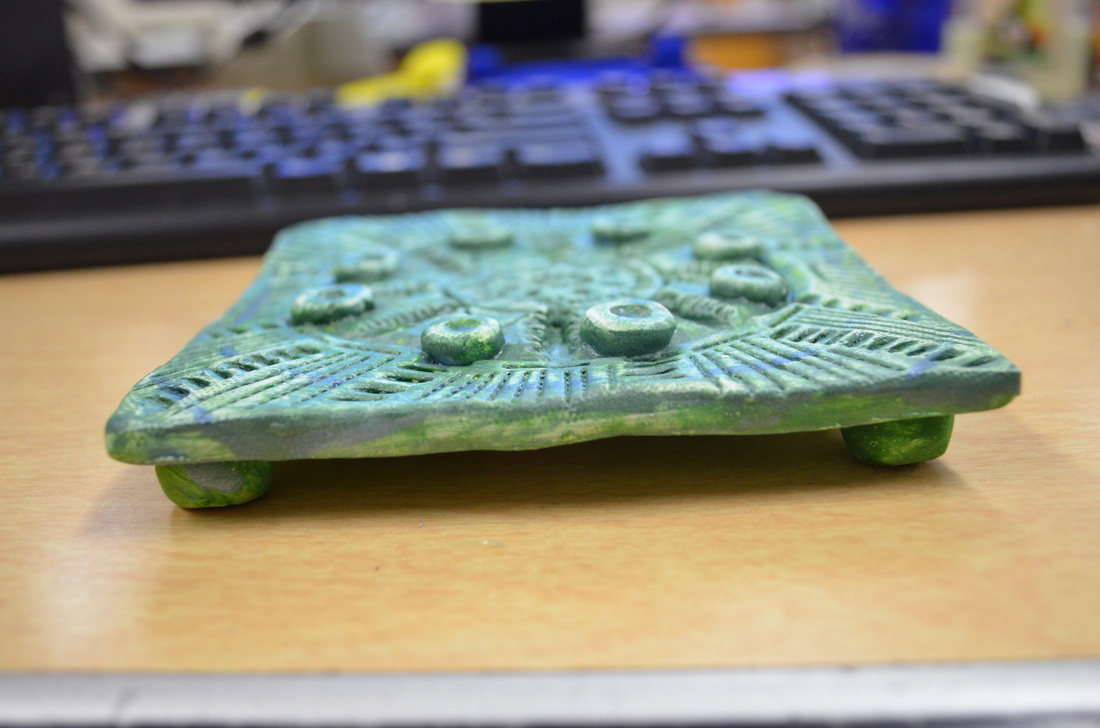
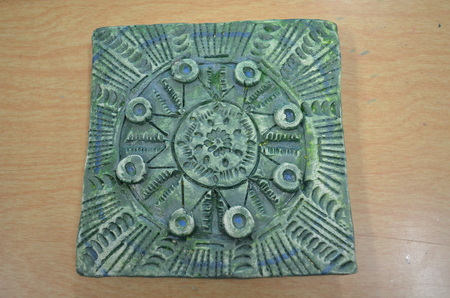 I have seen many art teachers teaching Islamic tiles to middle schoolers. It's a fun lesson and I took it even a step further by teaching addition and subtraction. Students were required to create a 5"x5" clay tile using at least one piece of addition and one piece of subtraction. Students were also required to use radial symmetry in their design and use non-objective shapes, patterns, and lines (no smiley faces or names...or "peace" and "love for that matter). I made copies from the book "Decorative Tile Designs Coloring Book" and laminated them so each table had a reference point for designs. Some students knew exactly what designs they wanted to do and other students really struggled, so having these reference points helped a lot. This also lead into teaching about medieval stained glass windows. We also watched a short video about Buddhist mandalas (which my 6th graders REALLY got into!) Age: 6th graders Time required: 4 (50 min.) class periods for construction & 3 (50 min.) class periods for painting/finishing I created videos for each step of this project's process. These were my first instructional videos, so they are somewhat rough. I made these videos because we are limited on space and resources in the classroom. I also find that videos are much more engaging for students than a live demo. I had each class vote on whether I should do live demonstrations or videos and ALL the kids voted for the videos. It saves my voice too. 1st Step ~ Planning the Clay Tile (with Buddhist Mandalas for inspiration) Step Two ~ Rolling a Clay Slab Step Three ~ Making Designs in Clay Using Radial Symmetry & Addition/Subtraction Step Four ~ Finishing the Clay Tile Step Five ~ Painting the Islamic Tiles One problem we ran into was that many students did not sufficiently score/slip their feet so we had a lot or some fall off (we learn from experience, right!?). This was remedied by some epoxy glue and then having students paint their tiles once the glue had dried. I also made sure to make some extra tiles before firing and it was a good thing I did. One student's tile cracked into a million tiny pieces and another student promptly dropped theirs while it was still drying. I decided to be a nice art teacher and let these students have an extra I had made. Some students used mica flakes after they had finished glossing their tiles. This added a unique sparkly effect while avoiding craft herpes (glitter). The Artist Statement I also had students write a one-paragraph artist statement answering the following questions:
The statement was low pressure as I told students they were graded for content and not spelling/grammar errors. This statement was part of my assessment to check for understanding. We finished these right before winter break. Some students were very excited to wrap their tiles up in newspaper and take them home as Christmas presents. I stole some paint sample chips from the local hardware store and hole-punched them in the corner. I told students they could use the paint samples as gift tags. They turned out so cool! I have found it difficult to teach art history without being boring. I created this handout to be used in students' sketchbooks all semester long so we learn art history one piece at a time and not necessarily in order. The handout has small pictures of inventions to give students an idea of when time periods are happening. I also left small blank boxes at each time period for students to do a brief sketch of an example of artwork from that time period. PreviewDownloadGo to Teachers Pay Teachers to download this art history timeline handout for FREE!
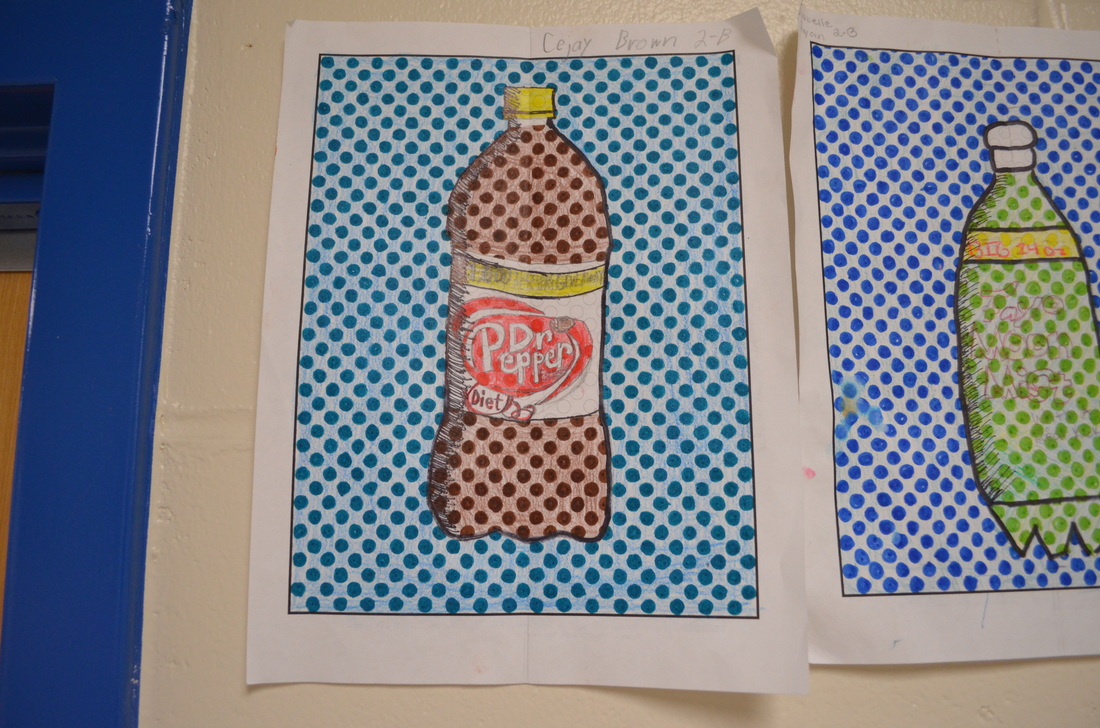
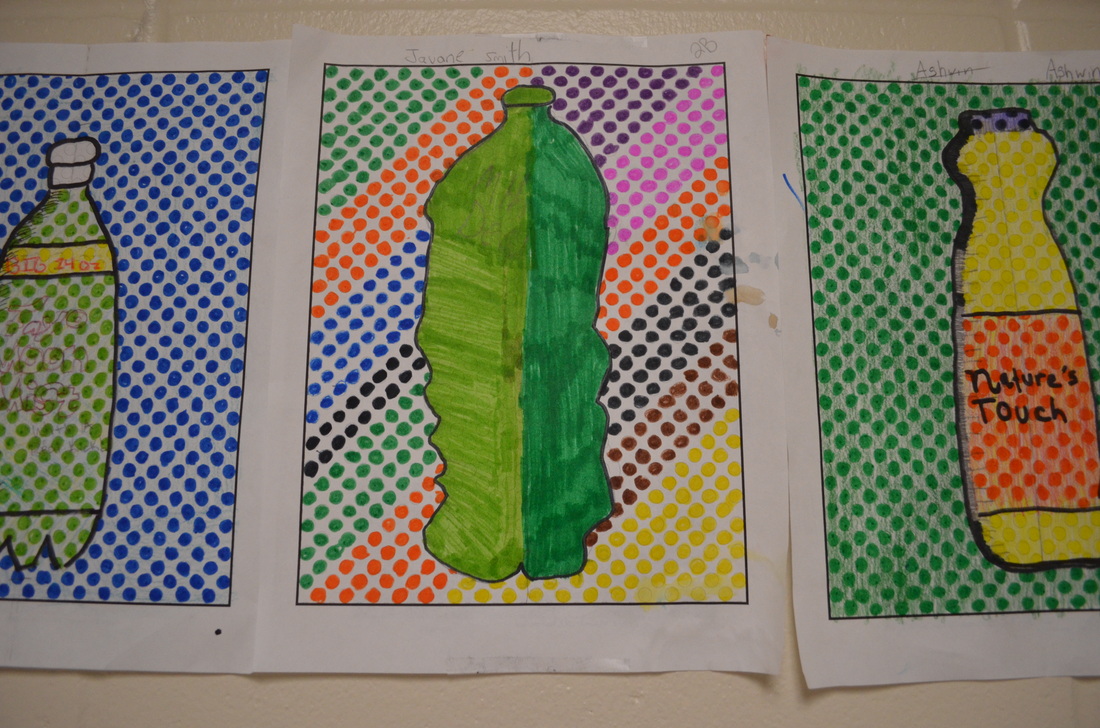
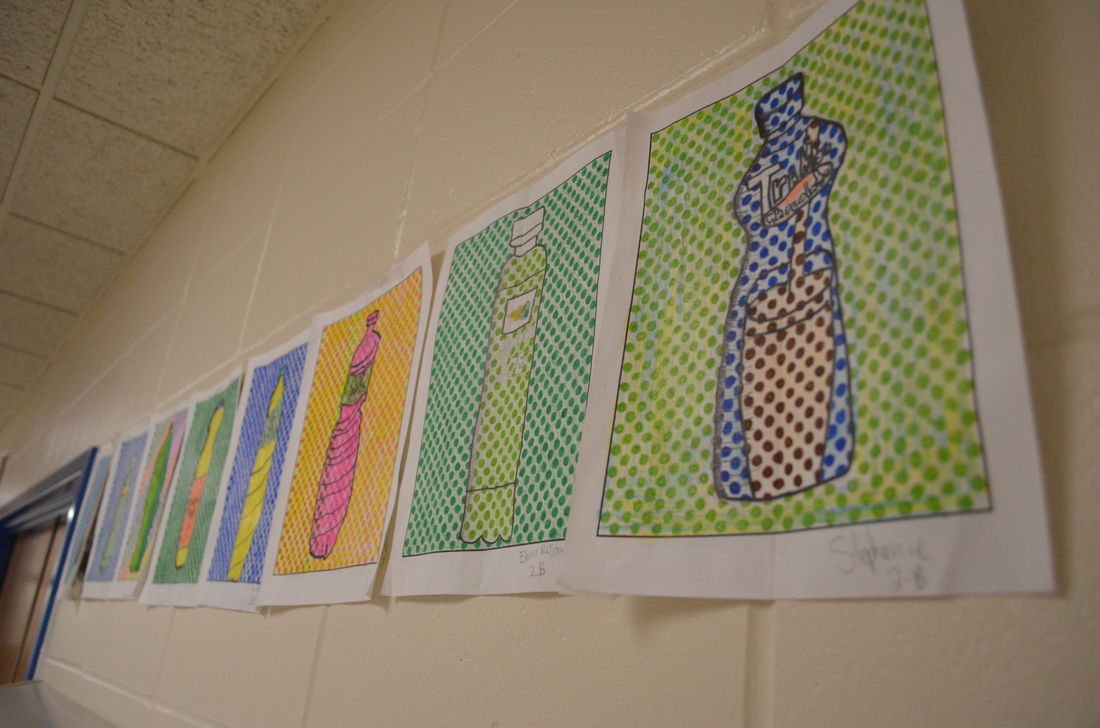
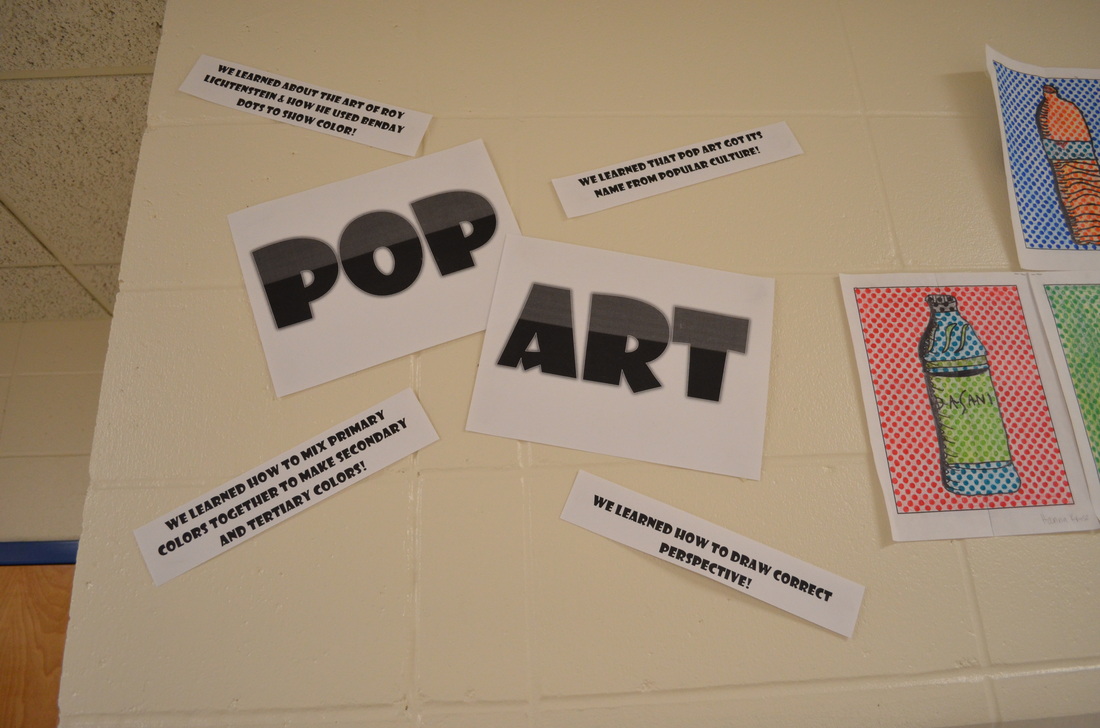
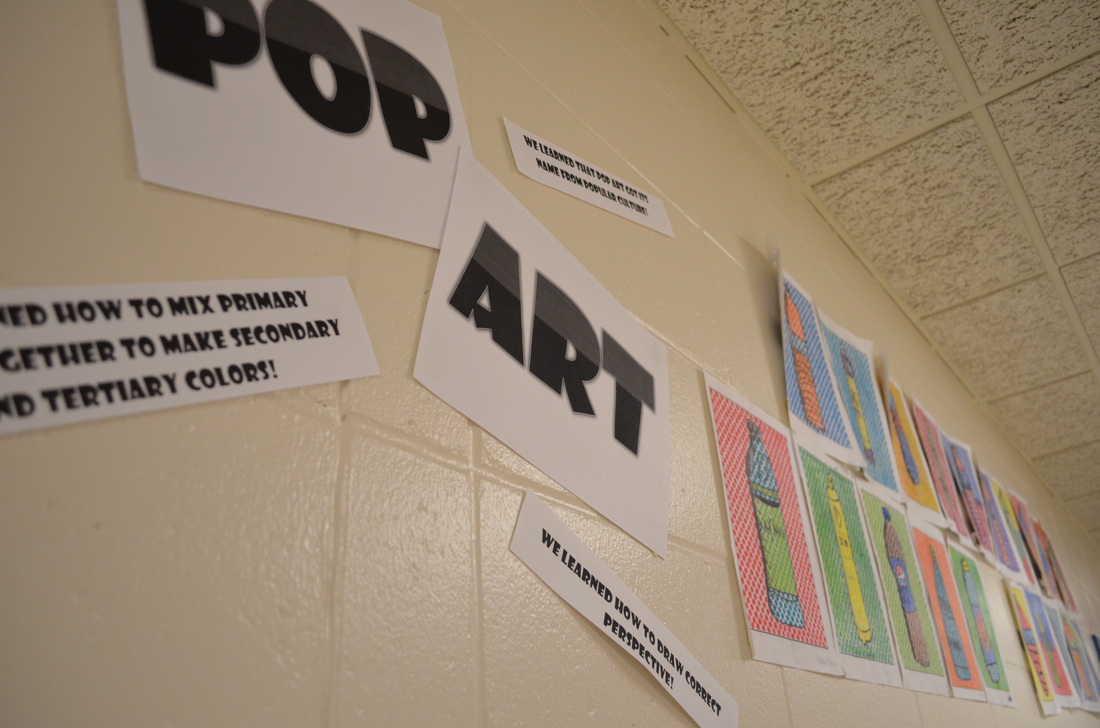
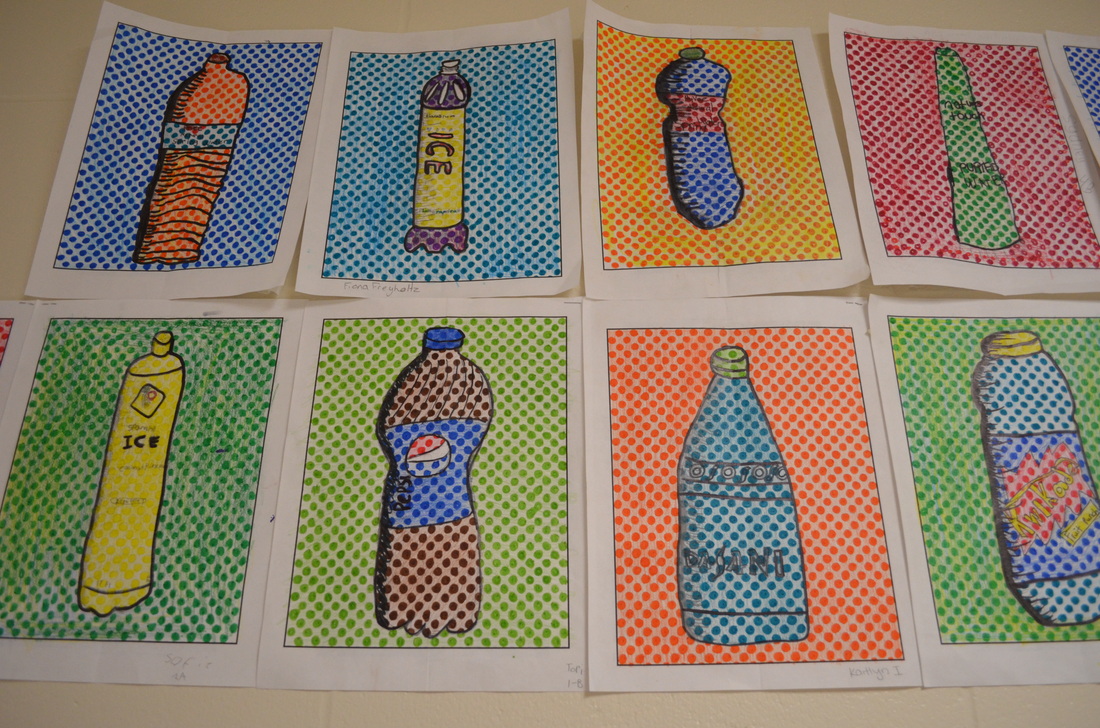 This was a project where students really impressed me. We had been collecting plastic bottles all semester long and so we had about 350 bottles stored in bags and boxes around the classroom. I knew I wanted to teach students how to draw perspective, but I was struggling on what. Then it donned on me-- plastic bottles! Each student chose a bottle to draw. We spent a whole class day talking about pop art and how pop art got it's name from popular culture. We also talked about how artists draw in perspective. They draw what they SEE, and not what they THINK they see. We also talked about how benday dots are kind of like pixels and how they create color when put close together (from far away, they look colored in....up close, they look like just dots). We also learned about creating value and how we could use hatching to show value in our bottles. I showed students comic book drawings that had hatching and this really had them motivated. Download the benday dots handouts!I have my benday dot handouts available in small dots and large dots at my TPT store We looked at several different pop artists including Andy Warhol, Robert Rauschenburg, and Claus Oldenburg....students kept saying that if you're a famous pop artist, you have to have a cool last name. ;) Step One Students practice drawing their bottle. I had students fold their benday dot handouts in half and try to draw only one half of the bottle on one side of the folded line. This helped students get the symmetry right. Step Two They drew the other side of their bottle to match the opposite side. Students had to check the top and bottle of their bottles to make sure they were curved and showing correct perspective. Step Three Students draw the details of their bottle-- logos, fluid ounces, slogans, designs, etc. Students then added their hatching lines to make value. Step Four Students colored in their whole picture LIGHTLY with colored pencils. Students were required to mix the primary colors of colored pencils at least once in their drawing. If students had black on their bottle, I encouraged students to choose another color, as it covers up their benday dots so you can't see them. Step Five Next, students started coloring in the benday dots with markers. This was the most time-consuming part of the lesson. Some students got really impatient, but I had them take breaks to stretch and read some art books if they needed it. Students then outlined all their pencil lines in sharpie to really make it pop. Overall, once they were finished, students really seemed to like their work. When hung up together, they definitely have a "pop" art vibe! 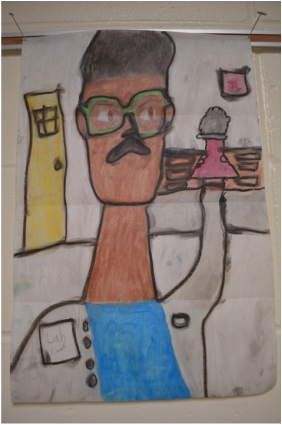 This lesson focused on the artist Modigliani, Expressionism, and Proportions of the face. Students used 12"x18" 60# paper (but 80# would have been better...), oil pastels, and baby oil to create their own "oil paintings". First, I showed students some of Modigliani's artwork. A big question was, "Why did he make all his portraits have long necks?" This led into a discussion about expressionism and how not all art is realistic. Next, we talked about what a portrait is and how we draw correct proportions. I used Expressive Monkey's proportions handout to keep students on track. We folded out papers in half and then each side folded towards the middle. This made three folds. The top fold was the "eye" line. The middle fold was the "chin" line and the bottom line was the "shoulder" line. This made the necks long like Modigliani's.
Students were then asked to brainstorm what they wanted to do when they grow up. If students were stuck, I had them choose something they'd like to do when they grow up (like climb Mount Everest, play in the NBA, go skydiving, etc.) I had them draw three symbols that represented what they wanted to be or what they wanted to do. I modeled this for them by pretending I wanted to be a nurse. I drew a stethoscope, the red cross symbol, and a wheelchair. I told students that I wanted to be able to tell instantly what they wanted to be. Students spent two class periods drawing their self-portrait in pencil first. Then they started coloring in with oil pastel. I had small cups of baby oil spread out over each table. I made sure to only put a little bit in each cup to keep kids from using too much or spilling too much. Students used their fingers and q-tips to blend the baby oil and oil pastel together. Some students really didn't like the smell of baby oil while others had no complaints. We made sure to use newspaper below the portraits. As baby oil was added, the paper tended to turn transparent and there was baby oil everywhere. However, I noticed that after a month of these drying out in the hallway, that the oil seemed to evaporate. I used approximately 6 bottles of baby oil for 250 6th graders. It was more oil than I expected! I bought a pack of 500 q-tips at the Dollar Tree. I had a huge stash of old oil pastels that worked wonderfully though. The dried out oil pastels came right back to life when baby oil was added. I told students to use black last, as black is very tough to cover up and it gets smudges all over! Storing the portraits was a bit of a challenge. Some students used a bit too much oil, so their colors would rub off on other students' work. Next time I would monitor better how much oil the students used. As I stated before though, after a month of drying, they were much less oily. Overall this was a fun project and really helped me get to know my students better! Overall cost of the project was about $25 without the cost of paper for 250 6th graders. 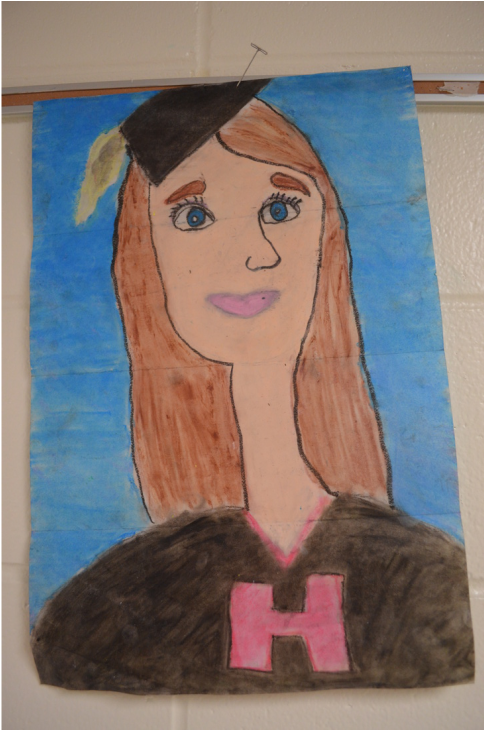 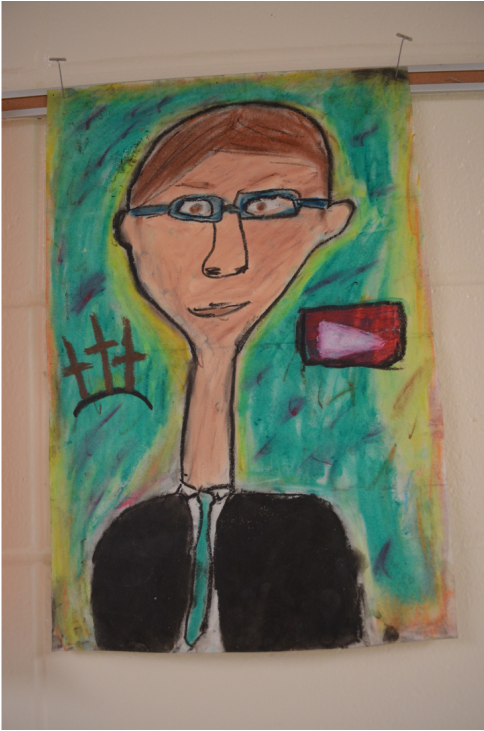 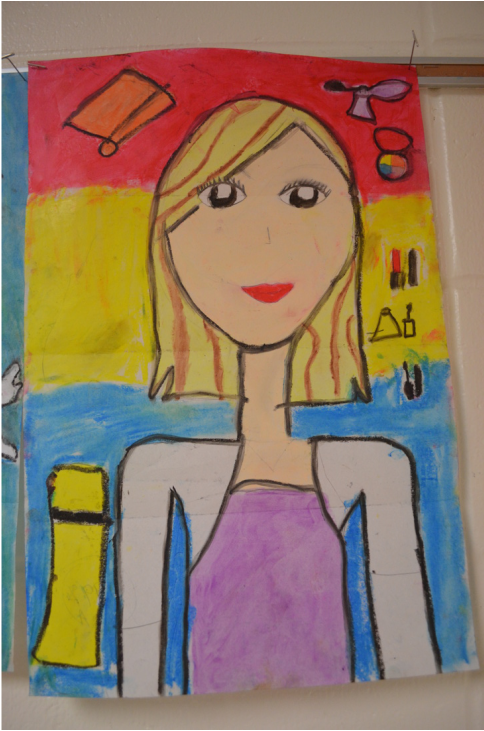 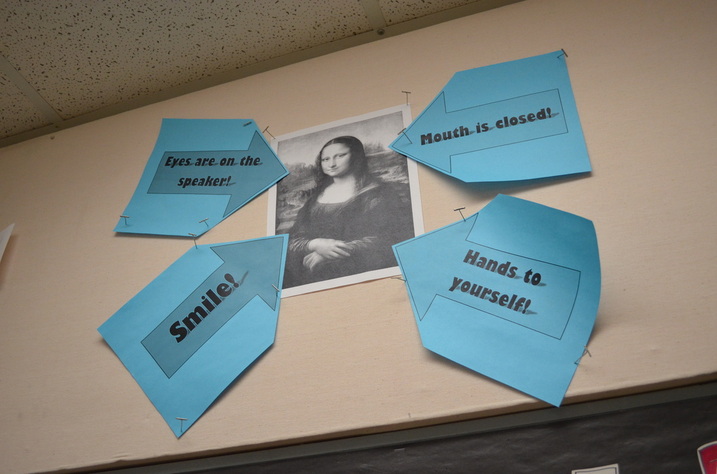 During my student teaching, I observed a middle school art teacher in her classroom. She used something she called "Mona Lisa". She had a poster of the Mona Lisa on her wall and every time she said "Mona Lisa" students immediately turned their eyes on her and were respectfully paying attention.
I decided to adopt this method in my own way. Throughout my room I have four small posters of the Mona Lisa with colored arrows pointing to her. On the first day of class, we talked about what to do when I say "Mona Lisa".
Once I told students about it, I had them practice by me saying "Mona Lisa". Some students gave me a pretty darn good impression of the Mona Lisa. I told students that when I say this, it means I have something very important to say that they shouldn't miss. Throughout the semester I have to remind them every now and then on what this means and why it is important but it is a unique way to get their attention without straining my voice or yelling "Quiet down!". 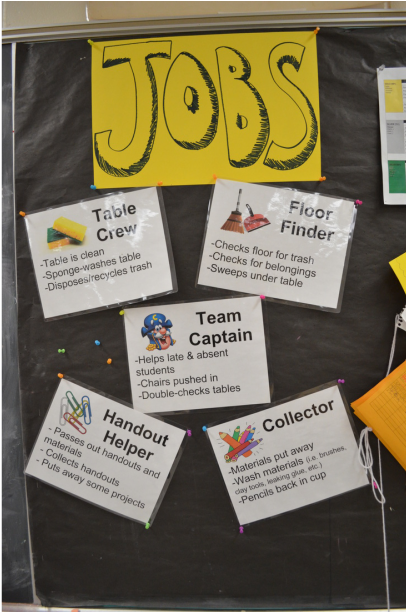 I started out teaching thinking I could get away without assigning students jobs. I thought students could clean up independently and respectfully with little intervention from me.
Boy, was I wrong. I was spending several hours a day cleaning up and wasting student time when it came to pass out work and handouts. That's when I came up with a pretty nifty system. I created five jobs:
I knew all students would want to be captain so I made sure to explain that the captain's job is the most work. They must act like a second teacher, they must rarely be absent, and they have the most responsibility. Team captains also have to do absent students' jobs. This seemed to take some of the glamour away from the role of captain. Since my classes range in size so much, I decided that any extra students at a table would choose either table crew or floor finder. I had students spend 5 minutes deciding amongst themselves what jobs they would do. Most students had a vote for their captains. Next, I had students choose a team name. They had 10 minutes to come up with a creative name that everyone agreed on. I wrote down each students' job next to their name on my seating chart along with their chosen team names. I stressed that if students didn't do their job (example: if I saw that team "Lady Gaga"'s floor was dirty, then I knew that that team's floor finder didn't do their job) then they'd get their name written down. If I had to write their name down three times within the semester, then they'd get what we call a "Stop & Think". Overall, this system has really stream-lined my daily instruction and saves me so much time at the end of the day. One good student doesn't get stuck doing all the cleaning as well. I think the custodians like it too. :) |
Mrs. QuamThis is my 11th year teaching art & graphic design! I have taught middle school for 2 years and high school for almost 5 years. I truly enjoy working with students on a daily basis. I also enjoy teaching real-world skills such as problem solving, using technology, and the power of teamwork and collaboration. My joy is sharing my passion for art with others! Archives
March 2024
Categories
All
|
||


 RSS Feed
Photo from Rob Qld
