|
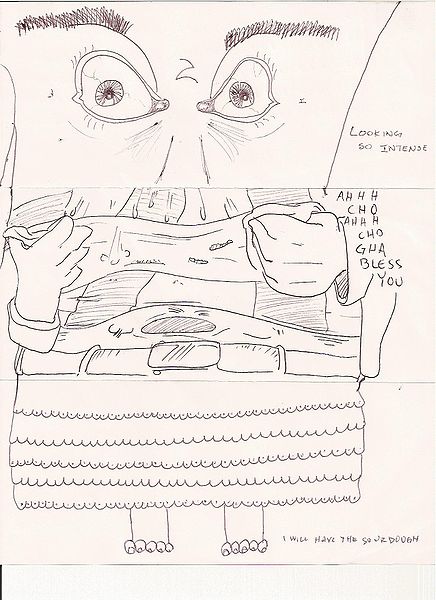
I've recently been trying to incorporate more fun into my art classrooms. My goal is to get students excited to come to art and graphic design class. One thing I've found that brings joy-- and even some social and collaboration opportunities-- is using games. I don't typically play an art-related game for an entire hour, but the following are art-related games I've researched and many that I've tried out in my own high school classrooms. Many of these games could be modified for younger students too. #1 Exquisite Corpse
How to Play:
#2 Pareidolia Scavenger Hunt
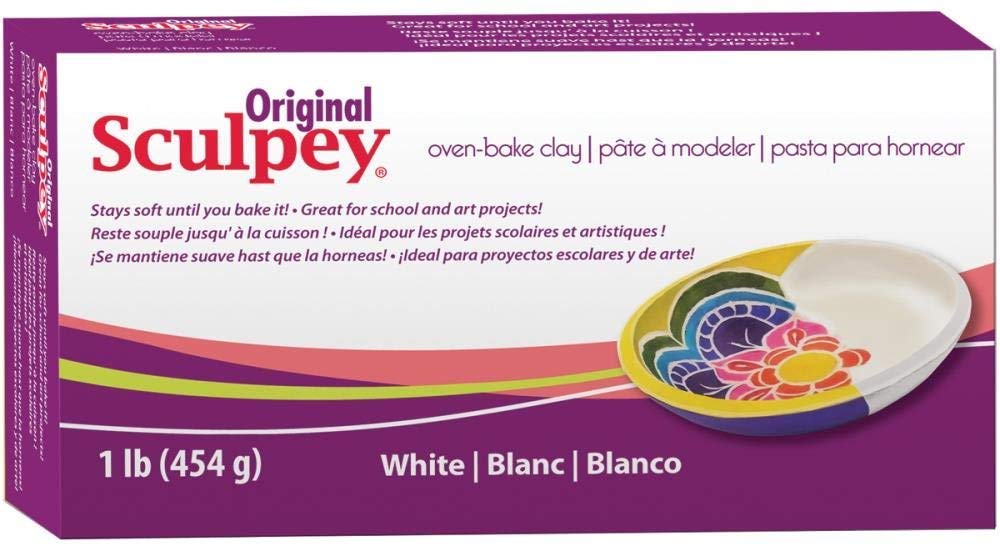
#3 Sculpey Pictionary
Need a list of pictionary words? Here are 138 different words at different difficulty levels I created for my classes. Download them free by clicking here!
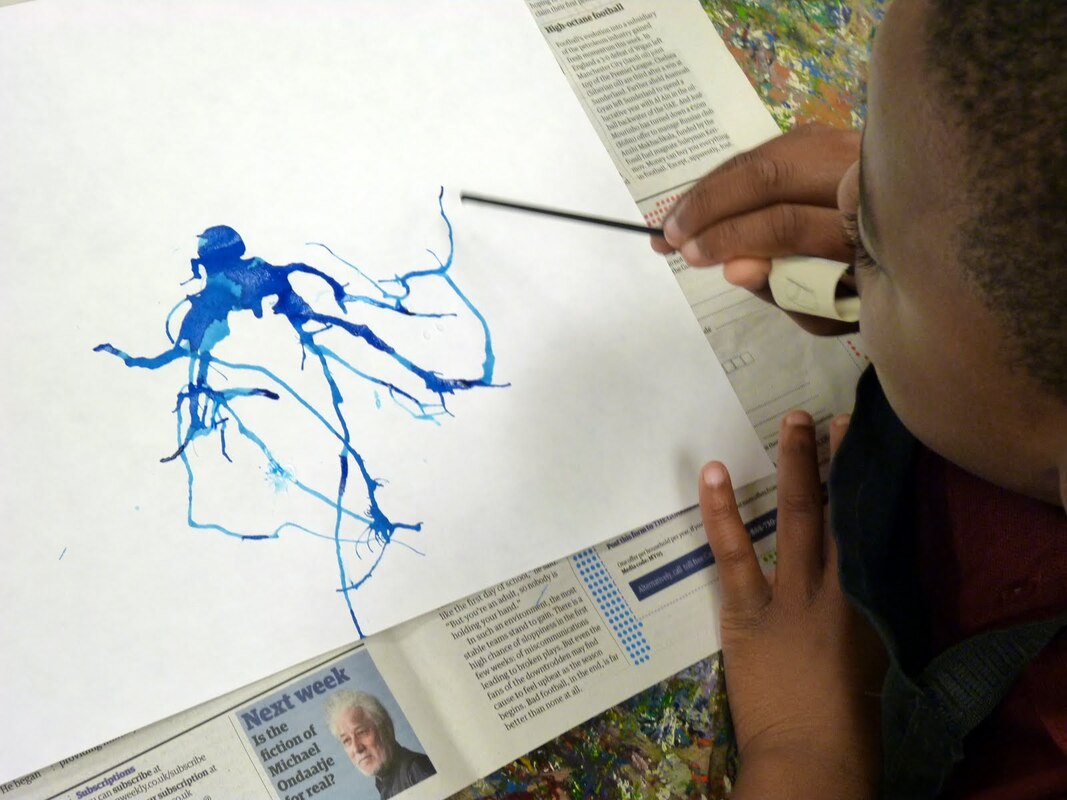
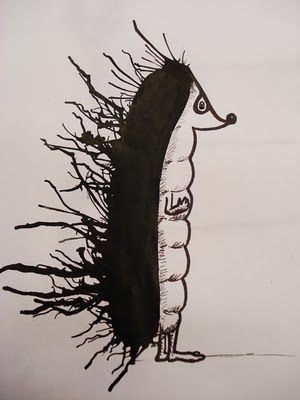
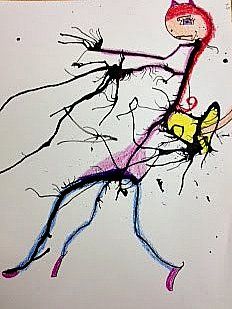
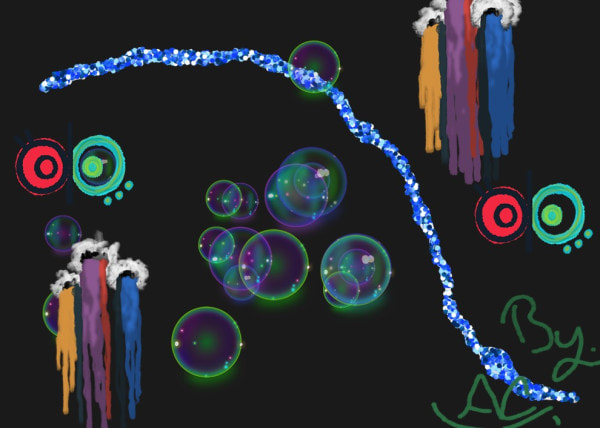
#4 Ink Blowing
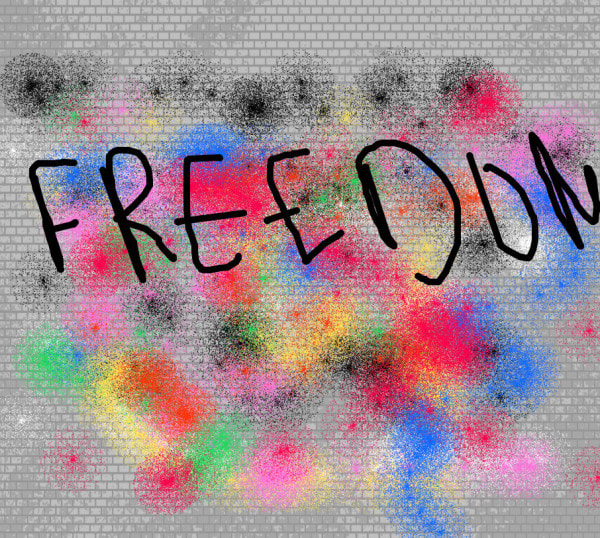
#5 Street Art Online Game
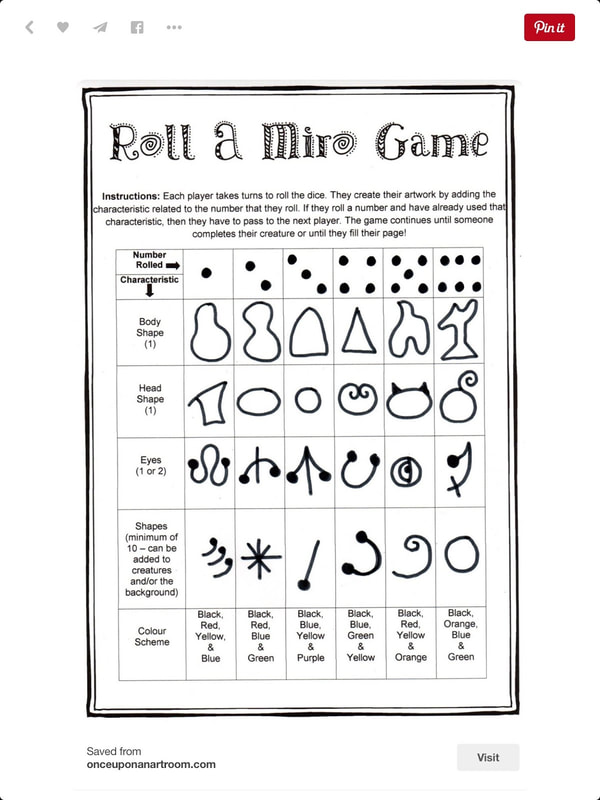
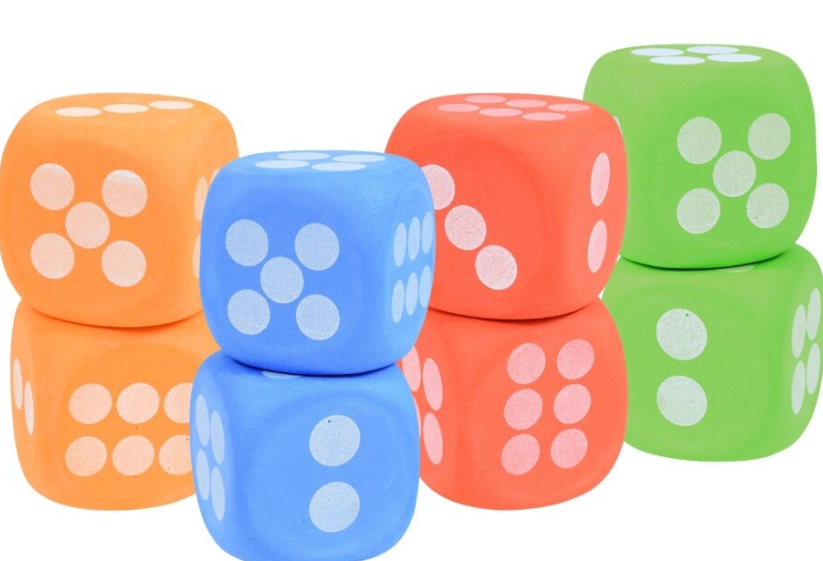
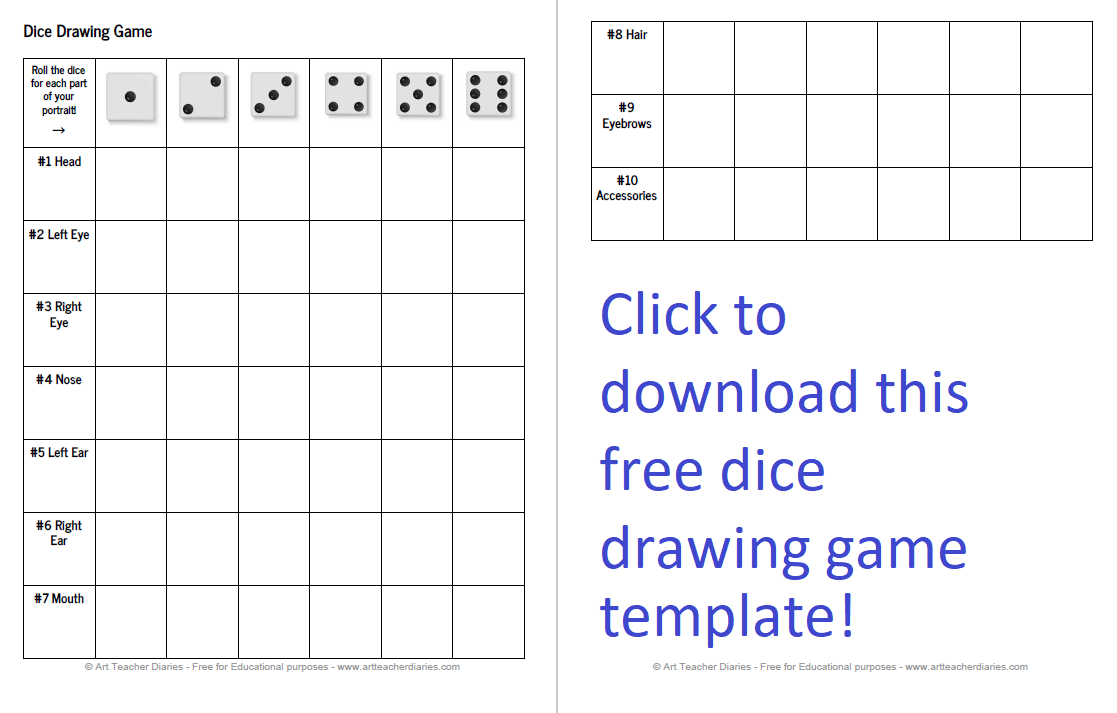
#6 Dice Drawing Game
1 Comment
I recently discovered the awesome online app coolors.co and just had to make a quick post about how to use this amazing program to help students understand and choose color schemes for various projects. Students can even use this program on their phones or an ipad. 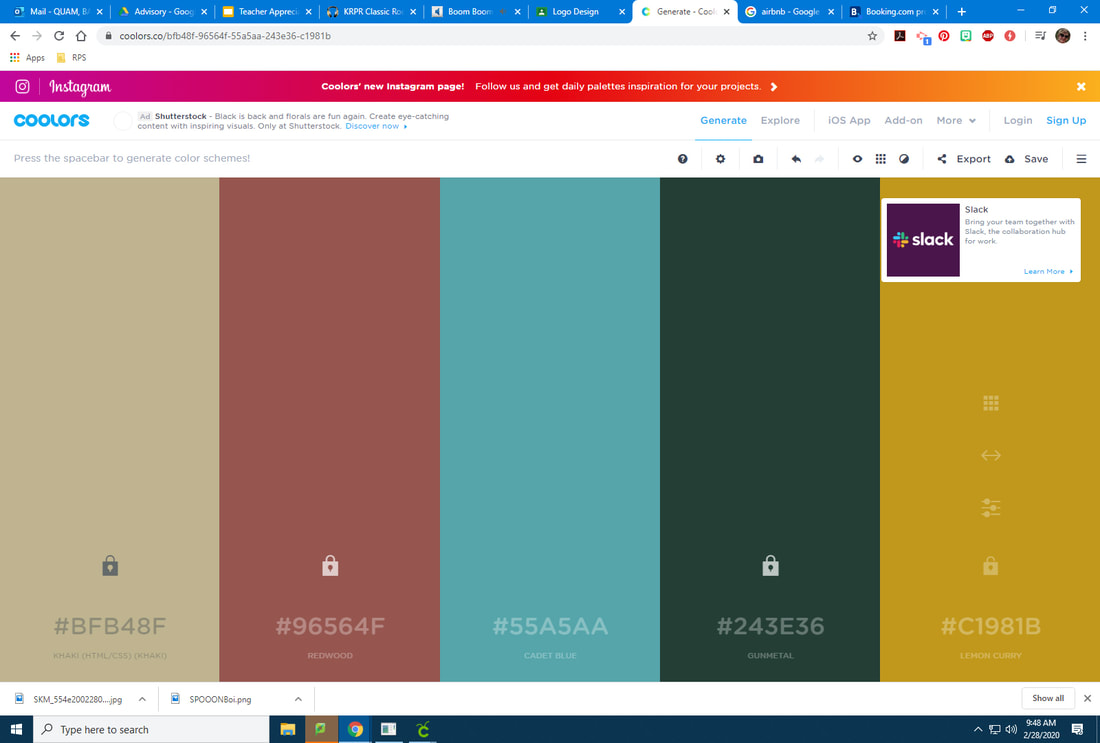 So how does it work? Simply go to https://coolors.co/ and click on the blue button to start. For my graphic design classes, each student was provided with one specific hex code (the 6 digit number after the hashtag under each color). Students had to enter that hex code as one of their necessary colors. The rest of the colors were decided by each student. I had students lock their required color and then press the spacebar on their computers to generate random colors. If a student saw a color they wanted to keep, I had students lock that color and continue pressing the spacebar. For students that wanted more control, I allowed them to find and adjust the colors using the adjust feature (see below). Students can adjust hue, saturation, and brightness. 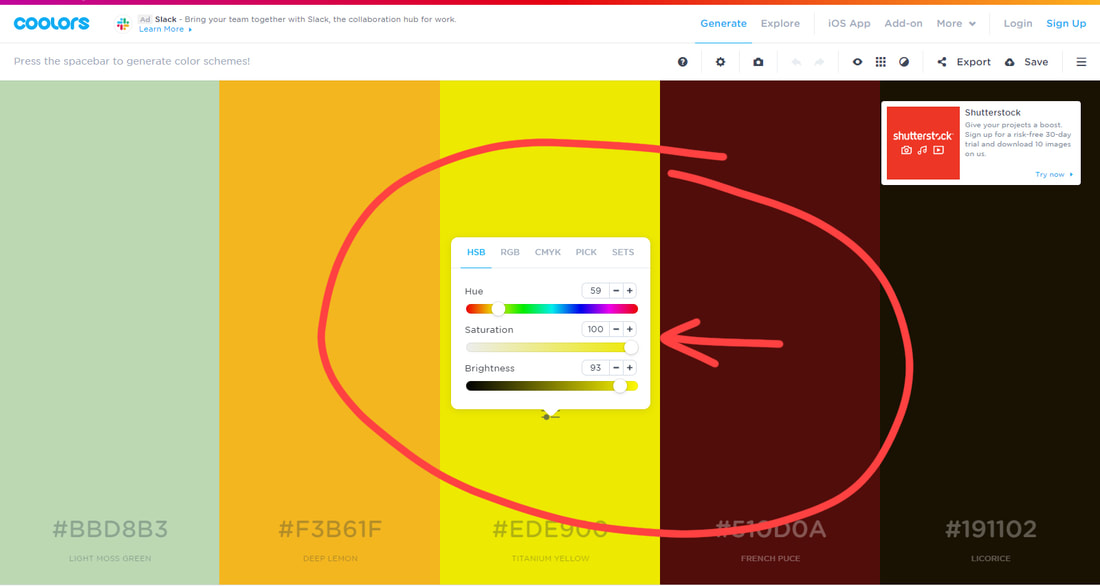 Once students chose their final color schemes, I had them record the hex codes in their logo design packet. Interested in seeing my logo design packet? Click the link or image below to view and download. This .pdf is currently free for all teachers personal and classroom use.
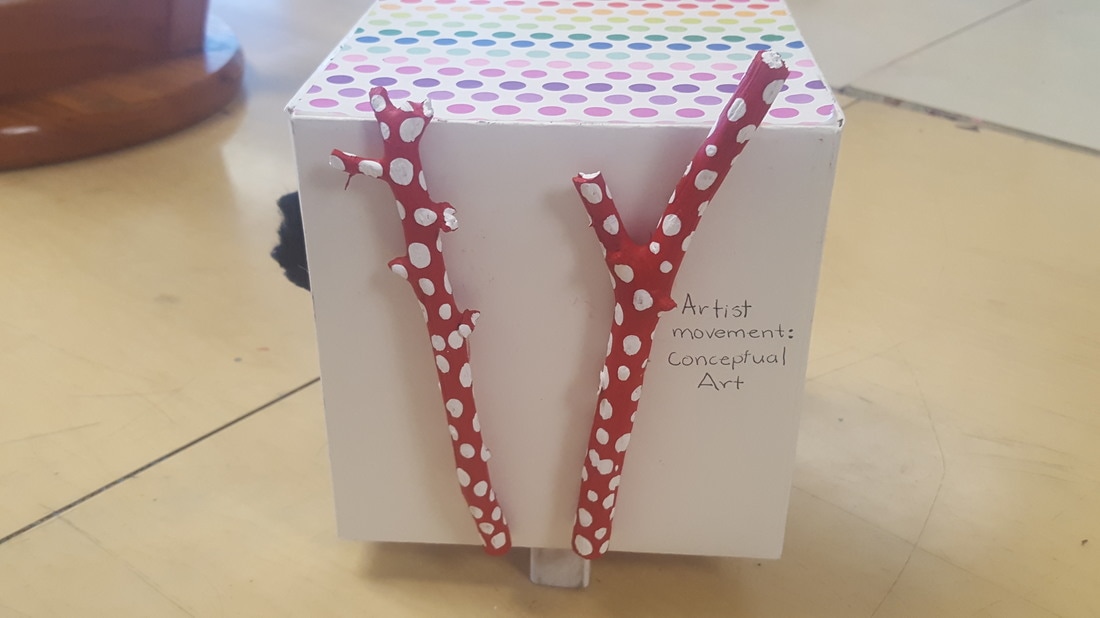
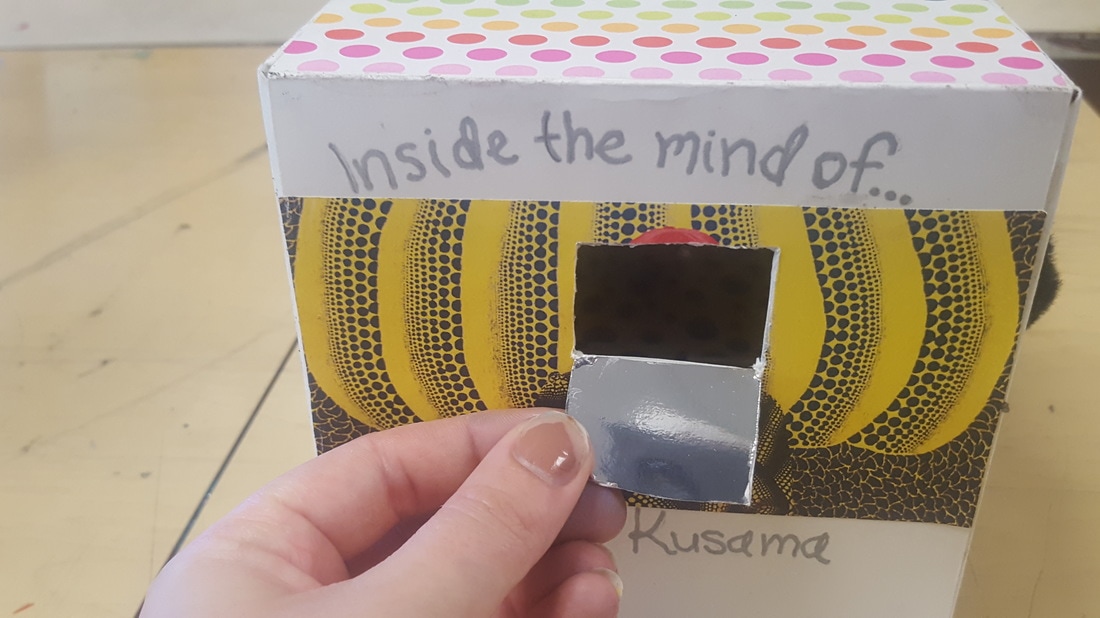
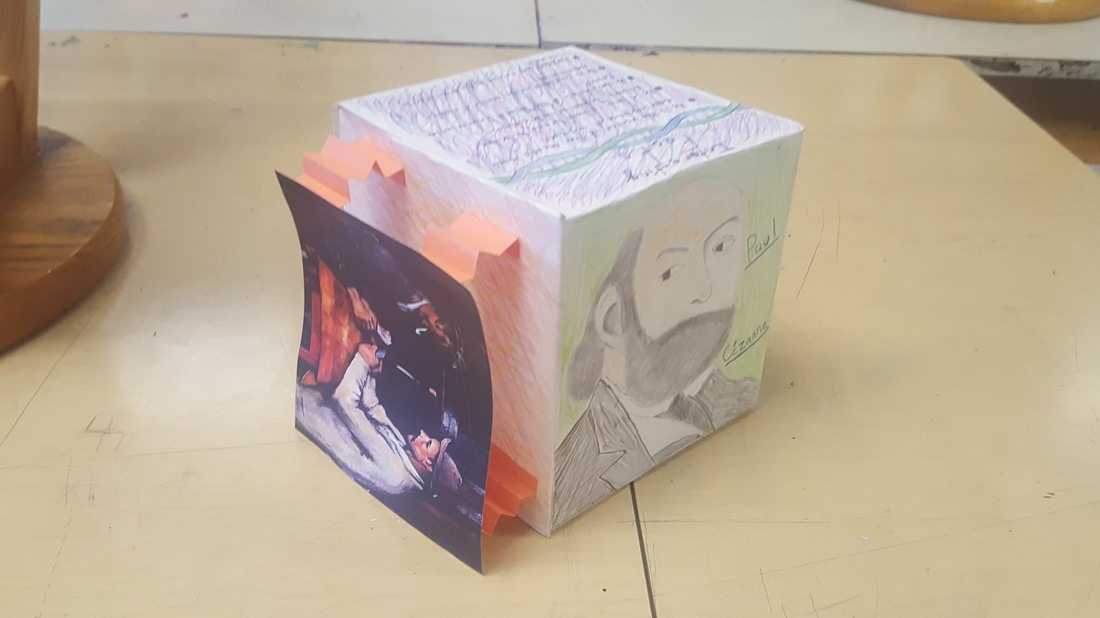
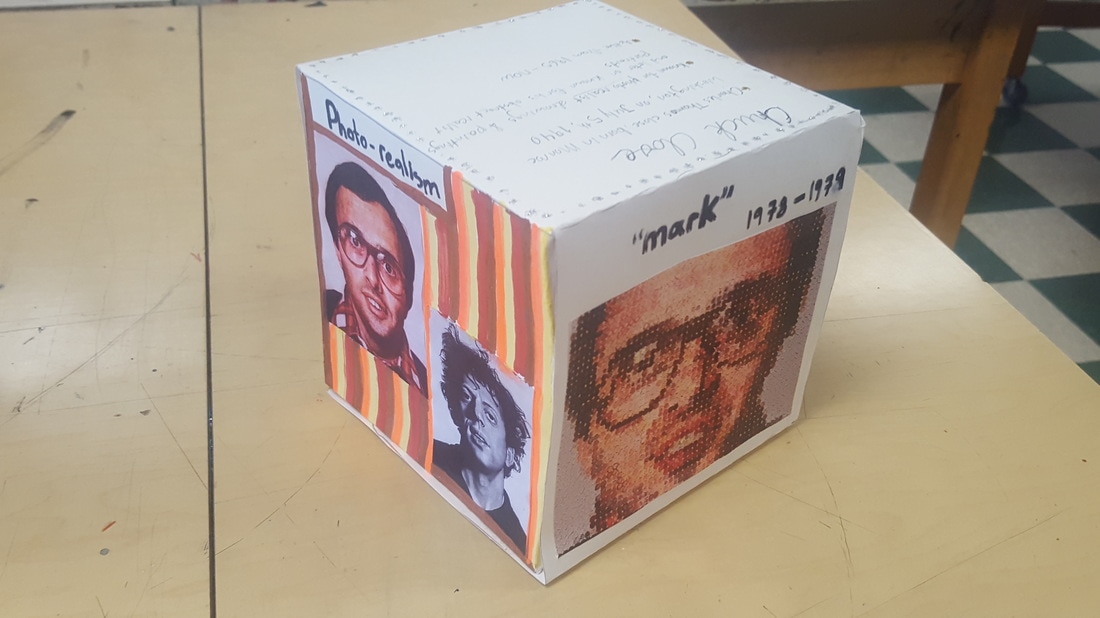
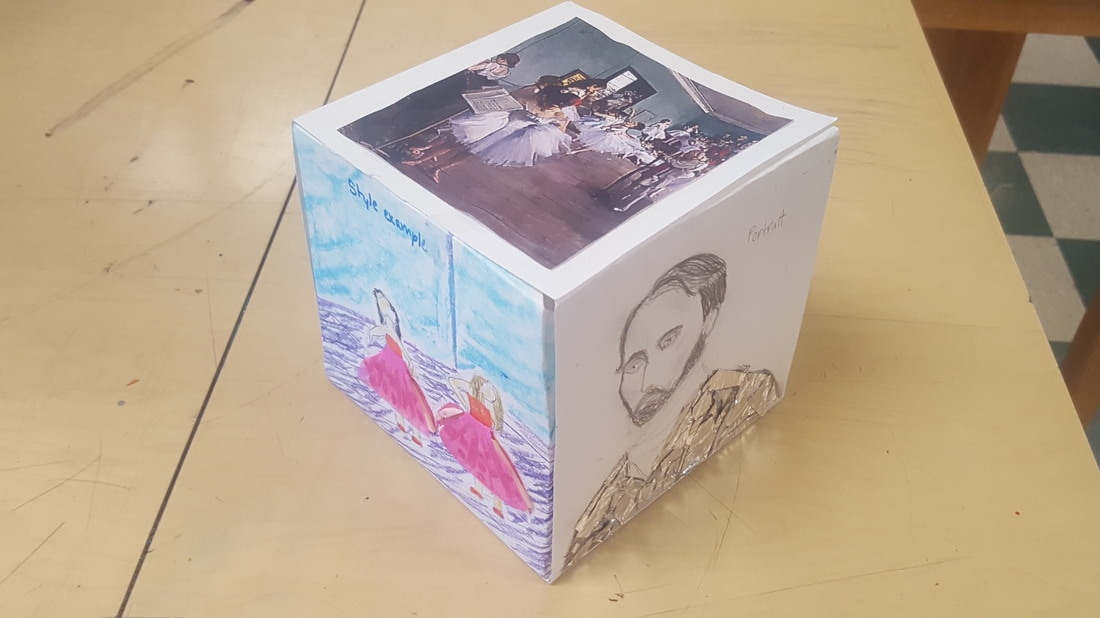
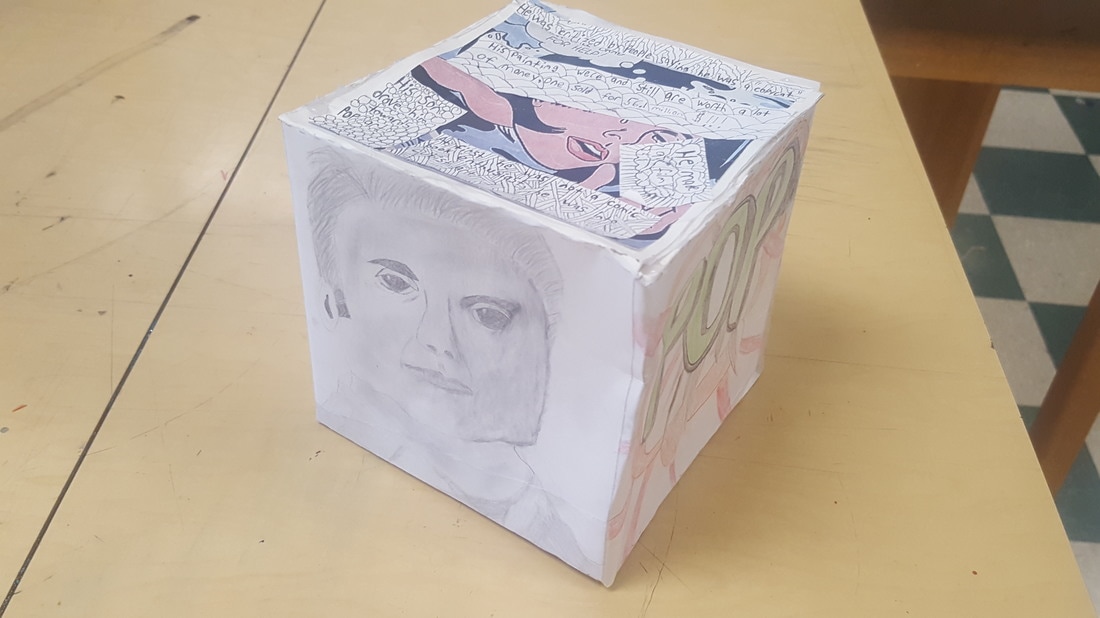
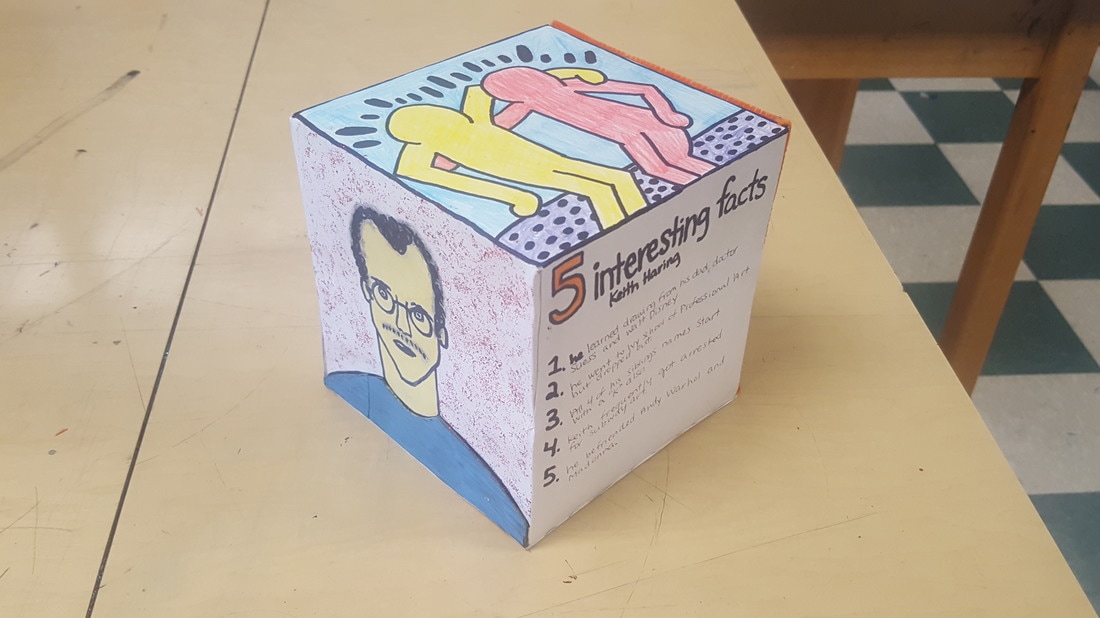
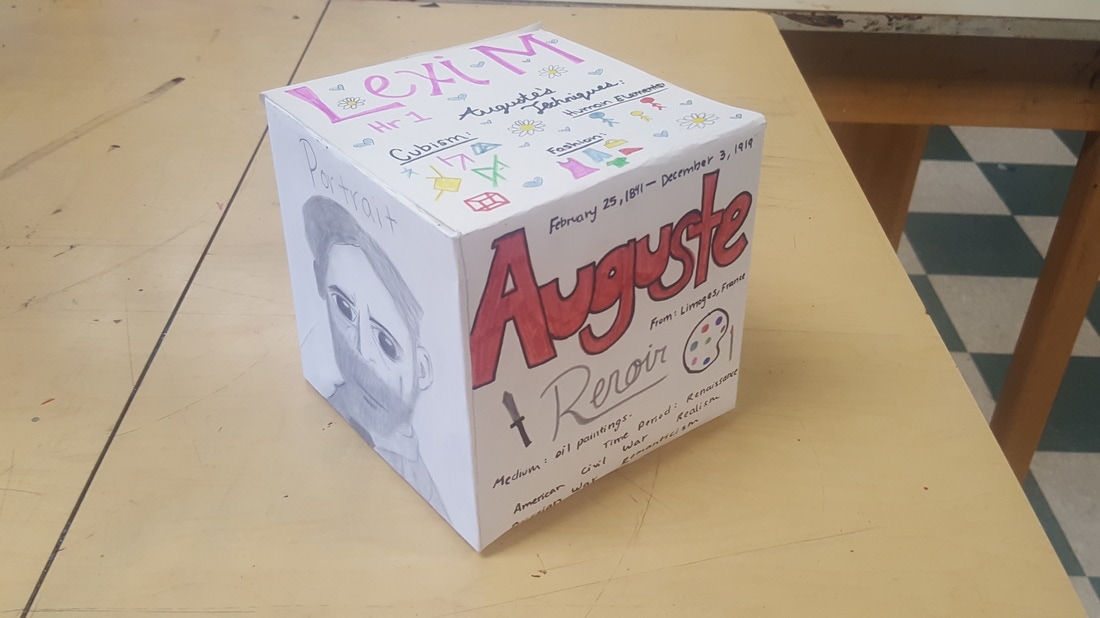
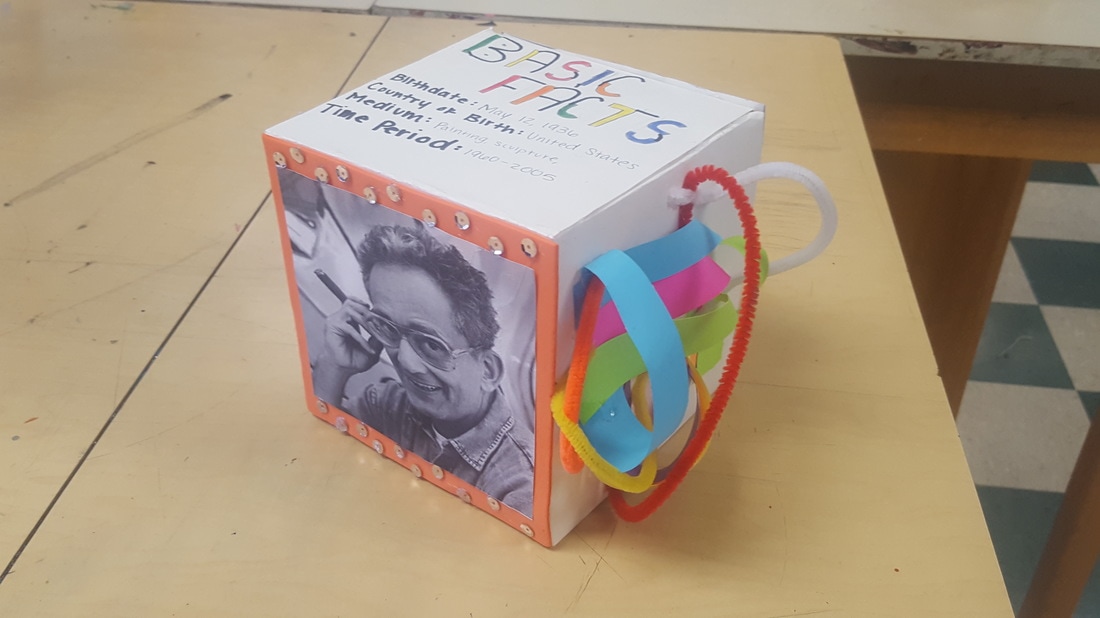
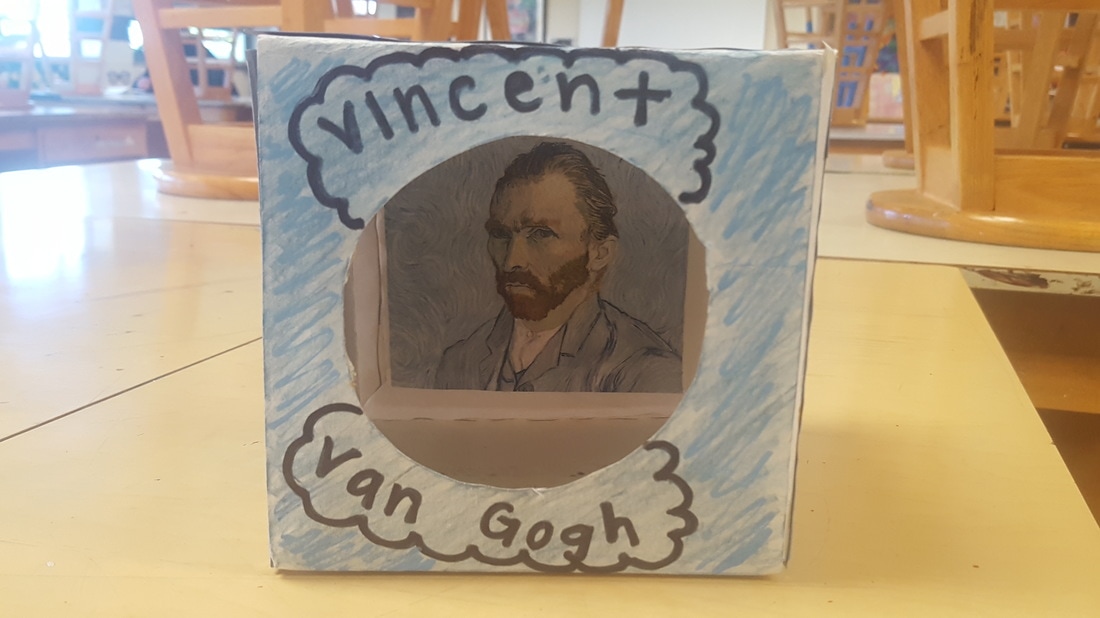
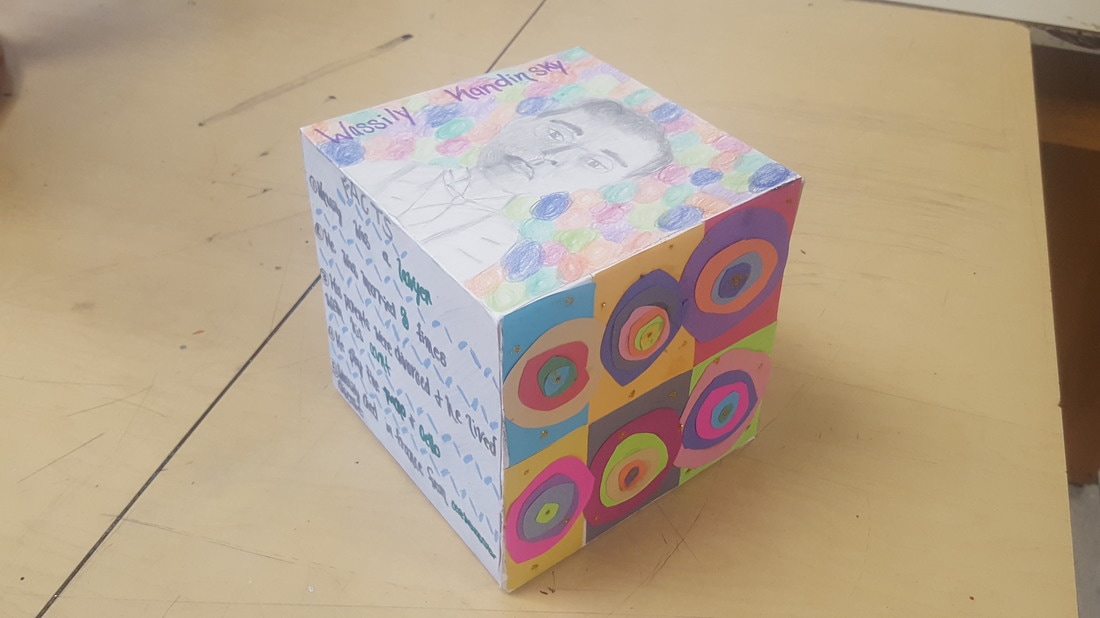
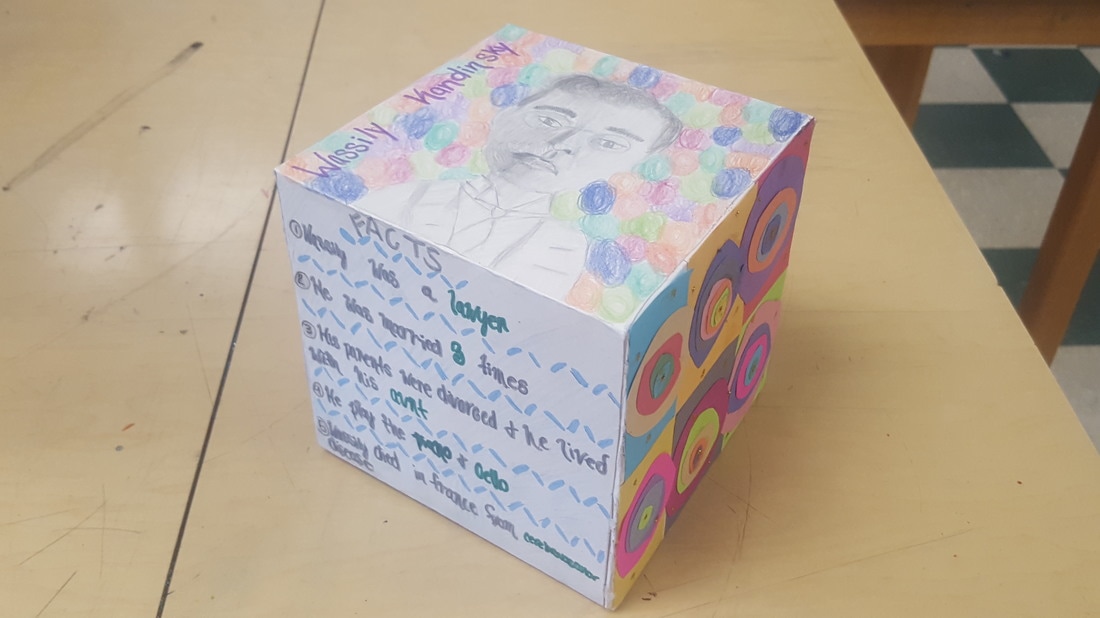
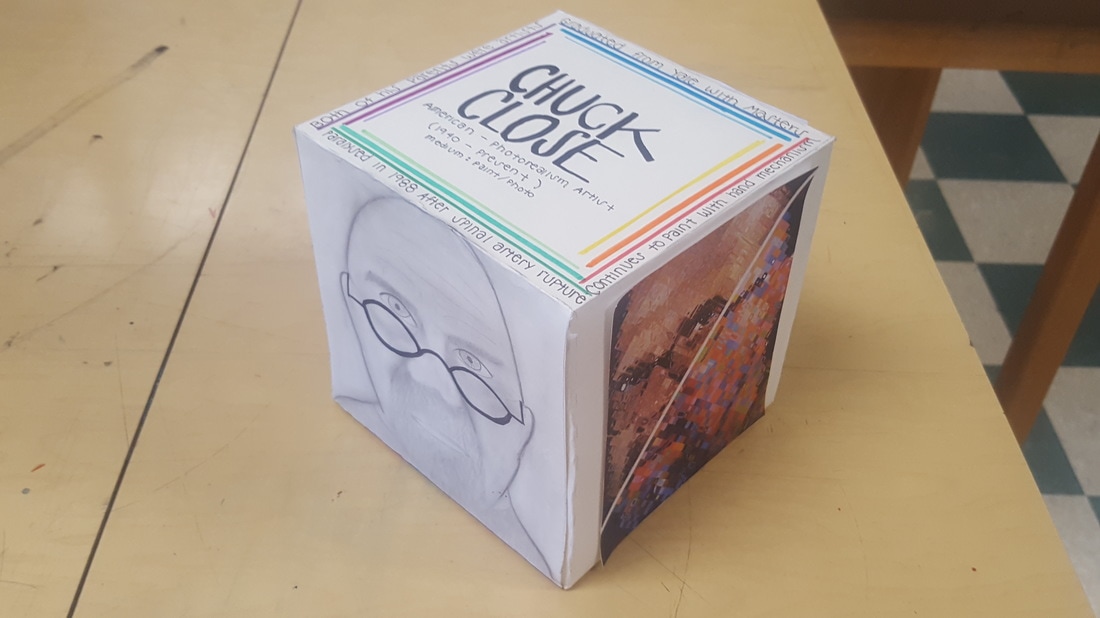
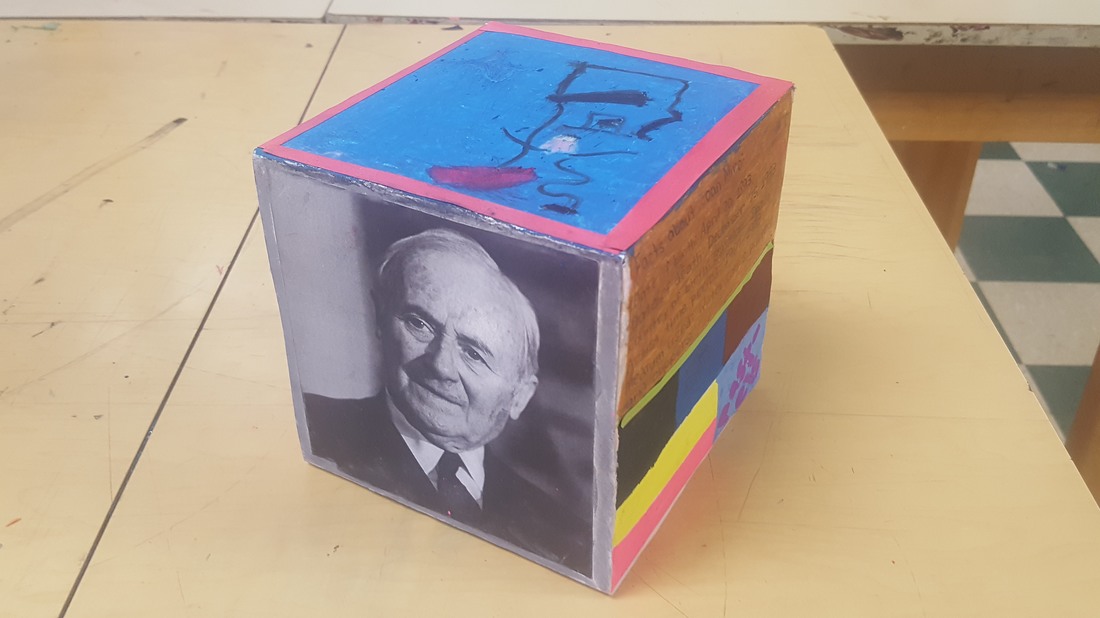
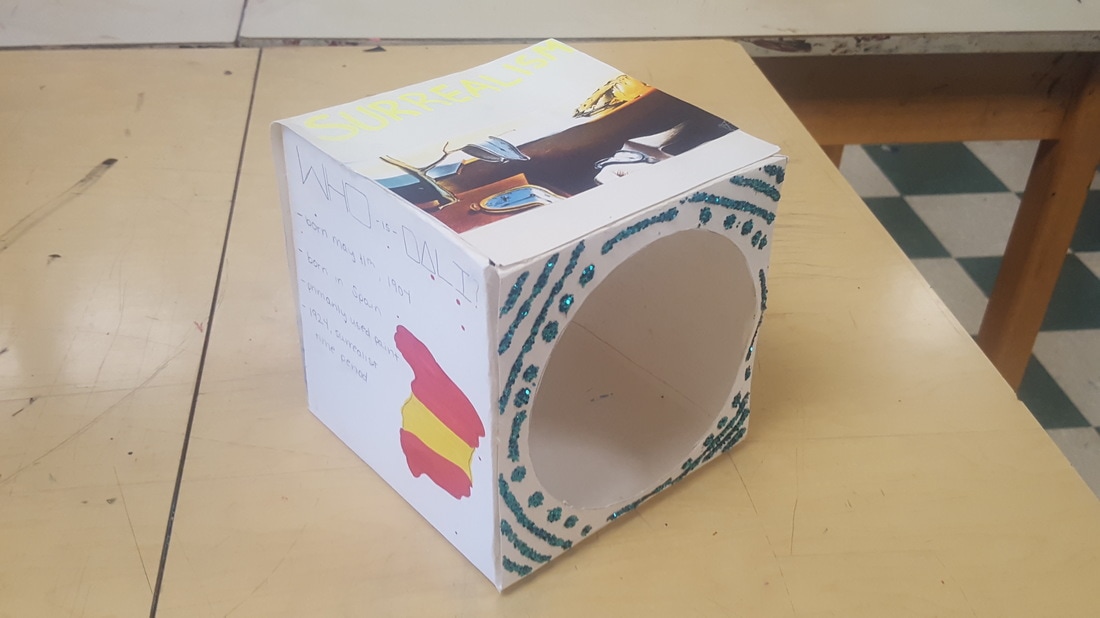
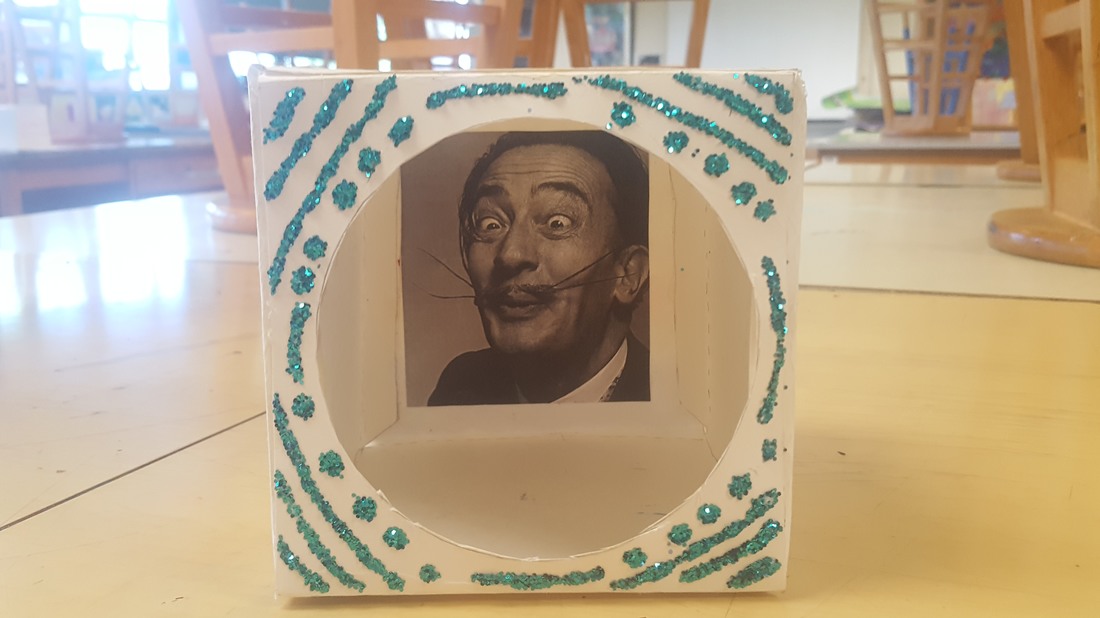
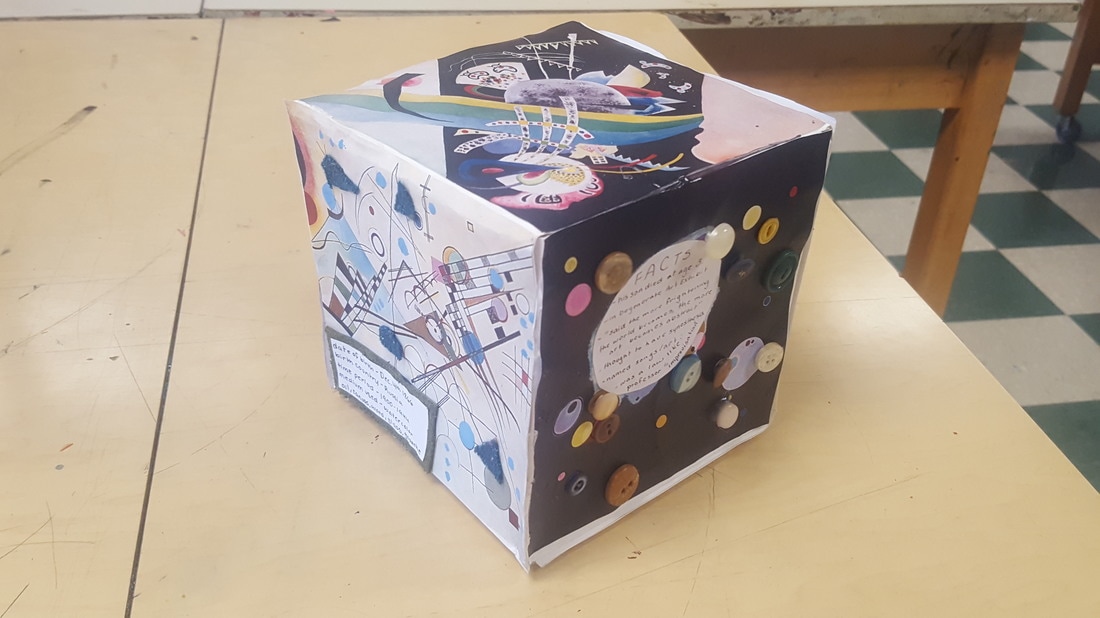
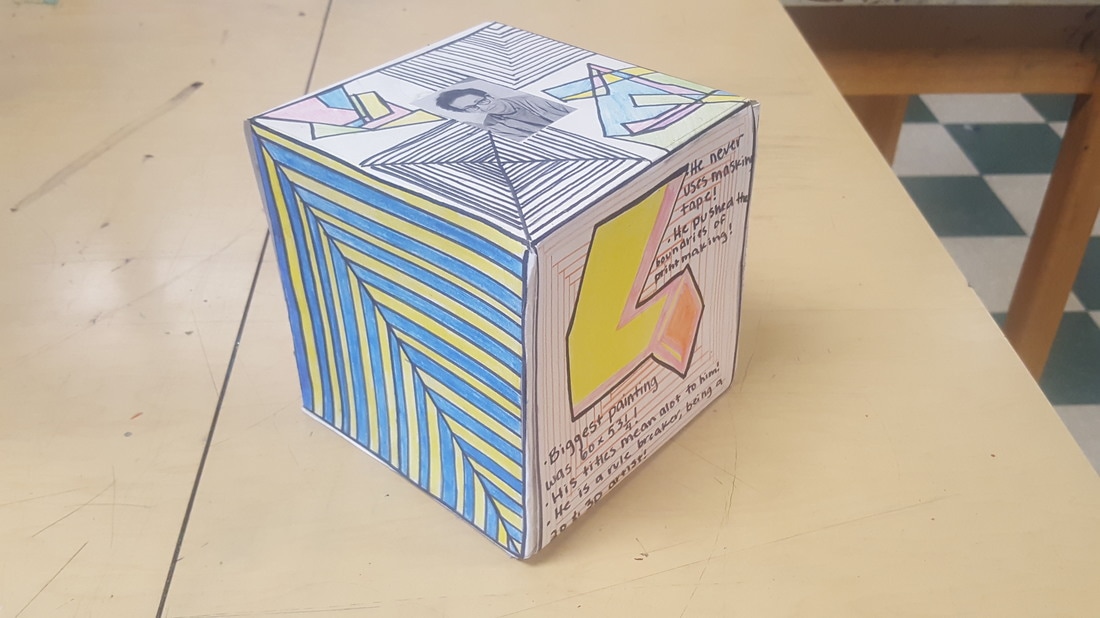
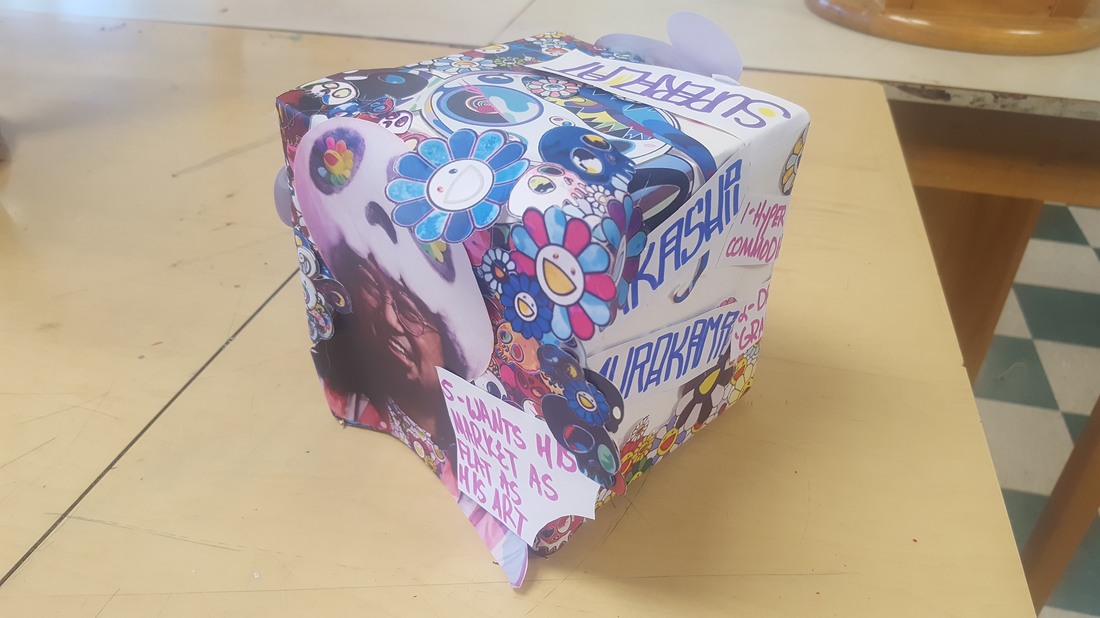
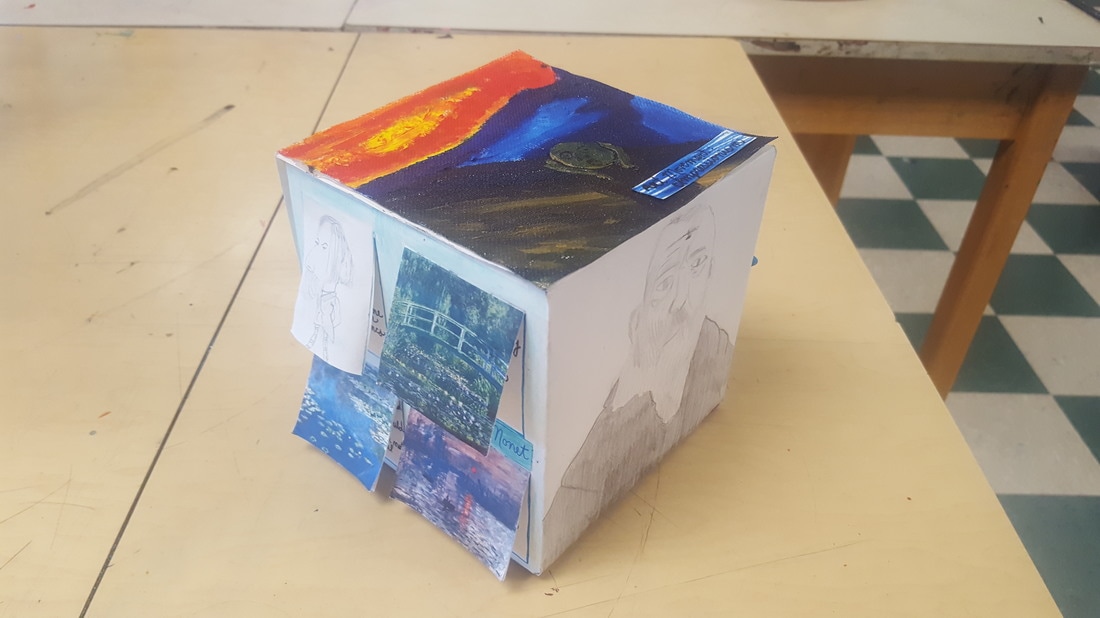
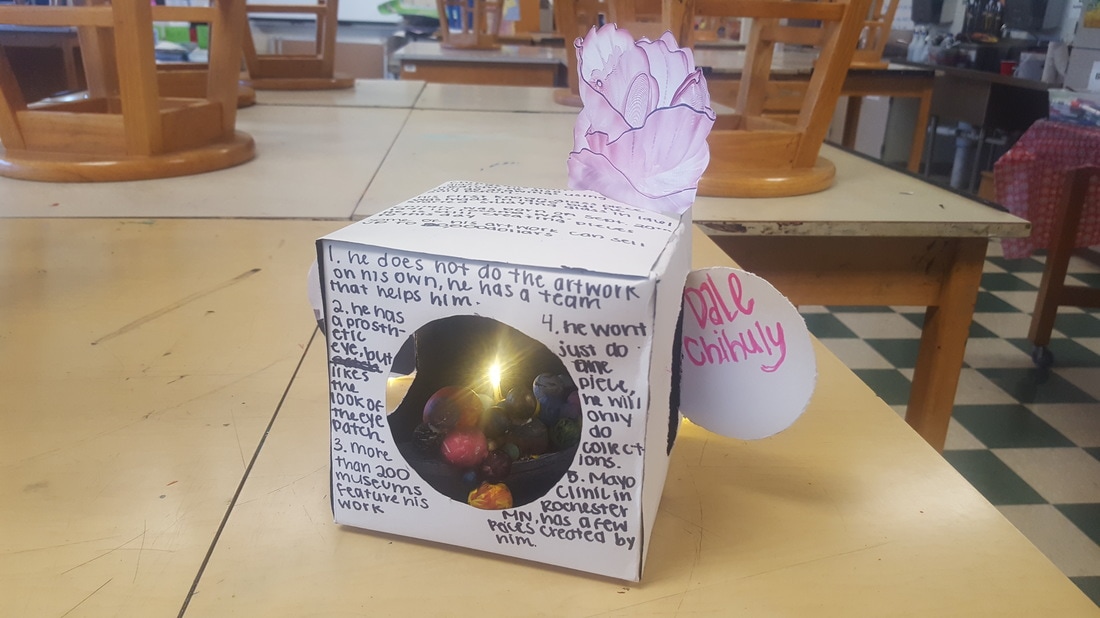
I have found using this packet to be very beneficial for students to slow down and think like a real graphic designer. In case you are curious, I give each student an assigned "company". This makes it more real-world too-- sometimes students get a company that really strikes a cord with them and others get something they think is boring. All of the companies I provide to students are made up and each student does a different design (no one has the same company assigned to them). But this emulates how it is to be a real graphic designer! Students are also put into small groups for the "pitch" stage. The other students in the group act like the "client" and give feedback on the 3 drawings eventually helping the designer decide which logo is strongest and what their final logo design will look like. Interested to see some of my graphic design 1 students logo designs utilizing their color schemes? Check out my gallery below. 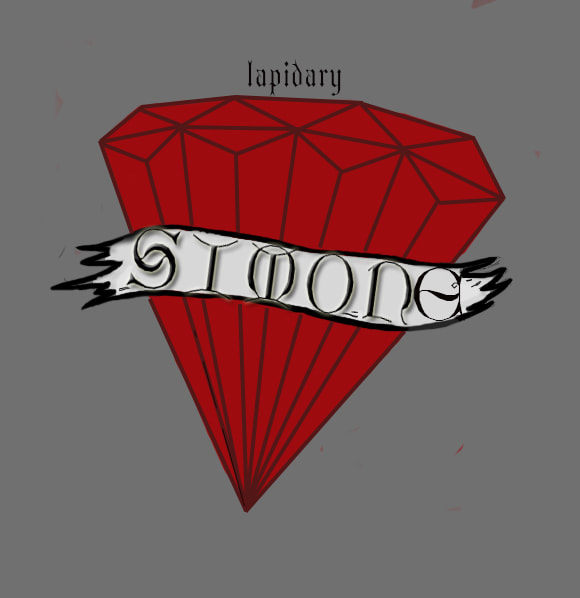 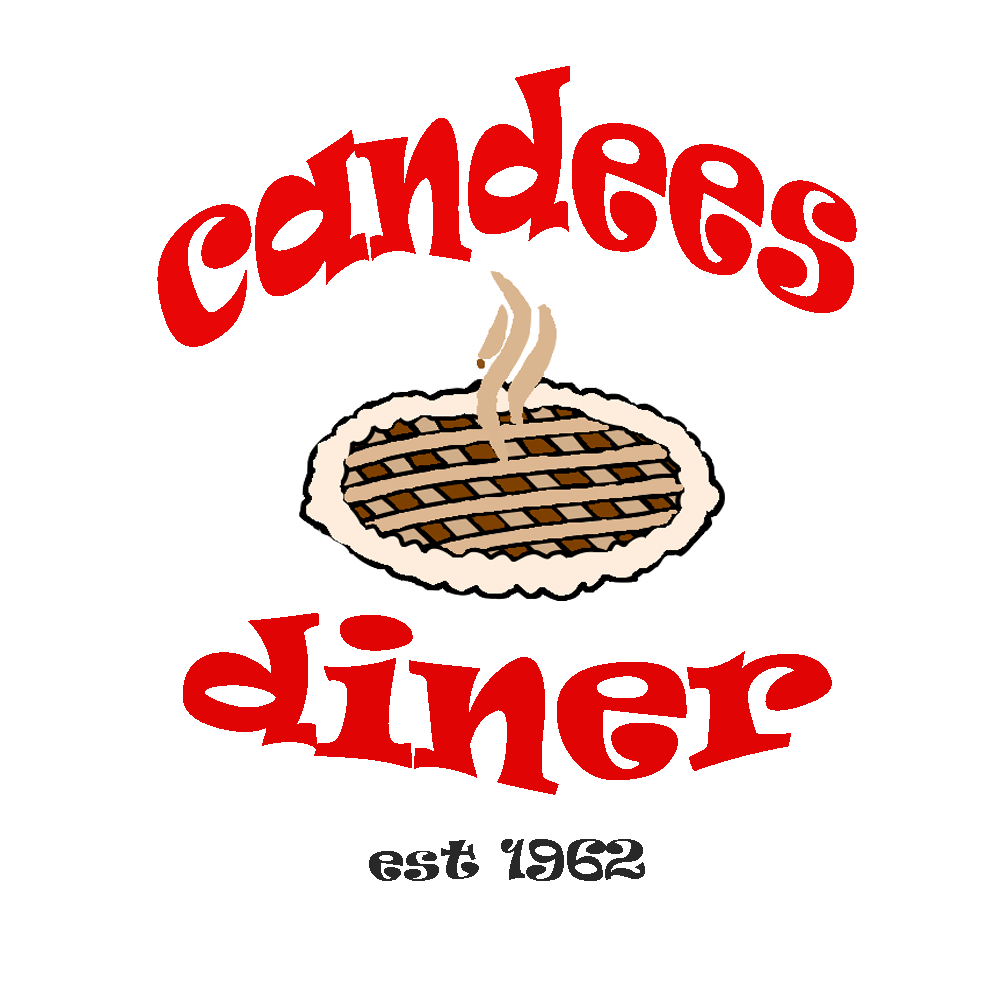    I have just added a new lesson with a template made by yours truly! Introducing the mandala color wheel lesson! I have seen this done on a larger scale with students measuring, but I wanted to take some of the headache out of the lesson to make it run a little smoother for my Art 1 students. Hence, the printable template! The template is intended for acrylic paint, but you could also use watercolor, colored pencils, chalk pastel, etc. This is an excellent project to introduce students to the concept of color & the kiddos love making an intricate and original design! Included in the Teachers Pay Teachers product listing is also a 19-minute demo video showing me create a mandala from start to finish using the template below. 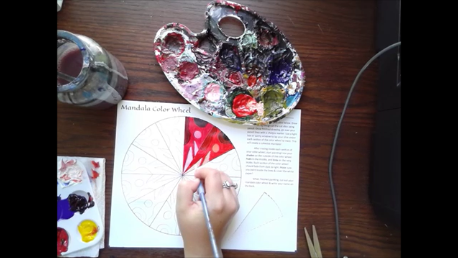 Screenshot of video included with the mandala color wheel lesson 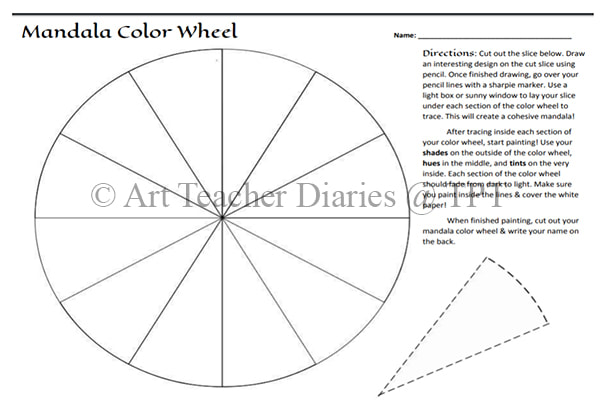 You can purchase the mandala color wheel template, video & powerpoint at my Teachers Pay Teachers store! 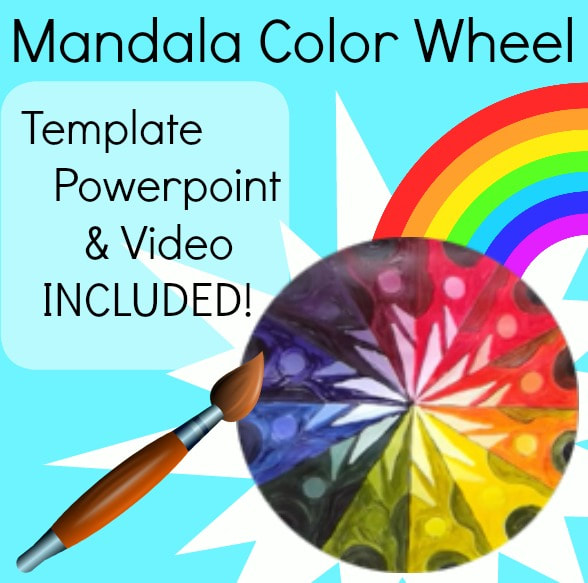 I started my graphic design 1 students on Adobe Photoshop CS6 standard version first. Eventually we started to move into Adobe Illustrator and this is a fun lesson to teach students the basics of Illustrator. Since Photoshop and Illustrator are very different programs, I informed my students ahead of time that this would be a another learning curve-- that some students might catch on quickly, while others might need more practice. Last year, I won a $4000 grant to purchase tech for our graphic design program from the Centurylink Grant award program. I purchased 36 small Wacom drawing tablets for students to use and I instructed my graphic design 2 students to use them for this illustrator sefie project. First, students took a selfie using their phone or one of my classroom cameras. I instructed students that their face had to be showing, but the artistic style, color, line quality, was up to them. I also told students they could change their selfie to an "alter-ego" which made for some very interesting changes to their actual look. This tutorial below by RiceGum on Youtube is both entertaining and informative & we watched the video as a class and then I posted it to the graphic design 2 google classroom for students to reference. When I first taught this lesson, I was worried that it would be too "tracey" and boring for my more advanced students, but it ended up being really okay! Since I allowed students much creative freedom, they were able to really have fun with it. I even had a girl turn herself into a werewolf! After everyone was finished, I created a simple google slides slideshow of each student's selfie to share with the class and I plan on sharing them with future graphic design classes. It was fun having the students guess who each person was! Check out additional examples of graphic design 2 students illustrator selfies below: 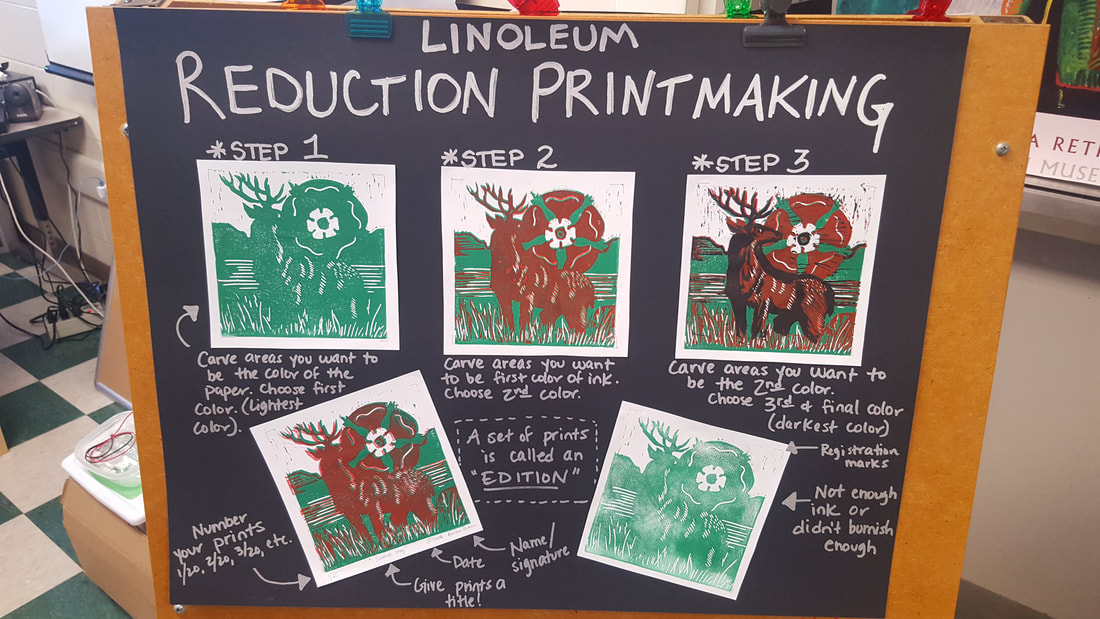 Art 2 students created reduction prints using a 6"x6" block of safety cut linoleum. Students had to create an original drawing and plan for 3 colors + the color of the paper (most often white). Feel free to use my basic instructions with examples below! Reduction prints always seem far more complicated in theory than when you actually make it. One of the best ways to help students understand this is to have them practice on a very small piece of linoleum. Something simple like a flower is a good subject matter. See the process below.  Step 1 - Carve away areas you want to be the color of the paper. In this case, the middle of the flower. Use the lightest color of ink first. In this case, yellow was used first. 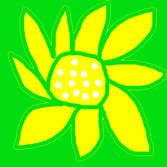 Step 2- Carve away the areas that you want to be your first ink color. In this case, the petals and middle of the flower were carved to preserve the yellow ink. Green ink was used next. 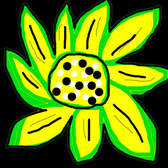 Step 3 - Choose your last ink color (this should be your darkest color, often black). Carve away the areas you want to be your 2nd ink color (in this case green). Everything else that isn't carved will be black! 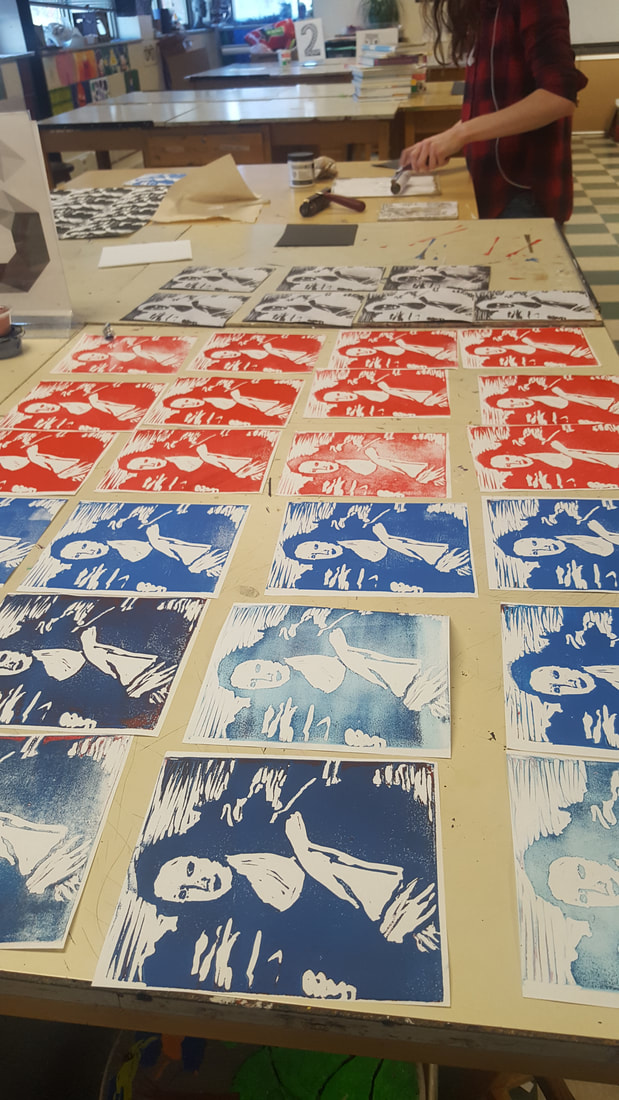 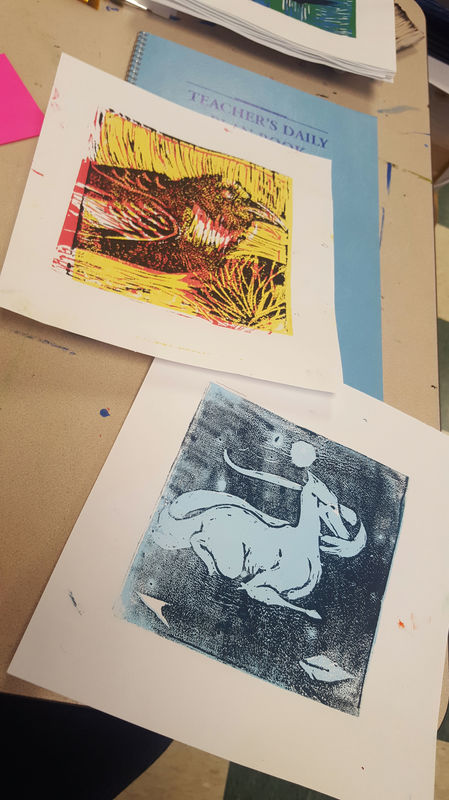 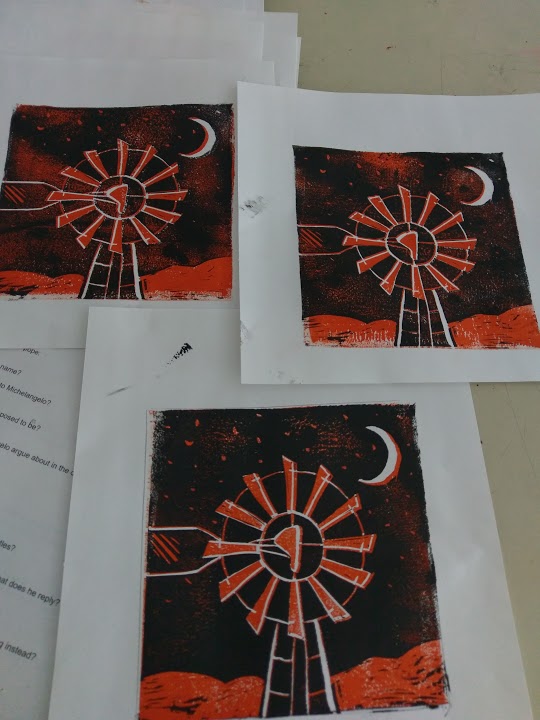 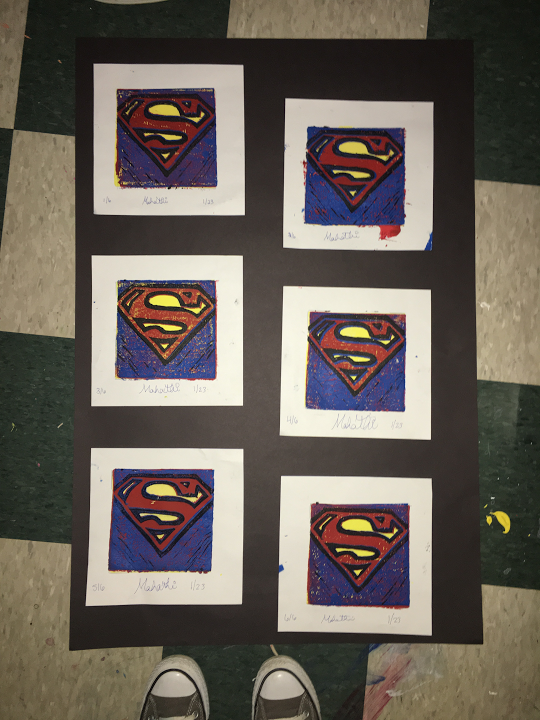 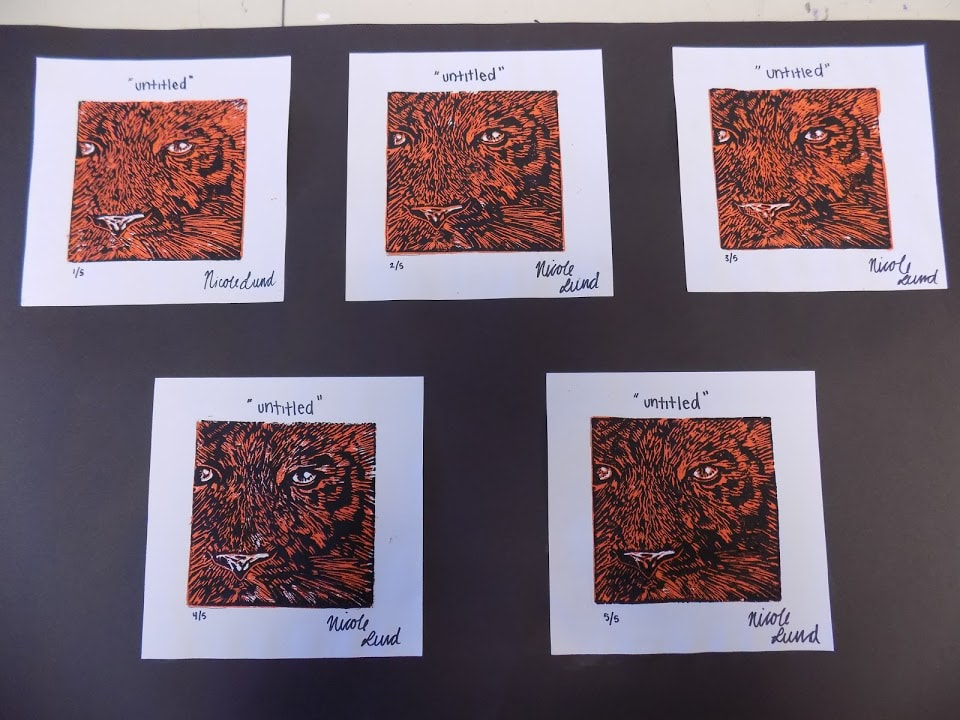    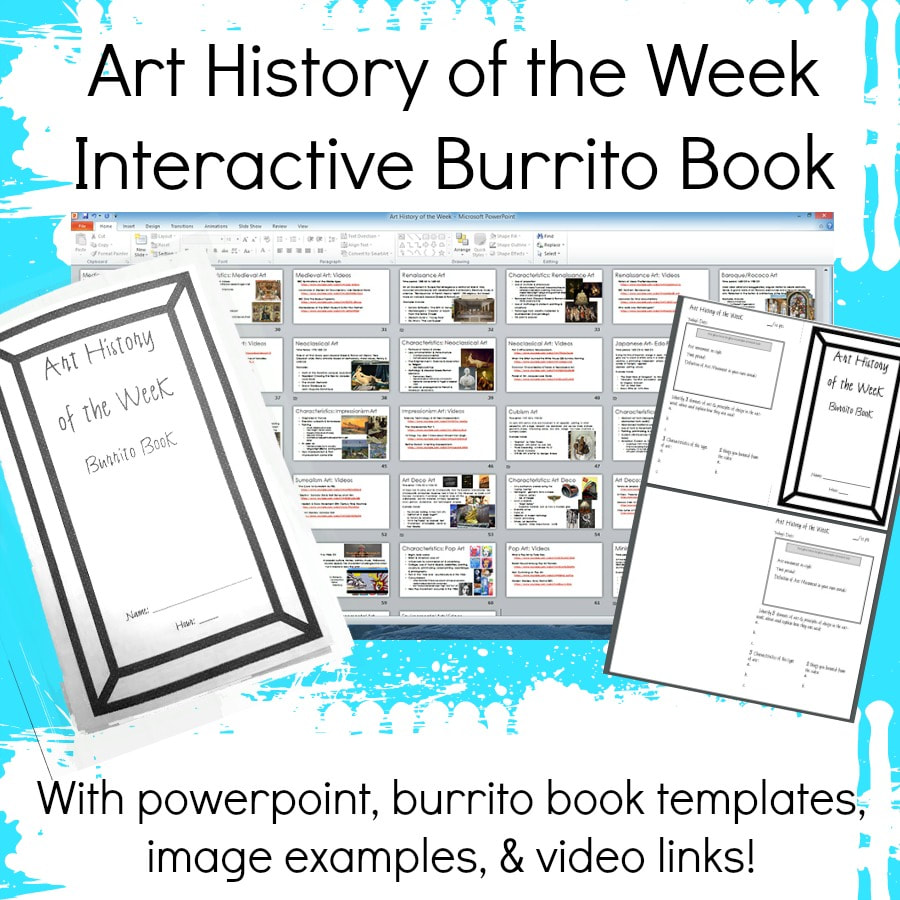 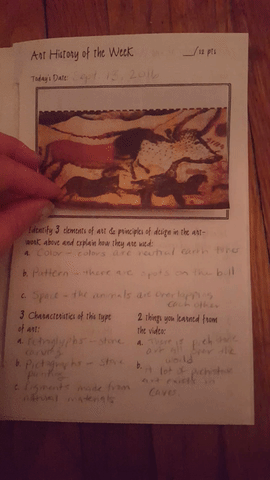 Make learning about art history more fun and engaging by having an art history of the week! Geared towards secondary level students such as high school and middle school, this download includes everything you need to teach a semester (or 18 weeks) worth of art history movements & styles. Each art history movement takes approximately 10-20 minutes to teach, depending on which video links you decide to use. Integrate art history mini lessons quickly and effectively without boring your students! Use the Burrito book template so each student can make their own art history "sketchbook" and all you need are scissors! Not sure how to make a burrito book? The template comes with pre-marked dashed lines for cutting and instructions with images in the powerpoint slideshow. Each page of the burrito book is dedicated to a different art movement. Students must write down the time period, art movement name, a definition in their own words, how the elements/principles are used in the example artwork, 3 characteristics of that art movement, and 2 things they learned from the video. The image examples are glued to create interactive flaps that make studying the art movements even more fun. This entire product took over 30 hours of work to complete, so save yourself some time & use this one! View the art history of the week templates, powerpoint, & more in my TPT shop!These cubes were made by my high school Art 1 students. Students signed up for a visual artist to research & create their own famous artist cube. I had students trace a cube template I made onto poster board and then encouraged them to "think outside the box" (Pun definitely intended). The results were pretty amazing! Each student then presented their creation to the class and we talked about our researched artists. 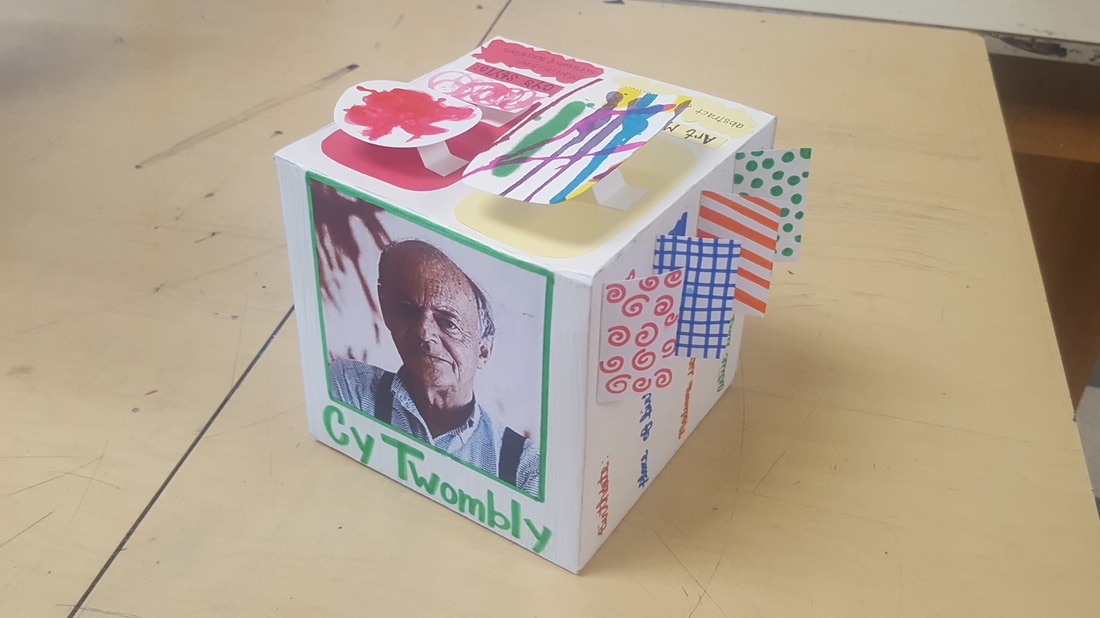 This semester, I got an idea from a fellow art teacher that I just love! The idea is that you take old hardcover books and upcycle them into sketchbooks! I had the library donate about 75 books to my classroom that had worn covers or torn pages. I asked each student to select a book and "upcycle" it in a way that they liked! I let my high school students use paint, oil pastels, markers, colored pencils-- pretty much any media of their choice. I got out my paper scrap and scrapbook paper buckets and let them go crazy...it has been so much fun! The nice part about this project is that it is ongoing, allows students a range of creativity and choice in their creations, and eventually each student will have a full and interesting visual journal to keep. Many of my students are taking this project very seriously. I plan on taking photos of each student's visual journal at the end of the semester and I will post photos soon! I created a set of prompts for each of my class. They have the entire semester to complete the prompts. I included the list of prompts below for your use. Art & Design Visual Journal Prompts
Draw/Paint II Visual Journal Prompts
Since 3rd quarter is just about done, I decided to try something new with my art students. I just finished having what I call "Mini conferences" with my high school students, and I had to write a blog post to report my findings! Basically, I spent two days meeting with each of my high school students one on one during class. Half the class was on the first day, half the class was on the second day. I focused on talking about the following with each student:
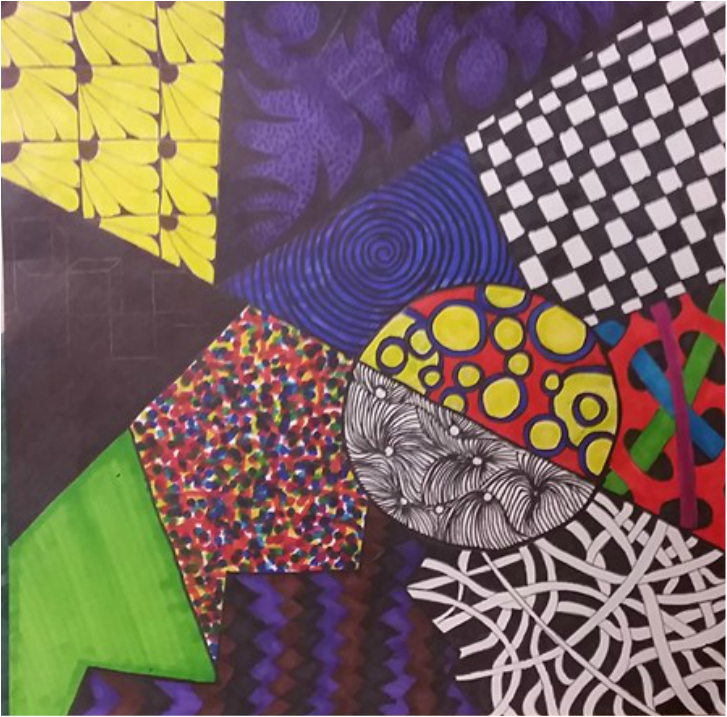
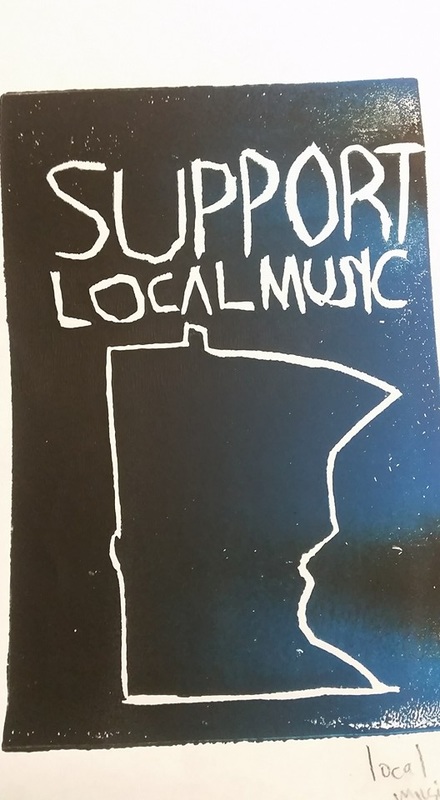
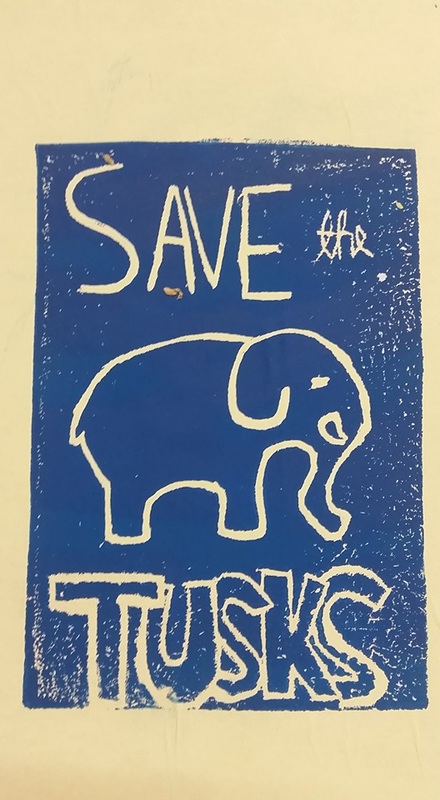
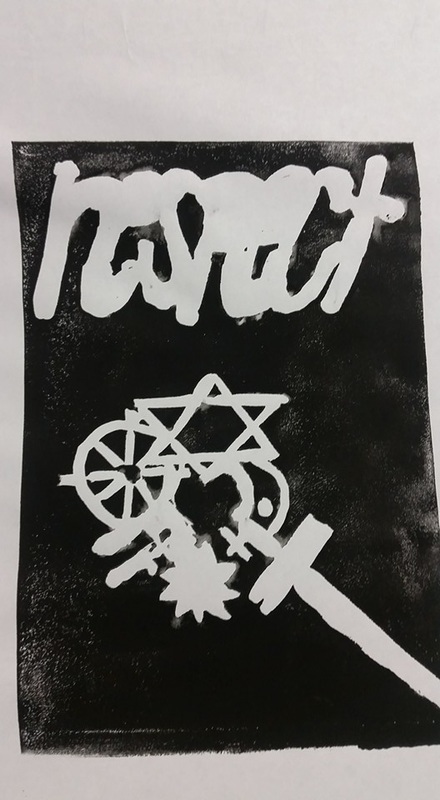
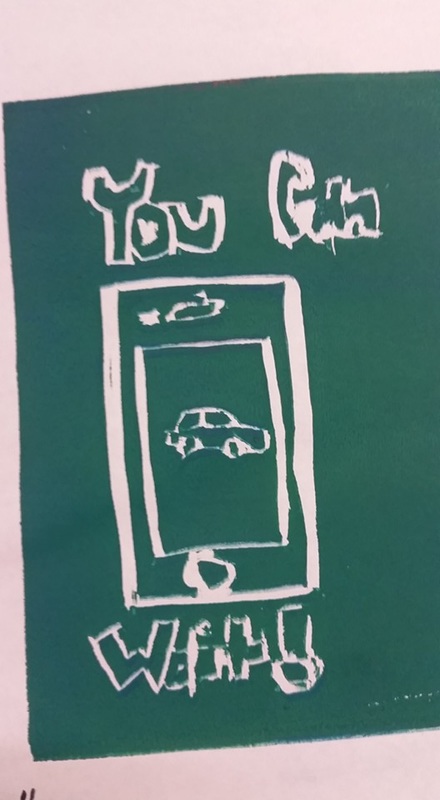
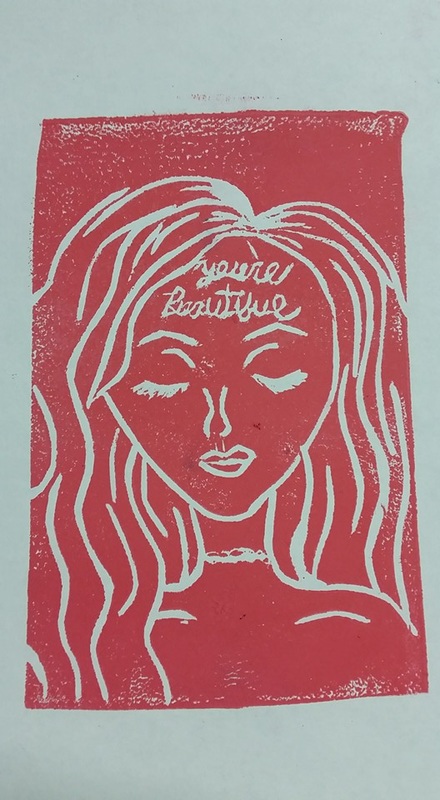
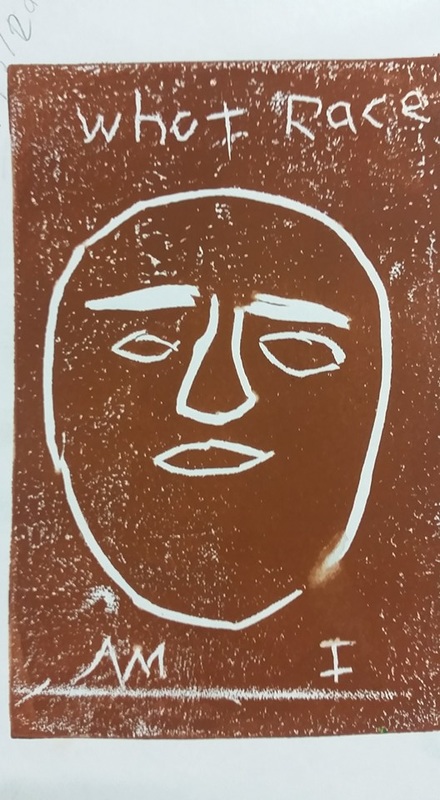
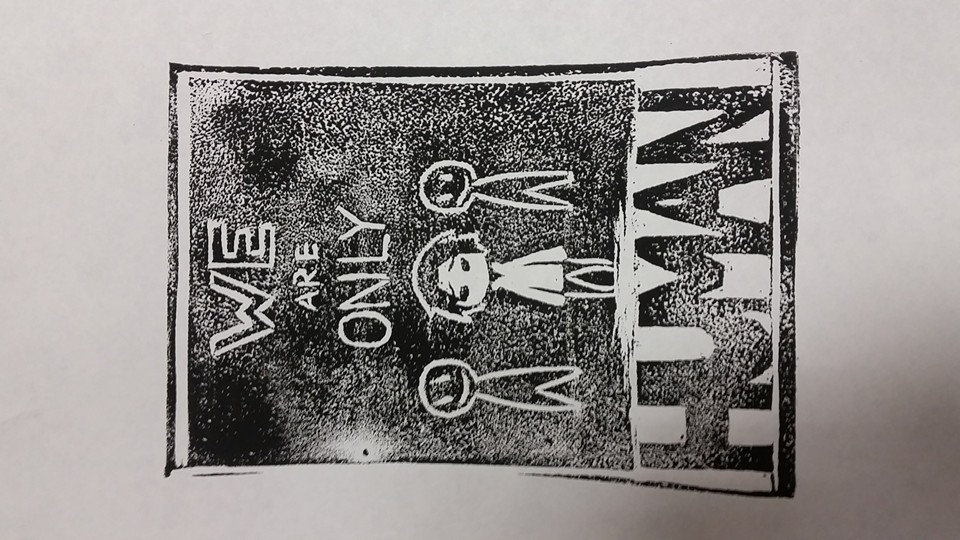
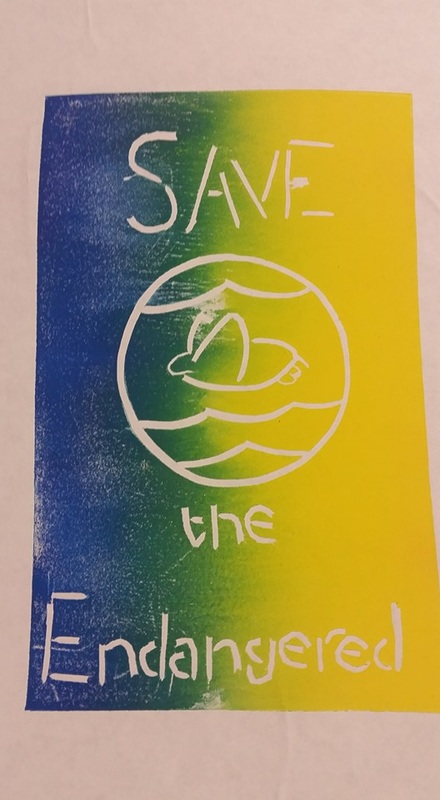
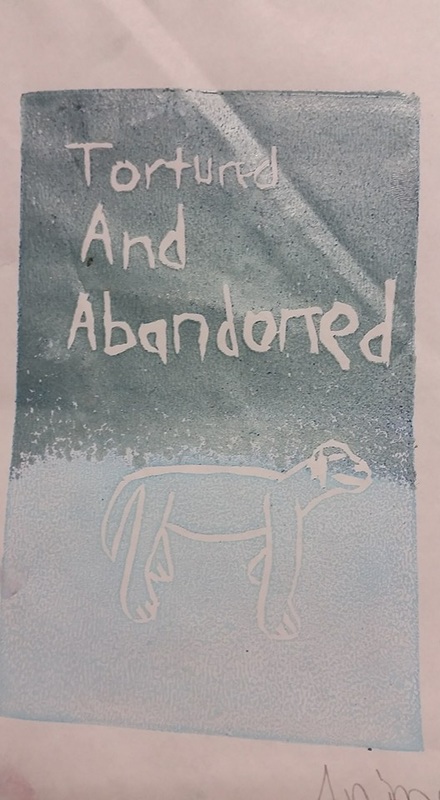
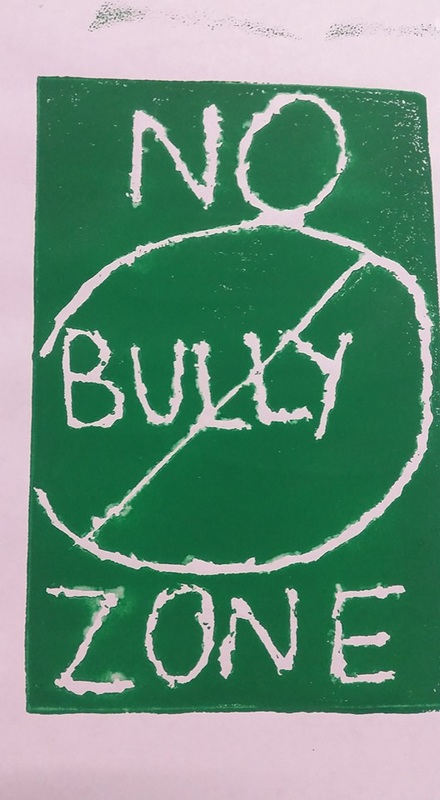
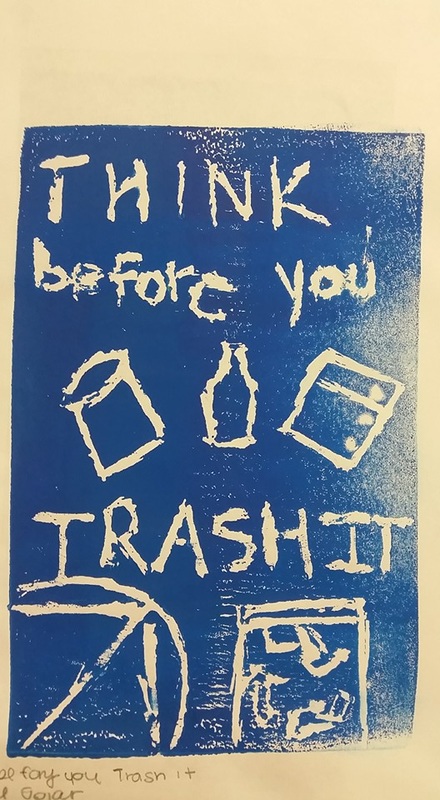
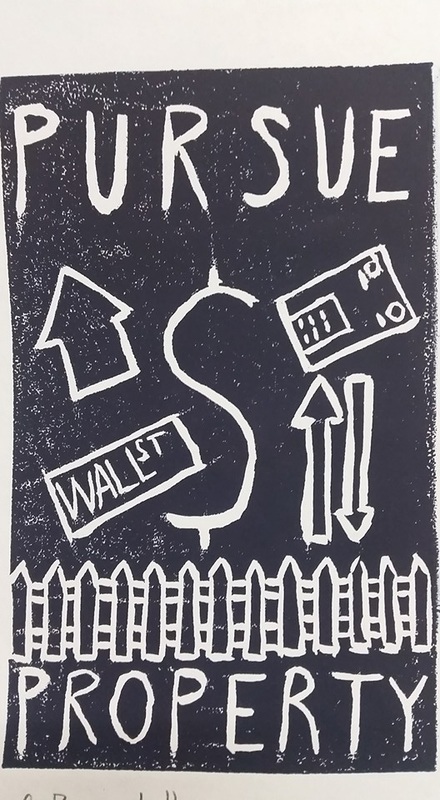
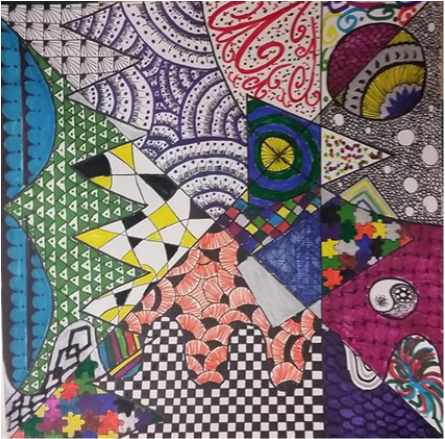
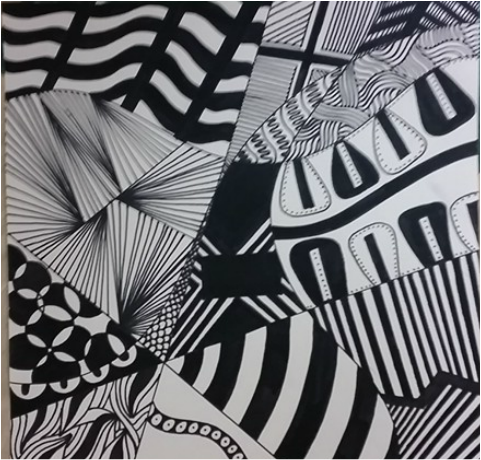
1. Get Feedback from Your Students This was something I was not expecting, but was beyond value to me! While talking with each student privately, they provided me with a ton of feedback to improve my teaching and curriculum. When I asked students how they felt about the class, most students said "Good". When I asked them about the pace of the class, I had several students say they felt that it was going too fast. Many students said they'd like to spend more time on their paintings. If I had never asked them this, I would have kept trucking along! I also asked students how they felt about the projects. Many students shared their own ideas for projects they would like to try. They gave me so many ideas, I just wish I had them for the entire year so we could do them all! 2. Identify Strengths and Weaknesses While discussing grades, I also talked with students about their strengths and weaknesses. Even if a student has 100% in my class, I know they are not perfect. For example, I have a student who has exceptional skill and a high level of perfectionism. Her artwork is college-level work, but her artist statement writing is below average. When discussing this with her, I discovered that she has always struggled with writing and just doesn't know where to start when writing an artist statement. She said she really struggled with getting her thoughts onto paper. We talked about this for a bit, so I offered a piece of differentiated instruction: I would walk her through the questions for the artist statement verbally, then she would orally respond with her answers and I would take notes for her on her responses. Next, I had her re-write my notes as a 2-paragraph artist statement. This seemed to really help her through the process and she still demonstrated her learning (which is the goal, right?) Identifying strengths and weaknesses with students helps them understand where they need to improve and grow, but it also helps me understand where I need to start with a lesson. It helps me differentiate depending on student skill level and readiness. 3. Help them Stay on Track I don't know about you, but I have a few students who would rather sit on their phones all day looking at themselves than work on their projects. For these students, I found the mini conferences to be extremely valuable. First, I showed them what work they were missing. One girl literally had no idea she was missing 3 assignments. Turns out, she forgot to turn 2 of them in. She immediately went to her drawer, got the 2 assignments out and turned them in. I didn't take points away. She had done the assignments and demonstrated her learning. Next, we talked about participation. I showed students the total number of points they had received and why they lost points (on their phones, not working during class, etc.). I think this was a real eye opener for some students. While the points don't negatively affect their grade, I keep track during class as a way to collect data. If a student is not doing what they are supposed to do, I take a point away, and attempt to redirect them. While I love my cell phone, I explained to students that when they're just on their phones the entire time, they are not able to focus and also miss important things like announcements, lessons, and the real world around them. I ended the conference by telling them that I care about their success in my class, whether they like art or not, and that my job was to help them succeed. I can't tell you how many of my struggling art students went right to work afterwards! 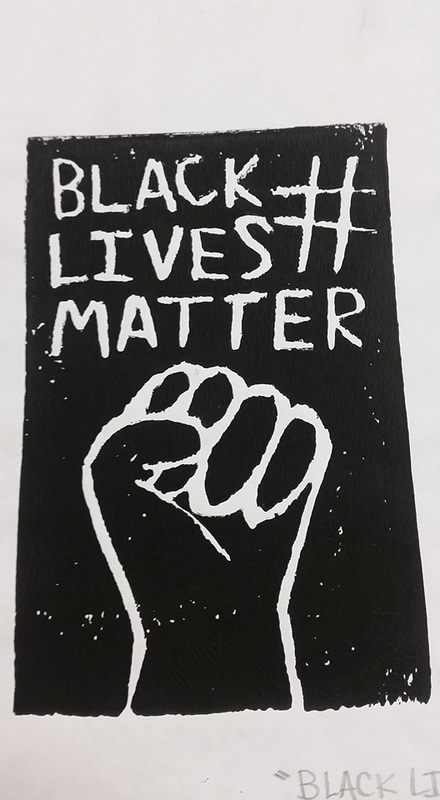 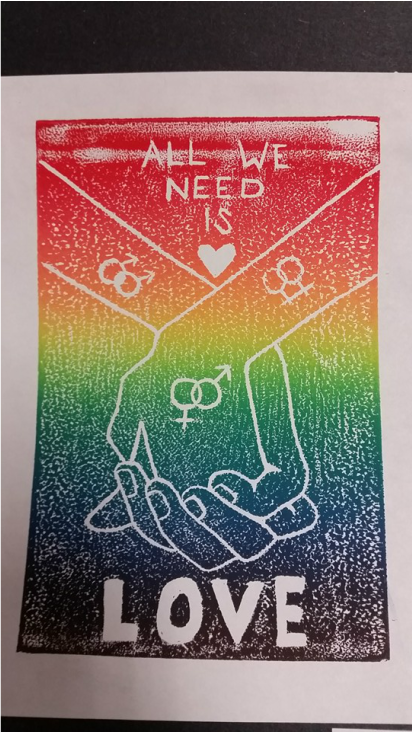 This project was quite extensive, but one of my favorite projects I have ever taught! We spent a day having a class discussion about the work of Shepard Fairey and the way Shepard Fairey uses visual art as a way to draw attention to a particular social issue such as pollution, inequality, and greed. We also talked about the works of Banksy and Ricardo Levins Morales (Minneapolis-based activist artist). We listened to a Podcast interview of Ricardo and his work. Listen to the podcast of Ricardo Levins Morales on MPR here. Students were first asked to brainstorm different social issues. At first, some students really struggled thinking of ideas. For the kids who struggled, I asked them what they liked. For example, a student said he liked music. I asked him if he knew of any problems in the music industry. He immediately said "Piracy", "Inequality", "Sexism" and "People need to support local music more". These are all great examples of social issues that tie into a student interest. Some examples of social issues chosen by students for this project include marriage equality, racial equality, saving and protecting animals, recycling, protecting the environment, religious equality, self esteem, perfectionism, anti-bullying, and greed. One issue I did run into was I had one student who wanted to do a design based around legalizing marijuana. Even though I personally didn't find this offensive, I knew it would be an issue since I teach at a public school! Drugs are bad...mmmk? So I had to explain to the student that while I am all for freedom of expression, that I would appreciate it if he chose a different, more school appropriate topic. I dislike the idea of censorship in my classroom, but there's got to be a line drawn somewhere, right? Next, students were given the challenge of illustrating that social issue. The goal was to create a design that clearly illustrated the chosen social issue. Some students did better at this than others. Each student had to show me their design plan in order to get their linoleum. Students used a 6B ebony pencil to outline their design plan, flip the plan on top of the linoleum, and burnish the design onto the linoleum. This helped students keep their words & letters backwards when carving without having to worry about writing the letters and words backwards. Finally, students started carving their designs! View my demo video below for complete instructions. Students were asked to create 6 different prints and choose 3 for display. After they finished preparing their prints for exhibit, they were asked to write an artist statement. Two of the guiding questions for their artist statement was "How can art change the world?" and "What is visual art's relationship to society?". Some of the responses I got were truly inspiring. Overall, I loved this project and how it engaged all of my students! My high school students just recently finished their Zentangle or Tangle tile project. We talked about the differences between geometric and organic patterns. Students were asked to divide their 12"x12" drawing paper up into at least 12 different sections with each section having a different pattern. Students used sharpies with different widths to create their patterns and designs. Students were also asked to create an equal balance of darker patterns and lighter patterns. I allowed students the option of adding color. My students with anxiety and depression really seemed to benefit from this project. My room was so quiet when they were working on this! Not to mention, my room was less of a mess! I played relaxing piano and classical music while they worked...which surprisingly most kids enjoyed. Some students said this was their favorite project of the semester!
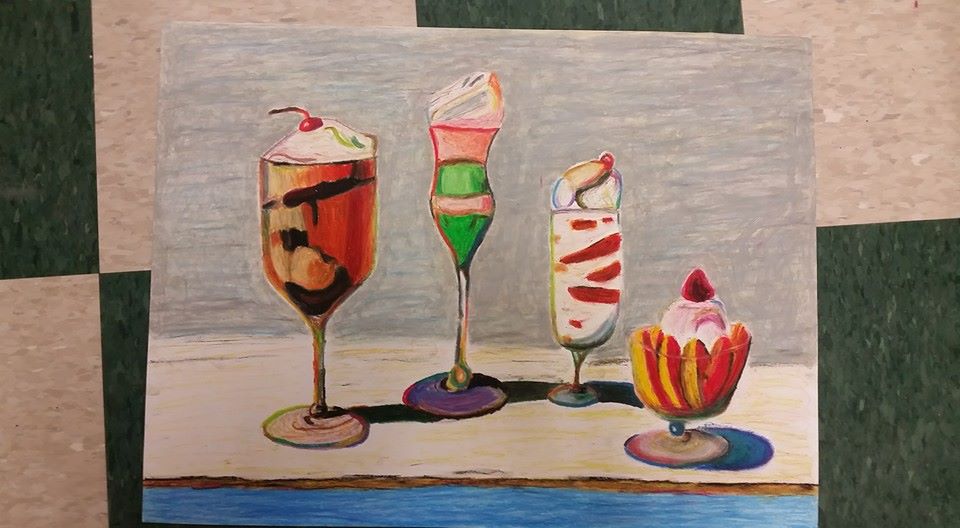
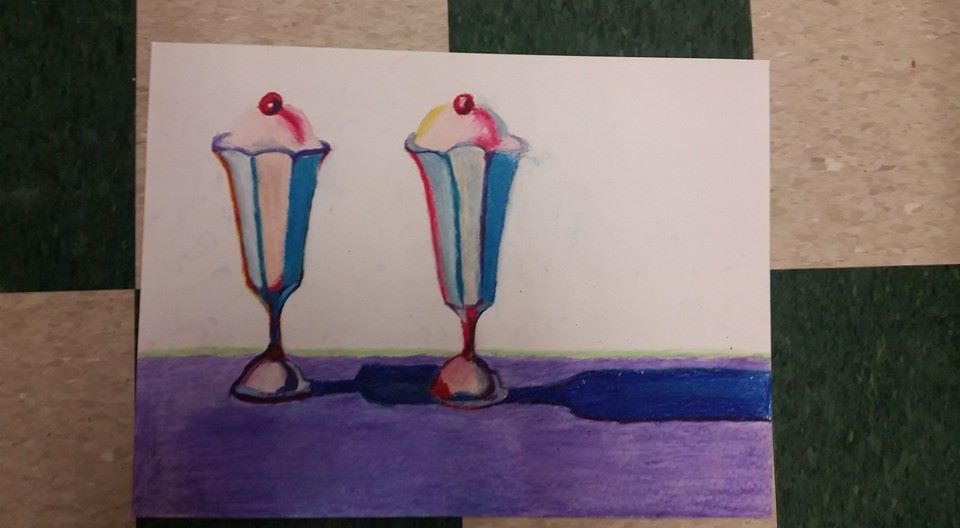
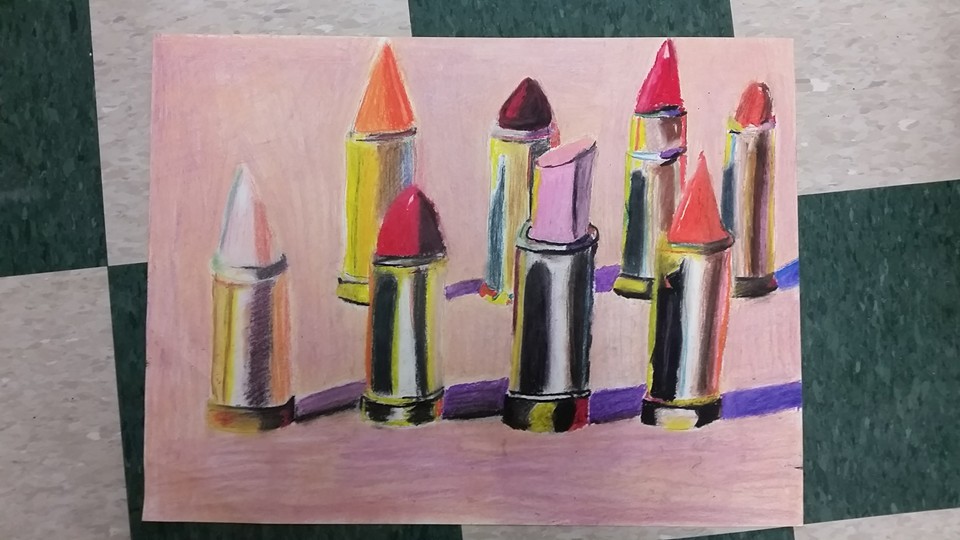
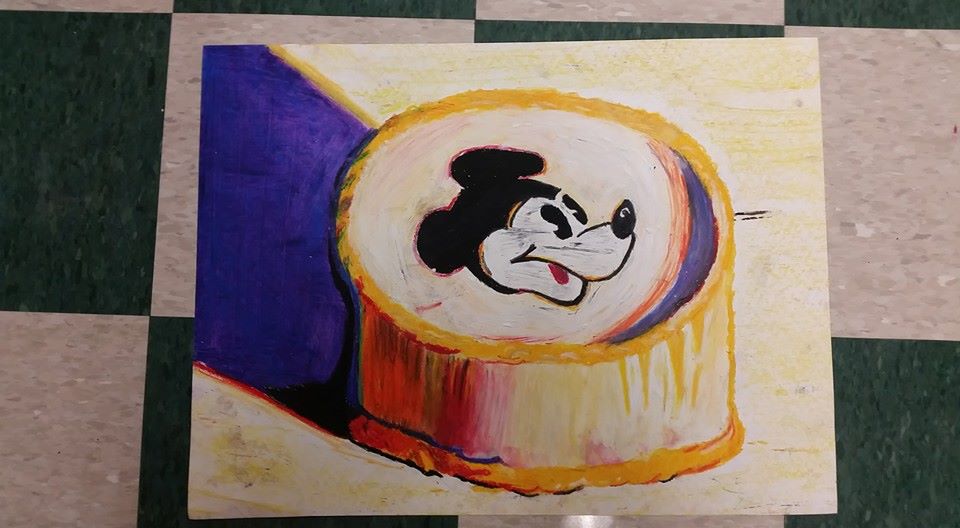
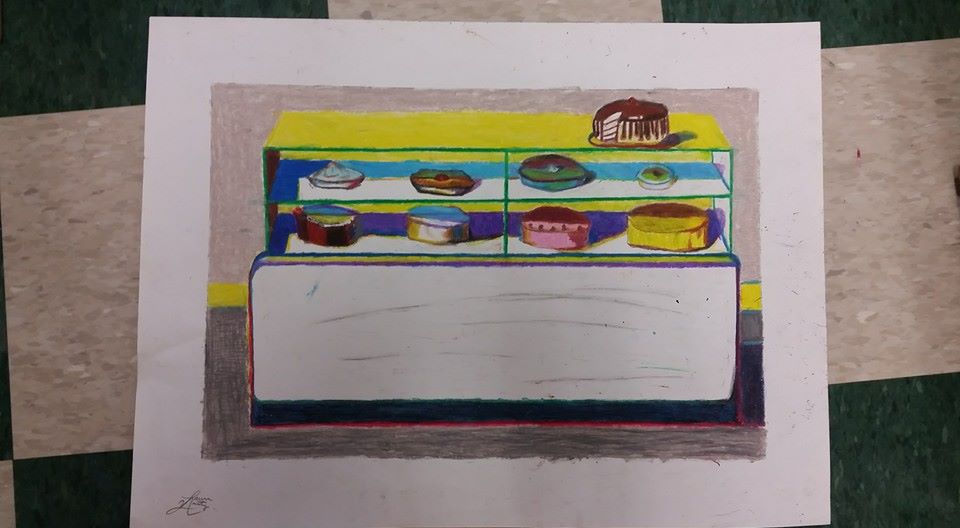
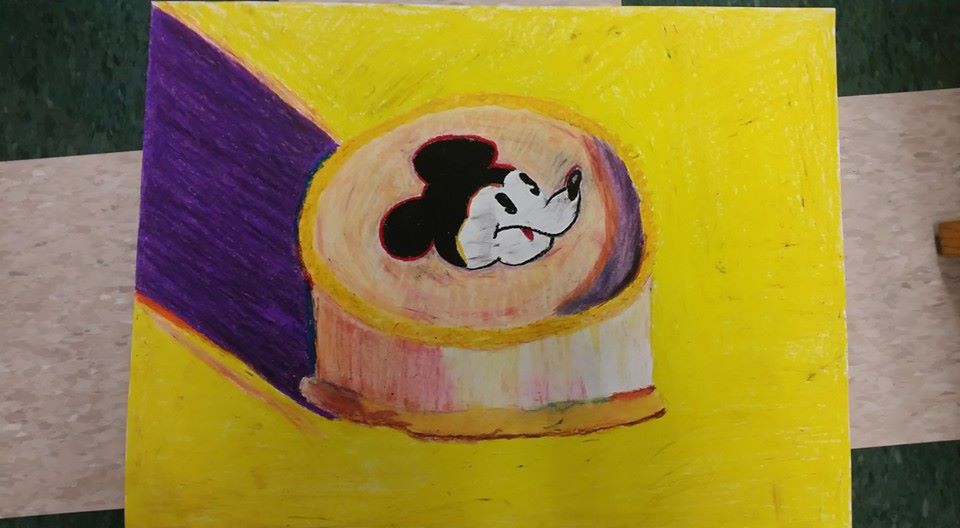
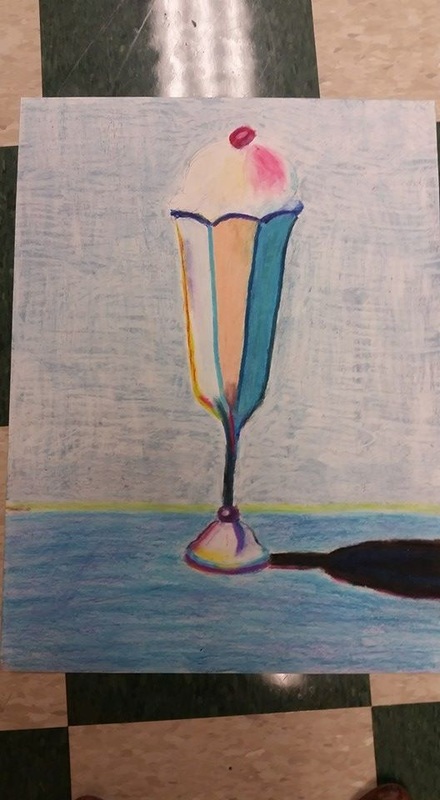
  My Draw/Paint I high school students did an awesome job on this project! Though I usually like students to have a more open-ended art assignment, this one seemed to work well for all students. For this assignment, I introduced students to the work of Wayne Thiebaud (Tee-Bow). We discussed how he used colors in interesting ways and applied the paint thickly to the canvas like frosting. His work has a 3-dimensional quality that makes it addicting to look at! I then had students experiment with oil pastel and mixing colors of oil pastel using the 3 primary colors. Finally, I had students choose a color copy of a Wayne Thiebaud work that they liked. The nice thing about Thiebaud's work is that it offers an enticing selection for students to choose from. My students had to draw the work based on the color copy with pencil first. Some students chose to draw using the grid method they had learned in the previous lesson. Next, they used oil pastel to add color. I encouraged students to apply the oil pastel very thickly to recreate the 3-dimensional quality of Thiebaud's work. This project was a lot of fun, because it helped even below average students feel successful at art. This project took approximately 2 weeks (10 50-minute class times) for students to finish. Halfway through the project I brought in cupcakes for all my students because they complained that Thiebaud's work made them hungry. What's better than making art and eating cupcakes!? |
Mrs. QuamThis is my 11th year teaching art & graphic design! I have taught middle school for 2 years and high school for almost 5 years. I truly enjoy working with students on a daily basis. I also enjoy teaching real-world skills such as problem solving, using technology, and the power of teamwork and collaboration. My joy is sharing my passion for art with others! Archives
March 2024
Categories
All
|
||||||||||||||||||||||||||


 RSS Feed
Photo from Rob Qld
