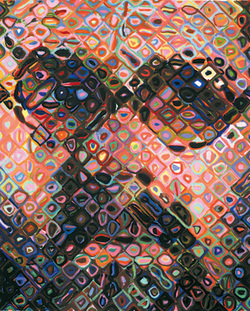
 The end of this semester has proved to be quite busy. We are currently working on our birchbark boxes and will hopefully be finished by the end of this week. I will be moving schools for the second semester and that means an entirely new group of students. It also means that I am working on planning the curriculum for this second semester. As an artist who likes to work in a variety of mediums, I am definitely one who likes to try new things and experiment with different lesson plans. A few of the projects we did last semester (pop bottle drawings and zentangle pyramids) will be repeated but I will be teaching many new projects this second semester. One project I have been dying to have students try is a large-scale collaborative grid drawing. I think I will be doing this project instead of the Chihuly sculptures with this group of students. I took inspiration for the grid drawing lesson from Chuck Close's gridded portraits. This lesson is still in the works, but I think it will be a great lesson on drawing what we SEE, rather than what we think we see. This is something I know a lot of 6th grade students struggle with and breaking it down into 5"x5" square chunks should ease frustration. The 7th & 8th graders do their own personal grid drawings and this should be a nice precursor for building up background knowledge of grid drawing. I chose six artists and their portraits for this lesson. I copied and pasted their images into a word document and overlayed a 7"x9" grid over each image. I applied the artistic filter "pencil sketch" over each image to show contour lines more effectively. The Artists:
The hardest part was narrowing my choices down to six artists. These may not have been your own choices, but my criteria for selecting artists was based on the lessons I will be teaching throughout the semester and I wanted to represent different cultures and show a balance of both men and women artists. I plan on printing each gridded artist image twice. I will use my paper cutter to cut out each small 1"x1" square from the image. I will then label the back of each square with a number so we can keep track of which image goes where. Then I will give students a handout for the project with a 5"x5" square box to draw in. Each student gets a small 1"x1" square and will be asked to transfer the 1" box into the 5" box on the handout. I plan on showing students examples of what we are doing, but not what our final image will be. I like a little mystery! :) Once students have their drawing in pencil finished, I'll have them color with markers or colored pencils. I will be testing this project out myself to see how it works before teaching it. The worst case scenario is that it doesn't turn out to look like a portrait. Each final work will be a combination of two art classes (approx. 30 students in each class). The final work will be 35"x45" in size with a total of 63 5"x5" squares in each work. Time required: 2 (50 min.) class periods You can see the document I created with the six artist images below. I will keep you posted about how this project works out!
0 Comments
|

Mrs. QuamThis is my 11th year teaching art & graphic design! I have taught middle school for 2 years and high school for almost 5 years. I truly enjoy working with students on a daily basis. I also enjoy teaching real-world skills such as problem solving, using technology, and the power of teamwork and collaboration. My joy is sharing my passion for art with others! Archives
March 2024
Categories
All

|
||
 RSS Feed
Photo from Rob Qld
