|
I recently discovered the awesome online app coolors.co and just had to make a quick post about how to use this amazing program to help students understand and choose color schemes for various projects. Students can even use this program on their phones or an ipad. 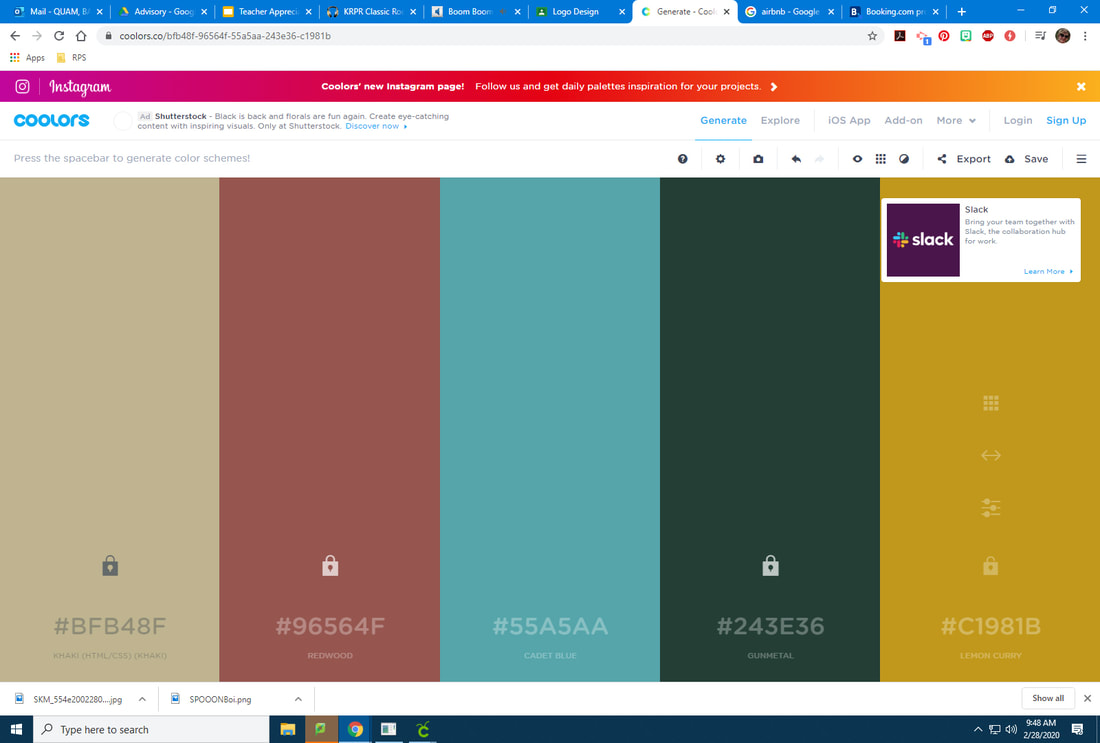 So how does it work? Simply go to https://coolors.co/ and click on the blue button to start. For my graphic design classes, each student was provided with one specific hex code (the 6 digit number after the hashtag under each color). Students had to enter that hex code as one of their necessary colors. The rest of the colors were decided by each student. I had students lock their required color and then press the spacebar on their computers to generate random colors. If a student saw a color they wanted to keep, I had students lock that color and continue pressing the spacebar. For students that wanted more control, I allowed them to find and adjust the colors using the adjust feature (see below). Students can adjust hue, saturation, and brightness. 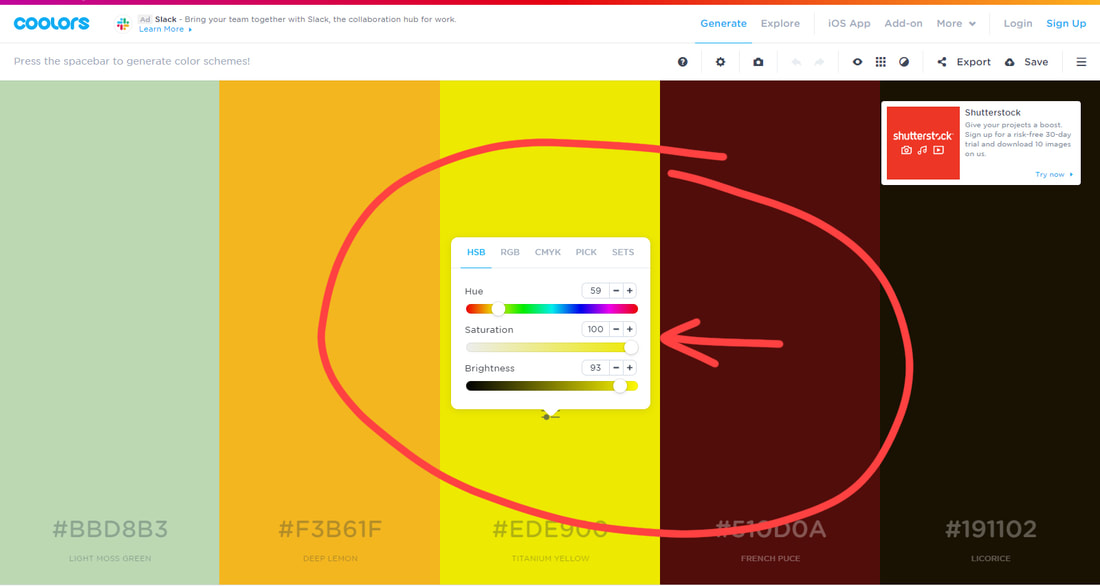 Once students chose their final color schemes, I had them record the hex codes in their logo design packet. Interested in seeing my logo design packet? Click the link or image below to view and download. This .pdf is currently free for all teachers personal and classroom use.
I have found using this packet to be very beneficial for students to slow down and think like a real graphic designer. In case you are curious, I give each student an assigned "company". This makes it more real-world too-- sometimes students get a company that really strikes a cord with them and others get something they think is boring. All of the companies I provide to students are made up and each student does a different design (no one has the same company assigned to them). But this emulates how it is to be a real graphic designer! Students are also put into small groups for the "pitch" stage. The other students in the group act like the "client" and give feedback on the 3 drawings eventually helping the designer decide which logo is strongest and what their final logo design will look like. Interested to see some of my graphic design 1 students logo designs utilizing their color schemes? Check out my gallery below. 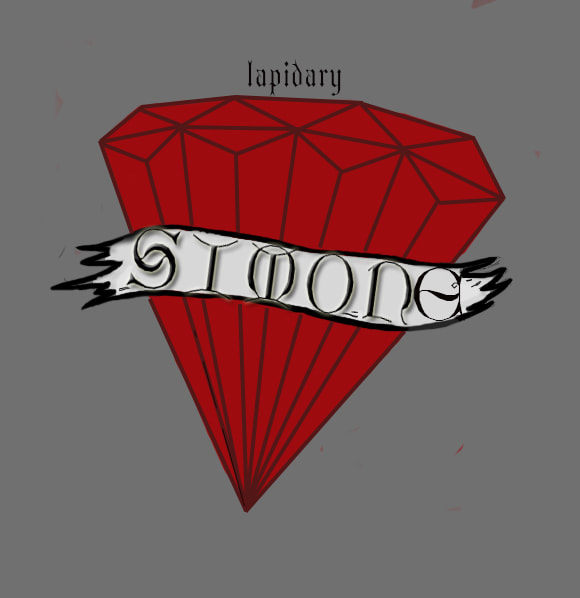  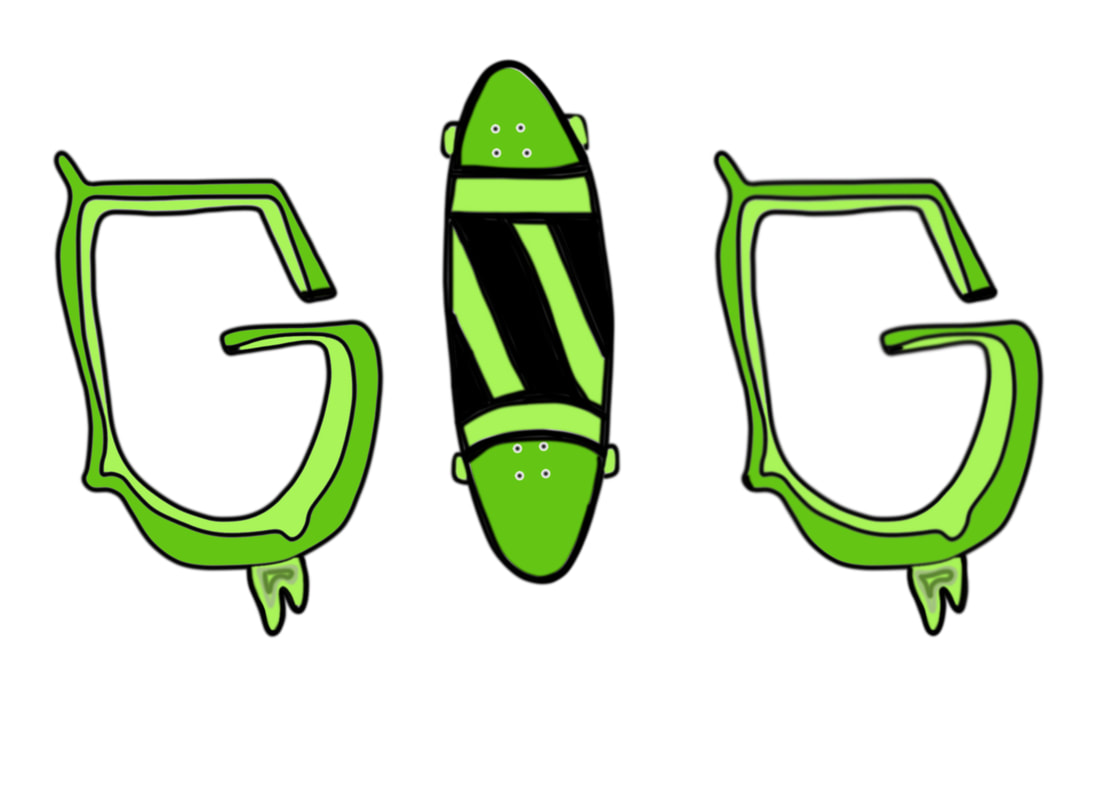  
1 Comment
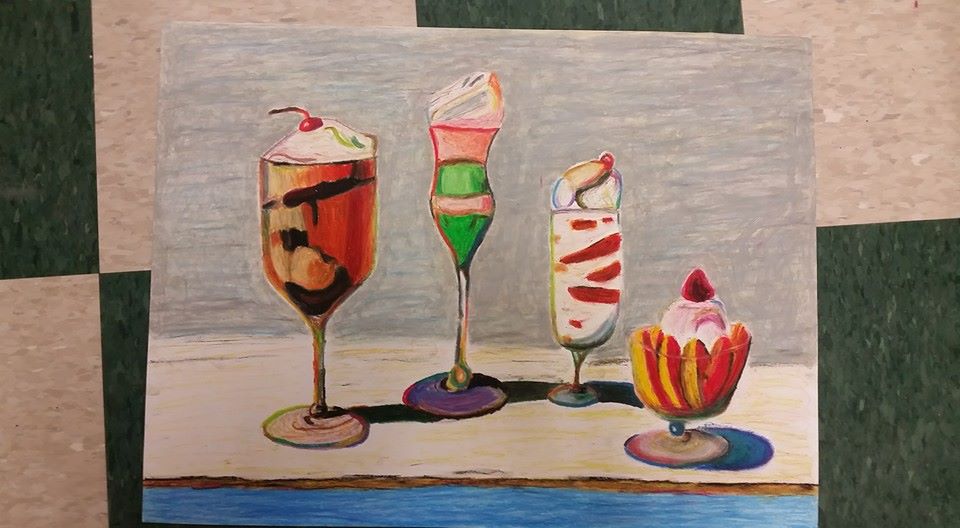
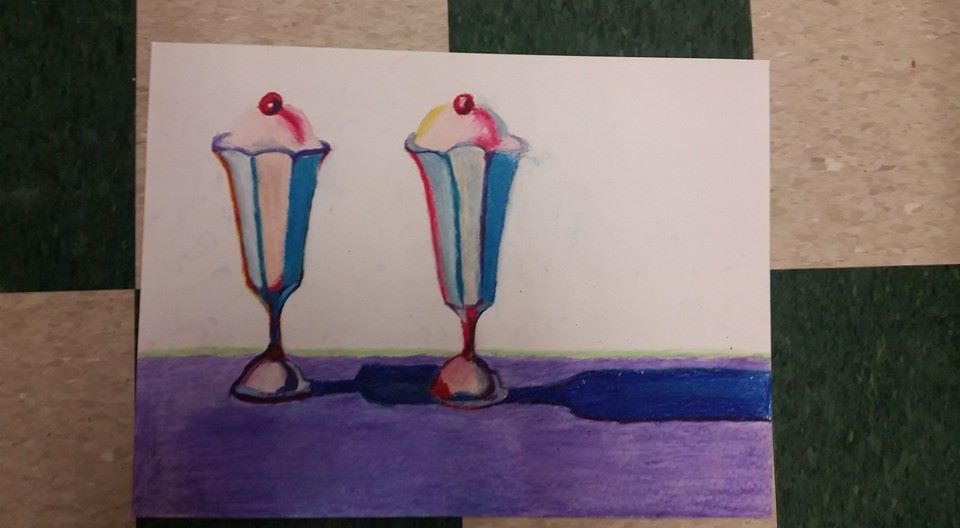
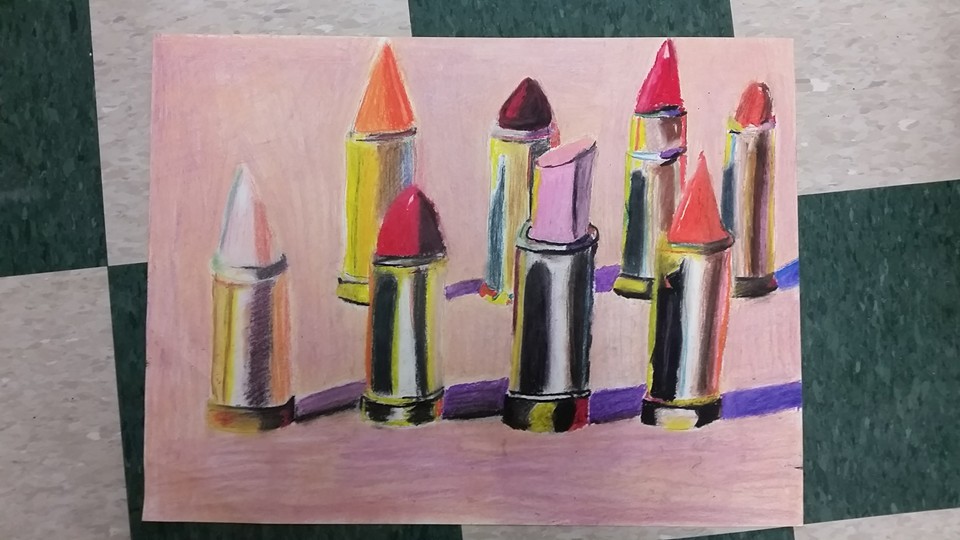
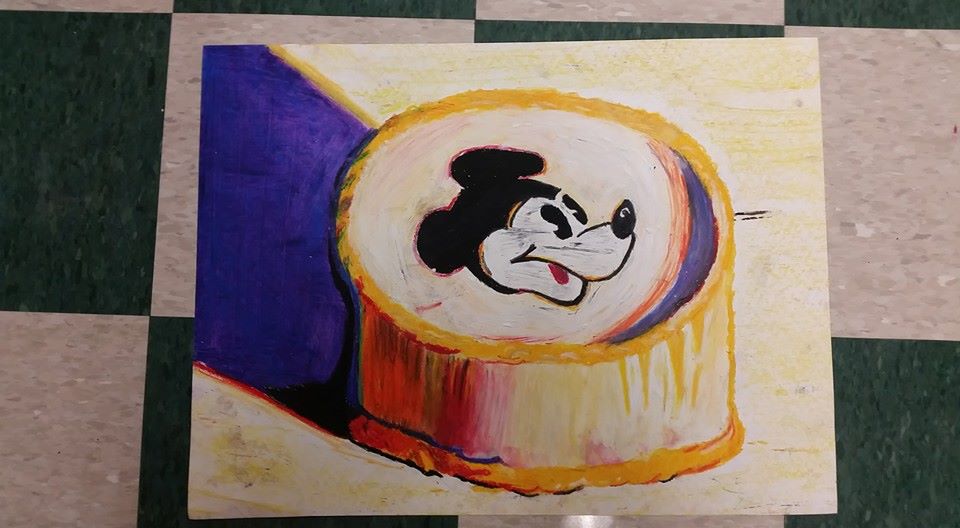
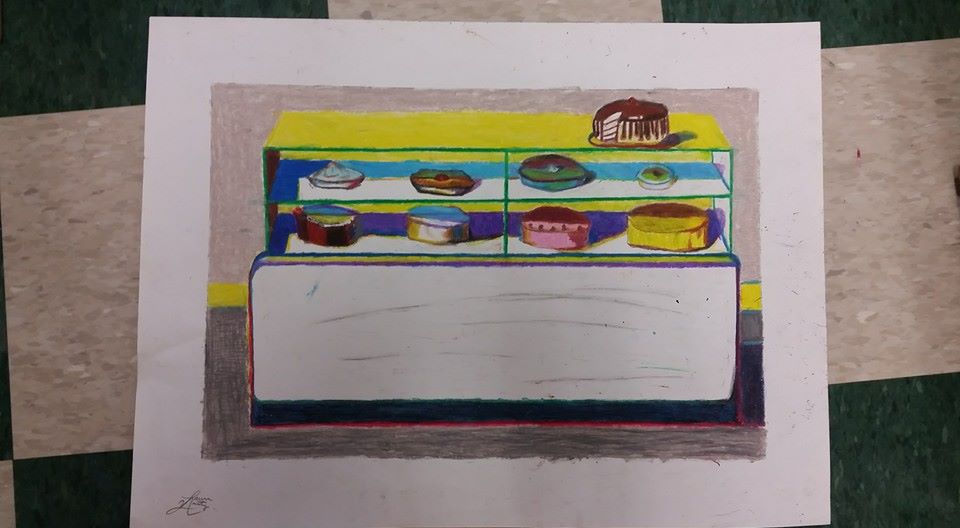
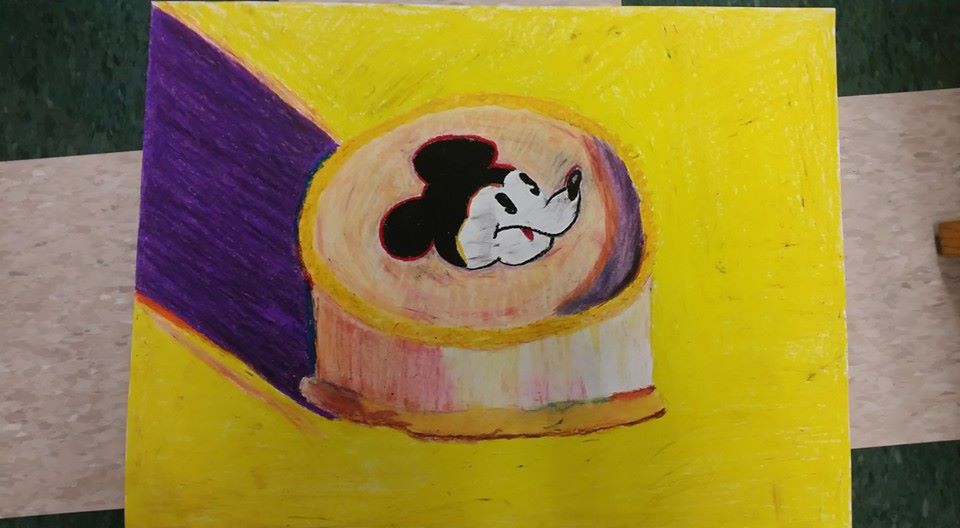
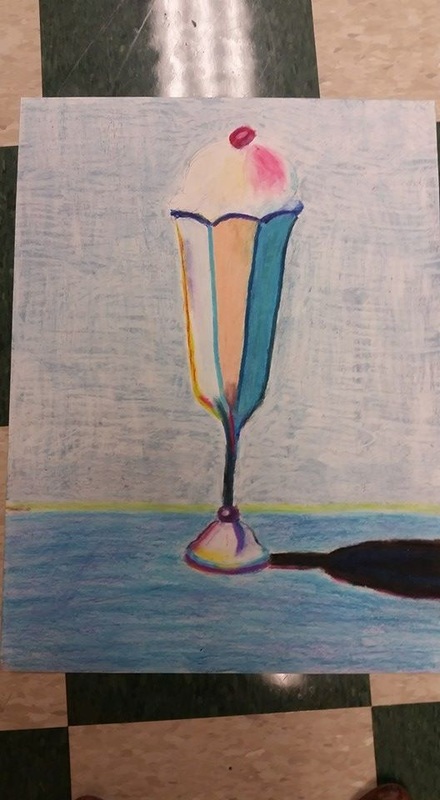
I have just added a new lesson with a template made by yours truly! Introducing the mandala color wheel lesson! I have seen this done on a larger scale with students measuring, but I wanted to take some of the headache out of the lesson to make it run a little smoother for my Art 1 students. Hence, the printable template! The template is intended for acrylic paint, but you could also use watercolor, colored pencils, chalk pastel, etc. This is an excellent project to introduce students to the concept of color & the kiddos love making an intricate and original design! Included in the Teachers Pay Teachers product listing is also a 19-minute demo video showing me create a mandala from start to finish using the template below. 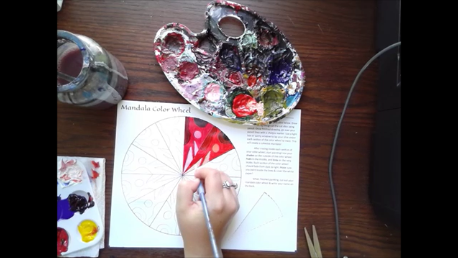 Screenshot of video included with the mandala color wheel lesson 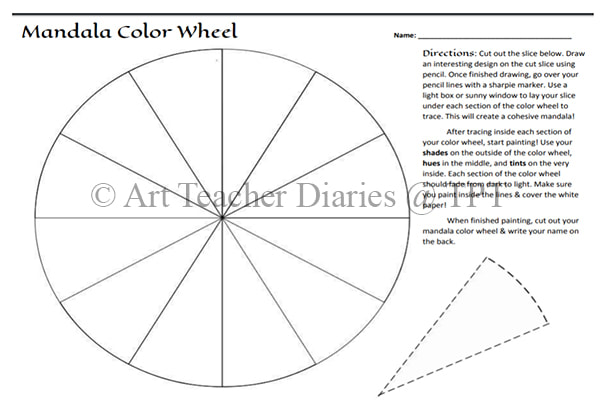 You can purchase the mandala color wheel template, video & powerpoint at my Teachers Pay Teachers store! 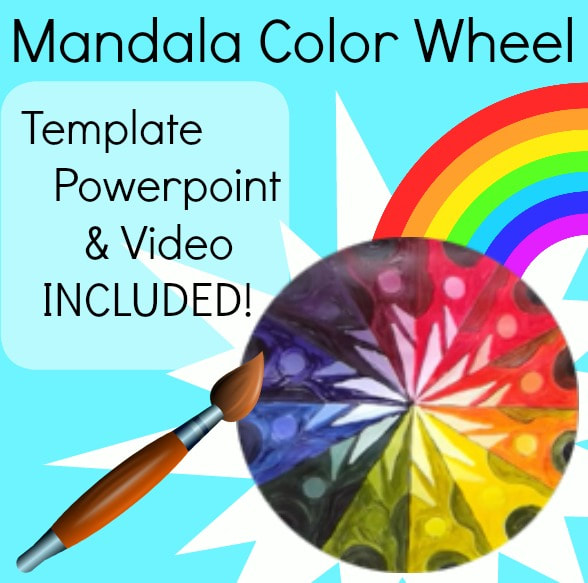  My Draw/Paint I high school students did an awesome job on this project! Though I usually like students to have a more open-ended art assignment, this one seemed to work well for all students. For this assignment, I introduced students to the work of Wayne Thiebaud (Tee-Bow). We discussed how he used colors in interesting ways and applied the paint thickly to the canvas like frosting. His work has a 3-dimensional quality that makes it addicting to look at! I then had students experiment with oil pastel and mixing colors of oil pastel using the 3 primary colors. Finally, I had students choose a color copy of a Wayne Thiebaud work that they liked. The nice thing about Thiebaud's work is that it offers an enticing selection for students to choose from. My students had to draw the work based on the color copy with pencil first. Some students chose to draw using the grid method they had learned in the previous lesson. Next, they used oil pastel to add color. I encouraged students to apply the oil pastel very thickly to recreate the 3-dimensional quality of Thiebaud's work. This project was a lot of fun, because it helped even below average students feel successful at art. This project took approximately 2 weeks (10 50-minute class times) for students to finish. Halfway through the project I brought in cupcakes for all my students because they complained that Thiebaud's work made them hungry. What's better than making art and eating cupcakes!? |

Mrs. QuamThis is my 11th year teaching art & graphic design! I have taught middle school for 2 years and high school for almost 5 years. I truly enjoy working with students on a daily basis. I also enjoy teaching real-world skills such as problem solving, using technology, and the power of teamwork and collaboration. My joy is sharing my passion for art with others! Archives
March 2024
Categories
All

|
||


 RSS Feed
Photo from Rob Qld
