|
Since 3rd quarter is just about done, I decided to try something new with my art students. I just finished having what I call "Mini conferences" with my high school students, and I had to write a blog post to report my findings! Basically, I spent two days meeting with each of my high school students one on one during class. Half the class was on the first day, half the class was on the second day. I focused on talking about the following with each student:
1. Get Feedback from Your Students This was something I was not expecting, but was beyond value to me! While talking with each student privately, they provided me with a ton of feedback to improve my teaching and curriculum. When I asked students how they felt about the class, most students said "Good". When I asked them about the pace of the class, I had several students say they felt that it was going too fast. Many students said they'd like to spend more time on their paintings. If I had never asked them this, I would have kept trucking along! I also asked students how they felt about the projects. Many students shared their own ideas for projects they would like to try. They gave me so many ideas, I just wish I had them for the entire year so we could do them all! 2. Identify Strengths and Weaknesses While discussing grades, I also talked with students about their strengths and weaknesses. Even if a student has 100% in my class, I know they are not perfect. For example, I have a student who has exceptional skill and a high level of perfectionism. Her artwork is college-level work, but her artist statement writing is below average. When discussing this with her, I discovered that she has always struggled with writing and just doesn't know where to start when writing an artist statement. She said she really struggled with getting her thoughts onto paper. We talked about this for a bit, so I offered a piece of differentiated instruction: I would walk her through the questions for the artist statement verbally, then she would orally respond with her answers and I would take notes for her on her responses. Next, I had her re-write my notes as a 2-paragraph artist statement. This seemed to really help her through the process and she still demonstrated her learning (which is the goal, right?) Identifying strengths and weaknesses with students helps them understand where they need to improve and grow, but it also helps me understand where I need to start with a lesson. It helps me differentiate depending on student skill level and readiness. 3. Help them Stay on Track I don't know about you, but I have a few students who would rather sit on their phones all day looking at themselves than work on their projects. For these students, I found the mini conferences to be extremely valuable. First, I showed them what work they were missing. One girl literally had no idea she was missing 3 assignments. Turns out, she forgot to turn 2 of them in. She immediately went to her drawer, got the 2 assignments out and turned them in. I didn't take points away. She had done the assignments and demonstrated her learning. Next, we talked about participation. I showed students the total number of points they had received and why they lost points (on their phones, not working during class, etc.). I think this was a real eye opener for some students. While the points don't negatively affect their grade, I keep track during class as a way to collect data. If a student is not doing what they are supposed to do, I take a point away, and attempt to redirect them. While I love my cell phone, I explained to students that when they're just on their phones the entire time, they are not able to focus and also miss important things like announcements, lessons, and the real world around them. I ended the conference by telling them that I care about their success in my class, whether they like art or not, and that my job was to help them succeed. I can't tell you how many of my struggling art students went right to work afterwards!
0 Comments
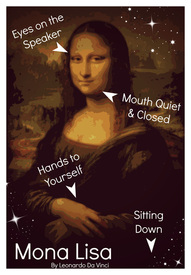 A while back, I wrote a small post on using the Mona Lisa as a means of Classroom management. I decided to take it a step further and design my own Mona Lisa poster with arrows and reminders for students. This poster can be printed quite large, up to 16"x20". I decided to create the posters in different colors too. I included all the posters and instructions in a product listing on my Teacher pay Teachers store website. The whole zip file costs $3.00 and all you have to do is print them out at home or school! You can also have them printed at office supply stores in poster format for around $5.00 for a large poster. If you use them, please let me know how they worked in your classroom! Remember, consistency is key when establishing the Mona Lisa rules in your classroom! 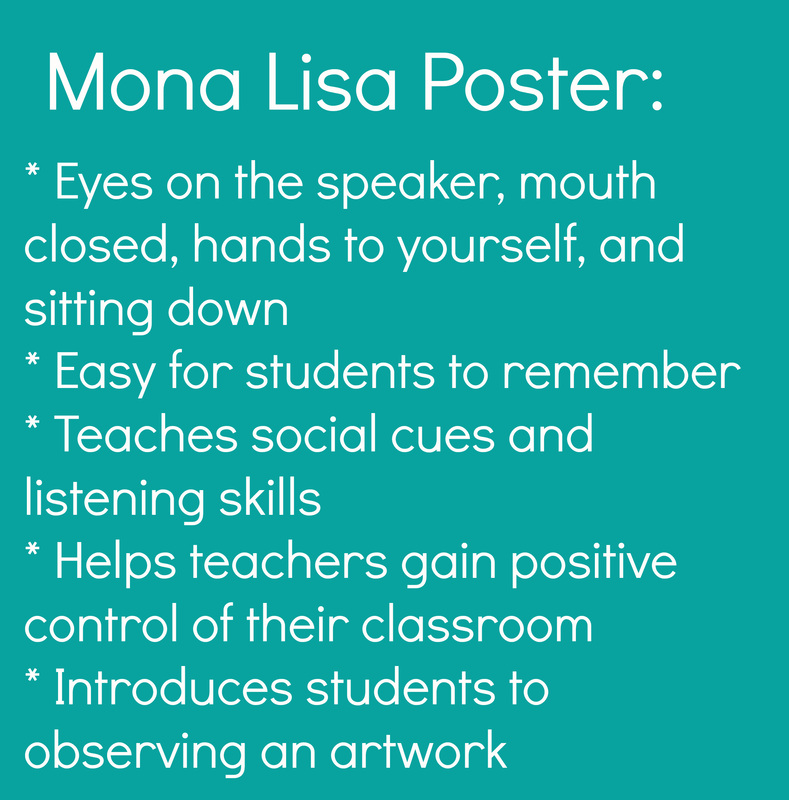 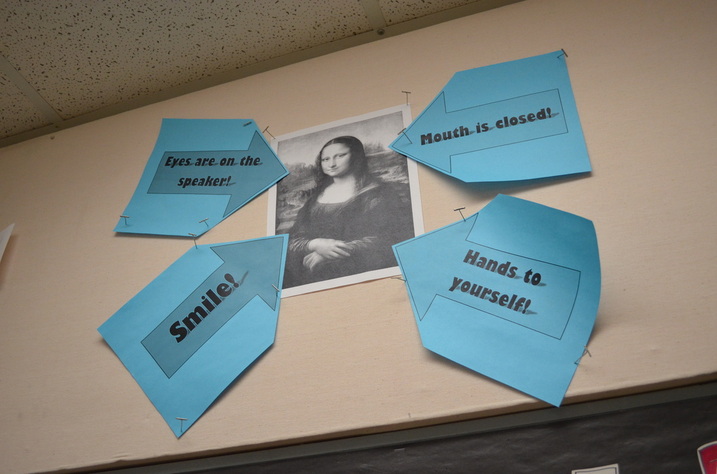 During my student teaching, I observed a middle school art teacher in her classroom. She used something she called "Mona Lisa". She had a poster of the Mona Lisa on her wall and every time she said "Mona Lisa" students immediately turned their eyes on her and were respectfully paying attention.
I decided to adopt this method in my own way. Throughout my room I have four small posters of the Mona Lisa with colored arrows pointing to her. On the first day of class, we talked about what to do when I say "Mona Lisa".
Once I told students about it, I had them practice by me saying "Mona Lisa". Some students gave me a pretty darn good impression of the Mona Lisa. I told students that when I say this, it means I have something very important to say that they shouldn't miss. Throughout the semester I have to remind them every now and then on what this means and why it is important but it is a unique way to get their attention without straining my voice or yelling "Quiet down!". 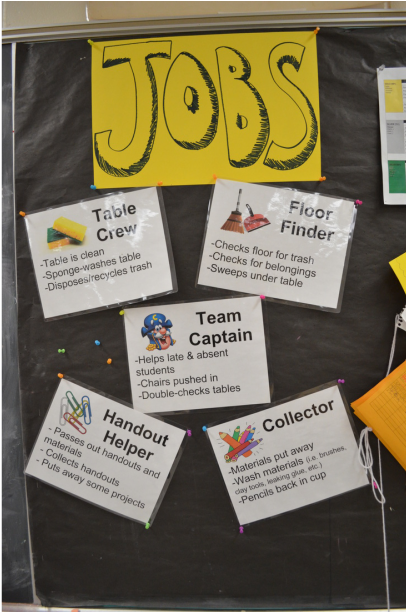 I started out teaching thinking I could get away without assigning students jobs. I thought students could clean up independently and respectfully with little intervention from me.
Boy, was I wrong. I was spending several hours a day cleaning up and wasting student time when it came to pass out work and handouts. That's when I came up with a pretty nifty system. I created five jobs:
I knew all students would want to be captain so I made sure to explain that the captain's job is the most work. They must act like a second teacher, they must rarely be absent, and they have the most responsibility. Team captains also have to do absent students' jobs. This seemed to take some of the glamour away from the role of captain. Since my classes range in size so much, I decided that any extra students at a table would choose either table crew or floor finder. I had students spend 5 minutes deciding amongst themselves what jobs they would do. Most students had a vote for their captains. Next, I had students choose a team name. They had 10 minutes to come up with a creative name that everyone agreed on. I wrote down each students' job next to their name on my seating chart along with their chosen team names. I stressed that if students didn't do their job (example: if I saw that team "Lady Gaga"'s floor was dirty, then I knew that that team's floor finder didn't do their job) then they'd get their name written down. If I had to write their name down three times within the semester, then they'd get what we call a "Stop & Think". Overall, this system has really stream-lined my daily instruction and saves me so much time at the end of the day. One good student doesn't get stuck doing all the cleaning as well. I think the custodians like it too. :) |

Mrs. QuamThis is my 11th year teaching art & graphic design! I have taught middle school for 2 years and high school for almost 5 years. I truly enjoy working with students on a daily basis. I also enjoy teaching real-world skills such as problem solving, using technology, and the power of teamwork and collaboration. My joy is sharing my passion for art with others! Archives
March 2024
Categories
All
|
 RSS Feed
Photo from Rob Qld
