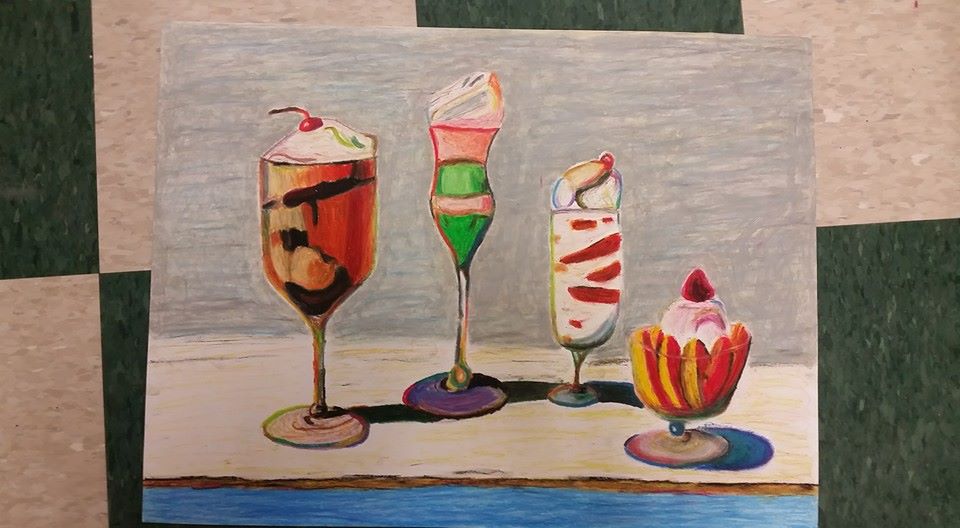
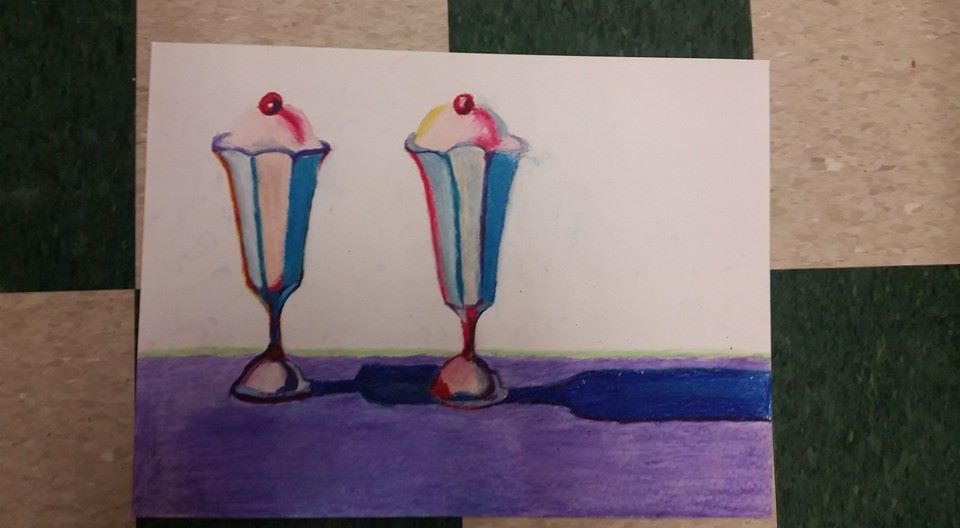
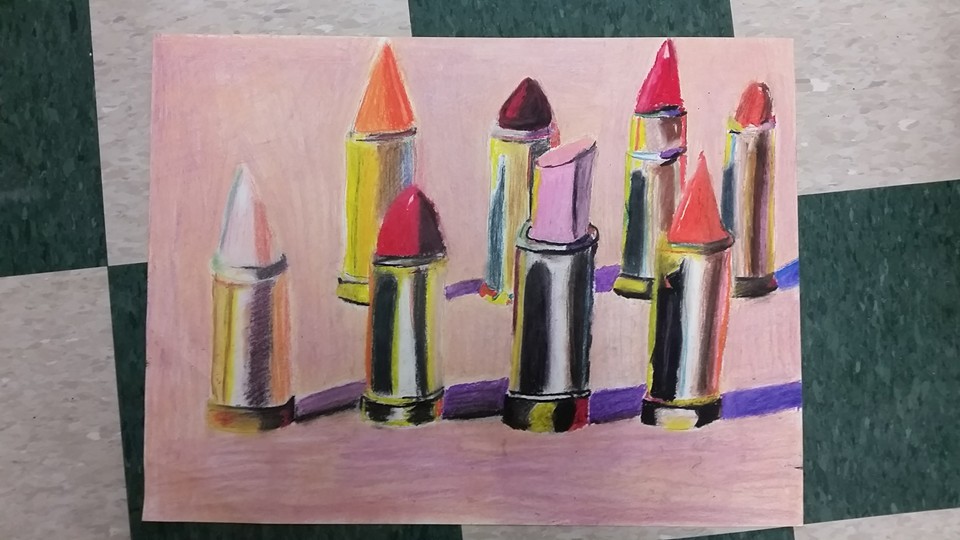
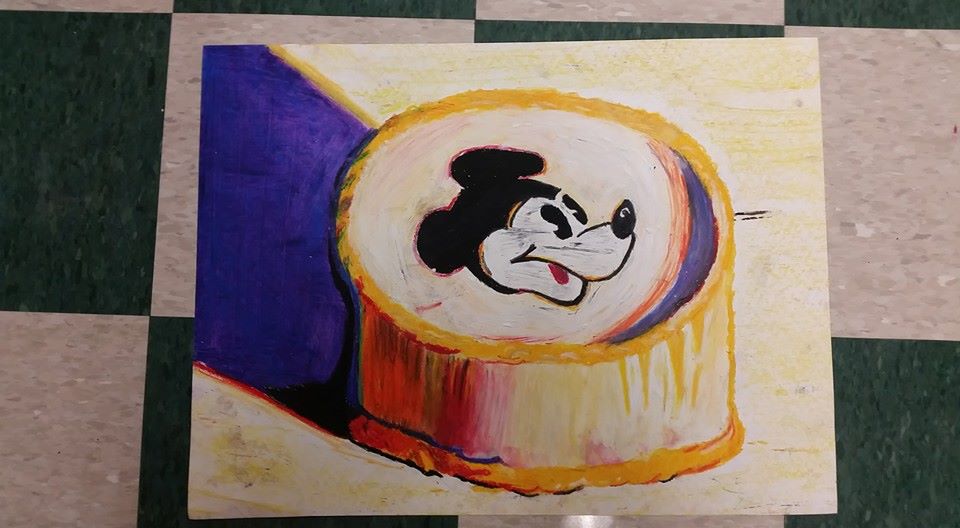
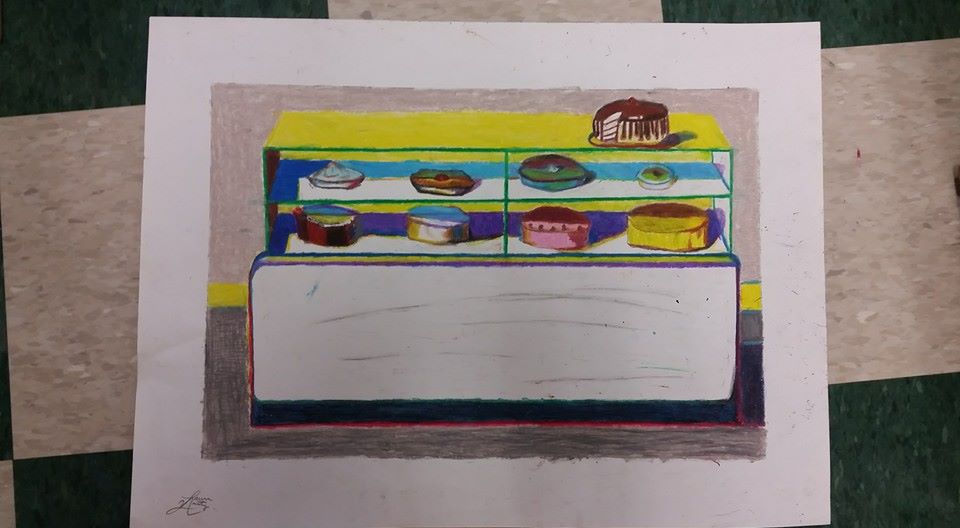
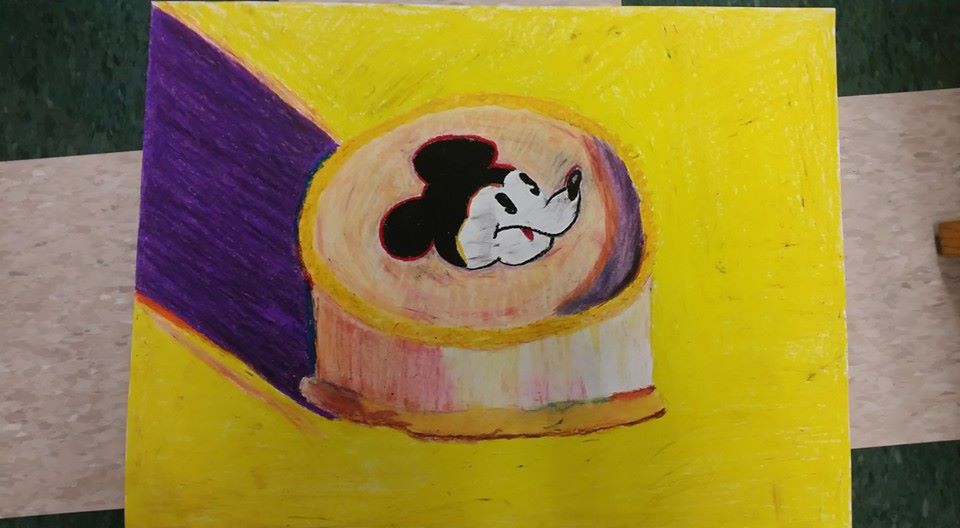
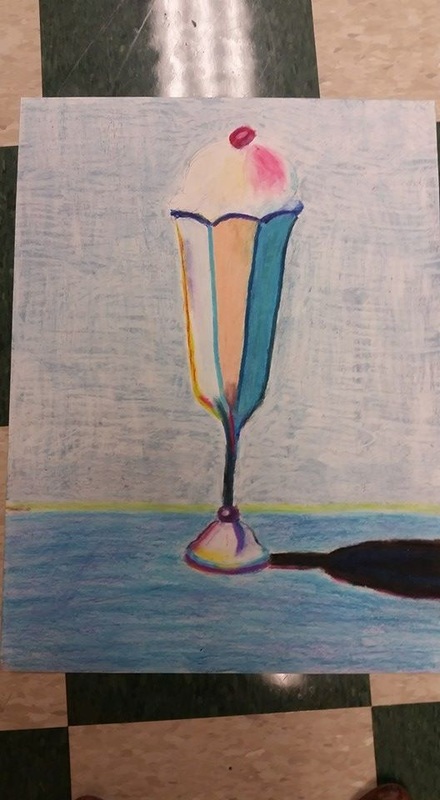
 My Draw/Paint I high school students did an awesome job on this project! Though I usually like students to have a more open-ended art assignment, this one seemed to work well for all students. For this assignment, I introduced students to the work of Wayne Thiebaud (Tee-Bow). We discussed how he used colors in interesting ways and applied the paint thickly to the canvas like frosting. His work has a 3-dimensional quality that makes it addicting to look at! I then had students experiment with oil pastel and mixing colors of oil pastel using the 3 primary colors. Finally, I had students choose a color copy of a Wayne Thiebaud work that they liked. The nice thing about Thiebaud's work is that it offers an enticing selection for students to choose from. My students had to draw the work based on the color copy with pencil first. Some students chose to draw using the grid method they had learned in the previous lesson. Next, they used oil pastel to add color. I encouraged students to apply the oil pastel very thickly to recreate the 3-dimensional quality of Thiebaud's work. This project was a lot of fun, because it helped even below average students feel successful at art. This project took approximately 2 weeks (10 50-minute class times) for students to finish. Halfway through the project I brought in cupcakes for all my students because they complained that Thiebaud's work made them hungry. What's better than making art and eating cupcakes!?
0 Comments
View the compiled stop motion animations below! 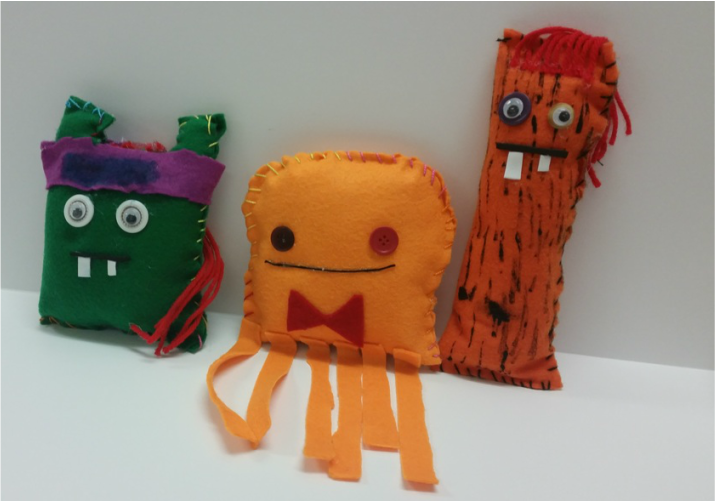 This was probably the most difficult to teach but most fun project I have done with my 6th grade students. This project took approximately 6 class times to complete. I had the idea for this project based on the "Ugly Dolls" that I've seen in gift shops here and there. I was also inspired to teach this project because my school eliminated it's FACS and Industrial Tech classes and I've had many students asking me when they will get to learn how to sew. This project cost around $200 for the supplies. That came to around $1 per student, which I thought was reasonable, considering the time they spent working on them. I got a jumbo box of 20 lbs of stuffing from Nasco art supplies for around $32. The felt was about 25 cents per sheet. The glue sticks were the most expensive part. I already had a lot of buttons and extra decorating materials. For this project, I taught over 200 6th graders how to sew in two class times. It was a lot of work, but I'll give you some pointers if you want to give it a go. Tips for this project:
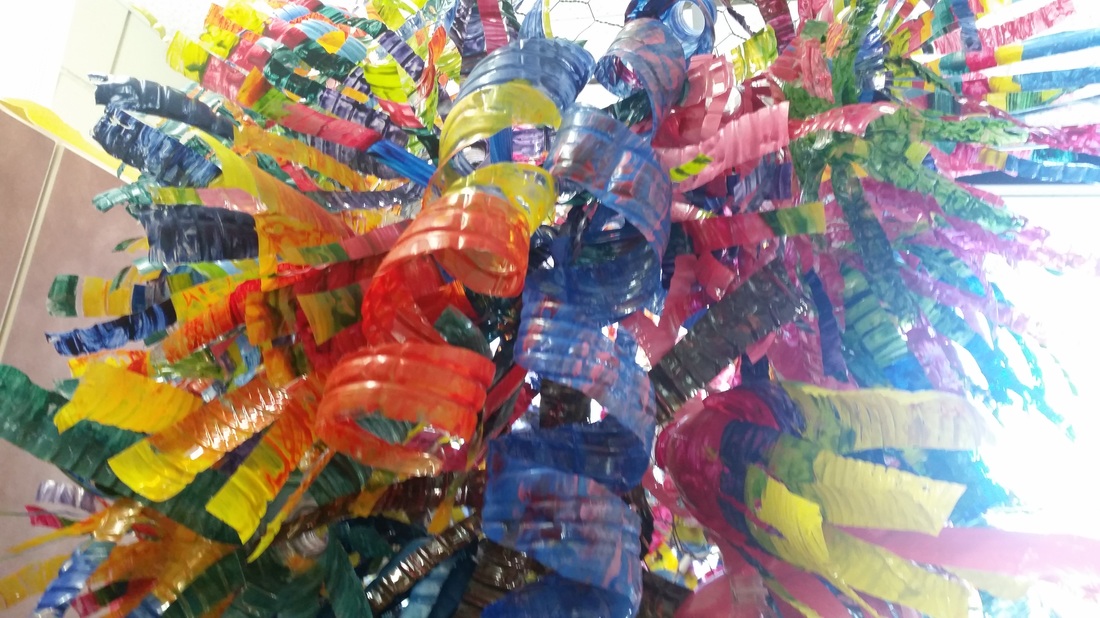
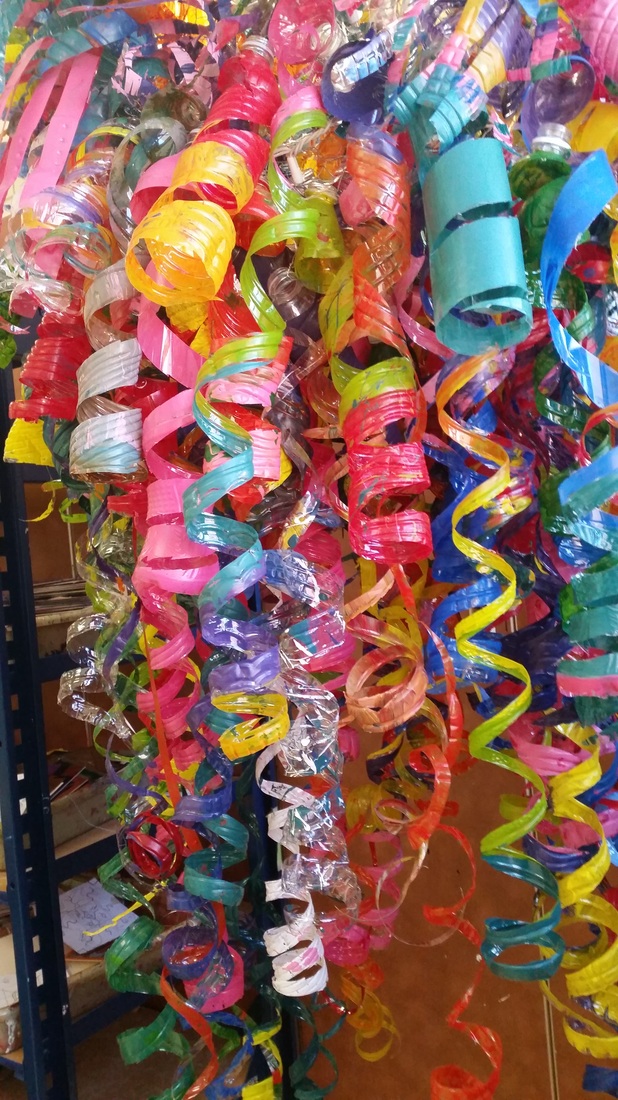
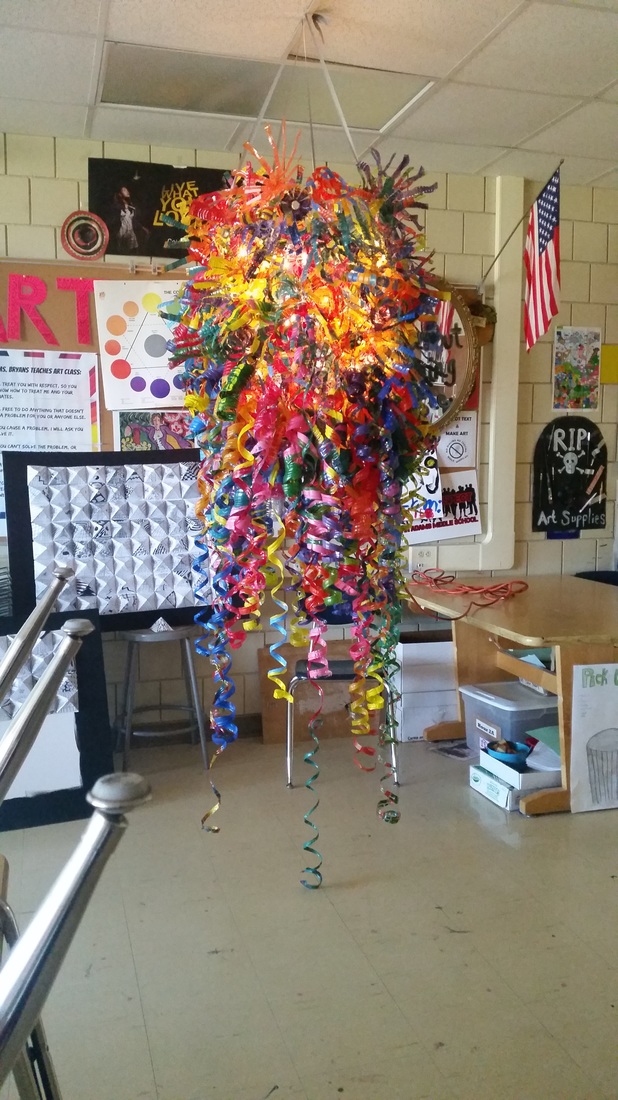
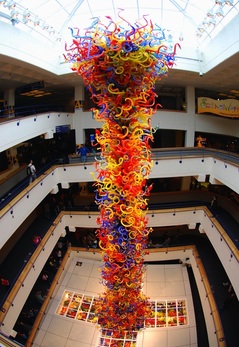
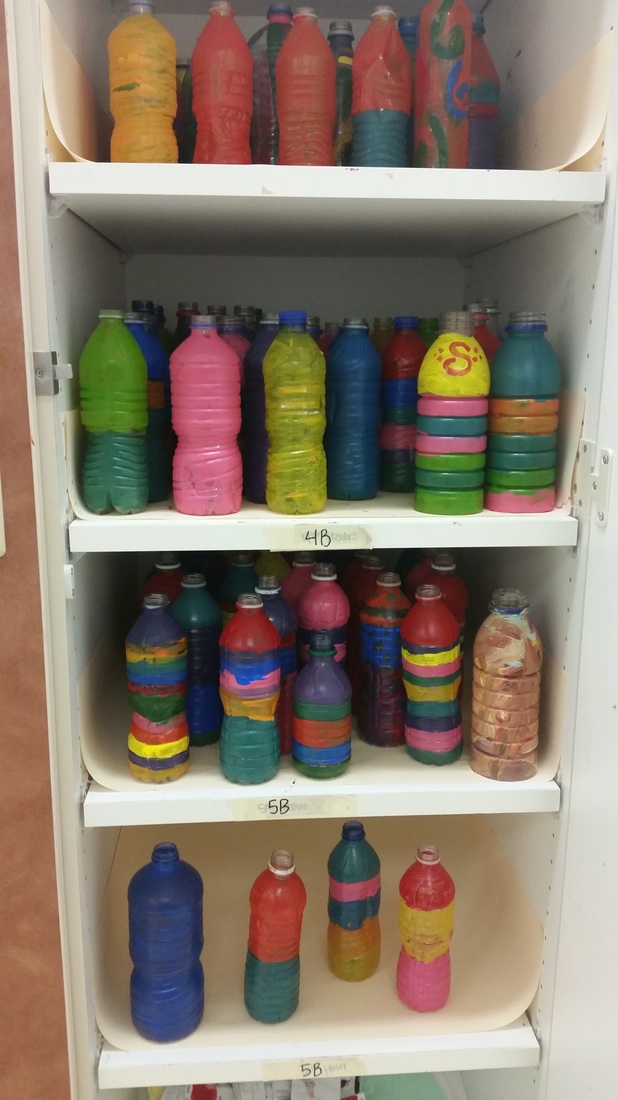
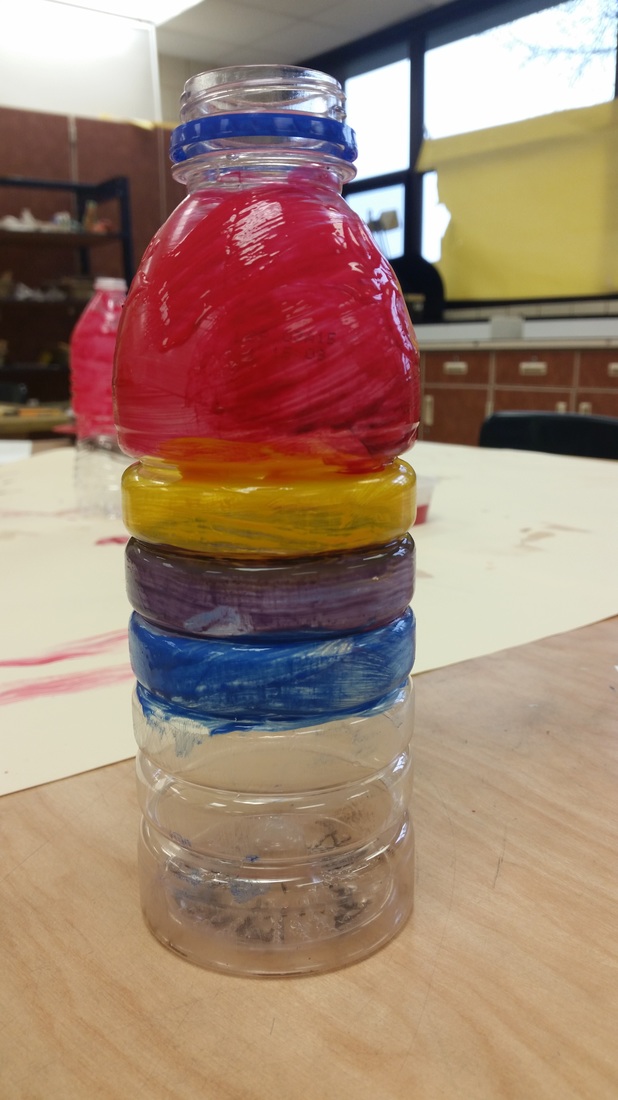
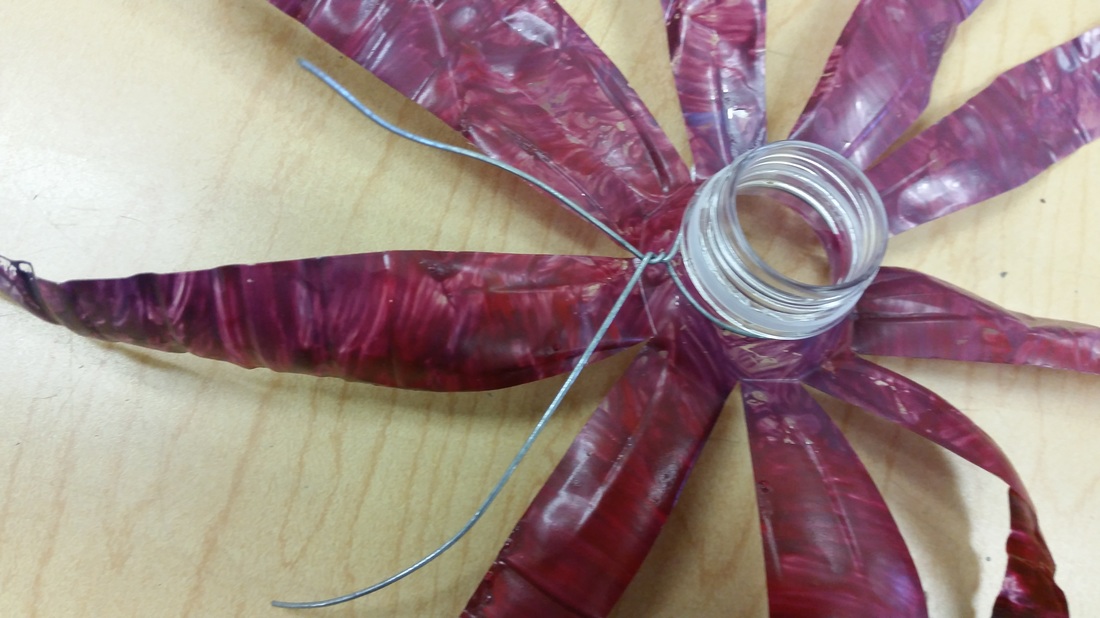
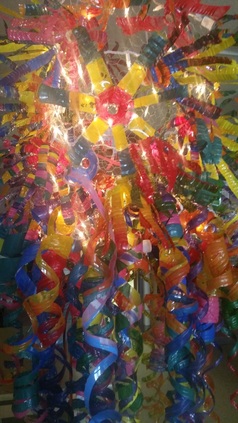
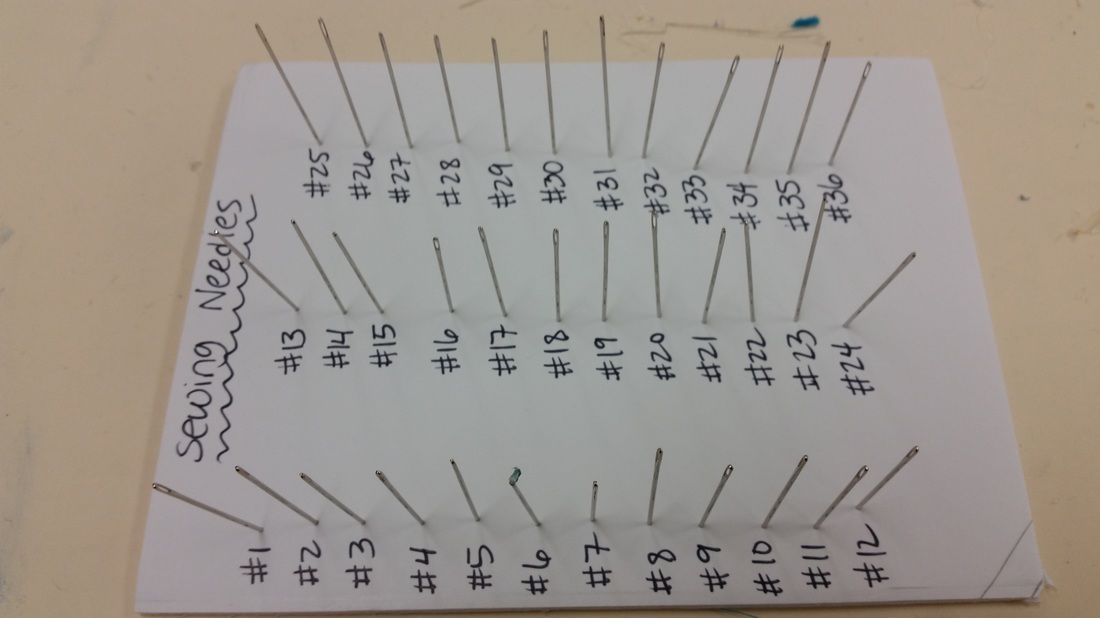 Organize & keep track of sewing needles by sticking them in a piece of scrap foam board. Label each needle with a # and assign each student a #. This worked pretty well! 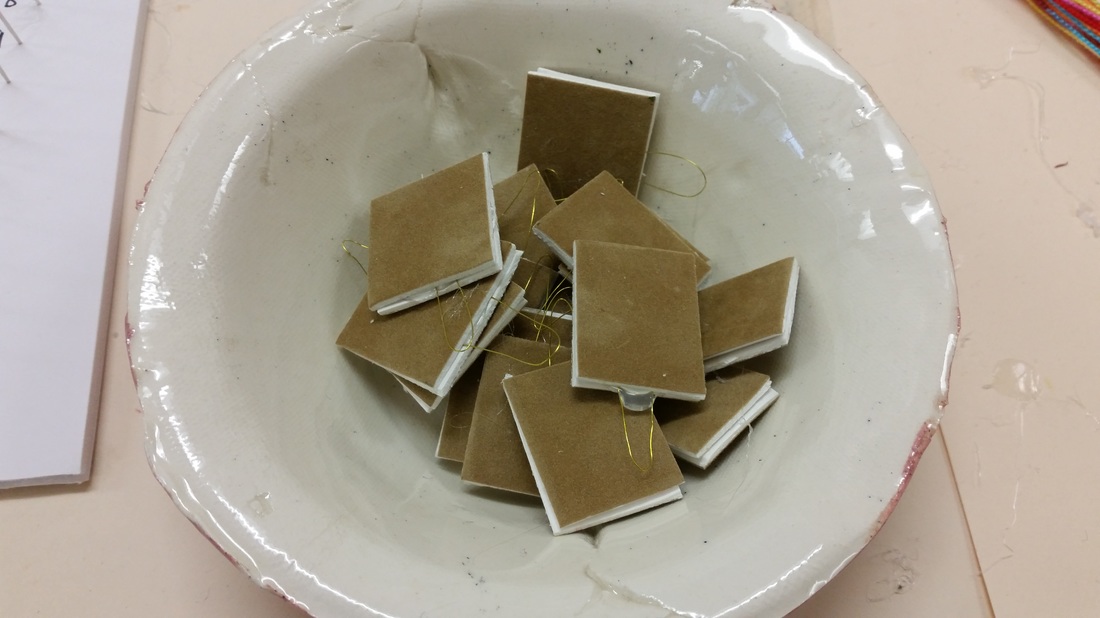 Don't buy store-bought needle threaders. They break very easily (as I learned the hard way). You can easily make your own with the thinnest jewelry wire you can buy, some scrap mat board or card board, and glue. These needle threaders saved so much time and the kids thought they were magic! 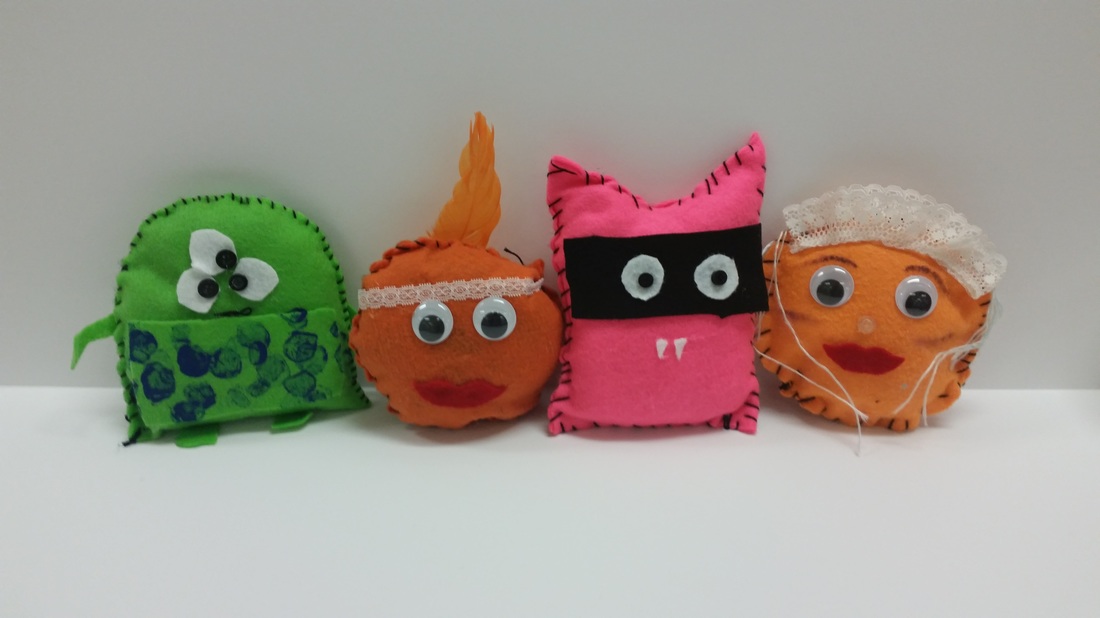 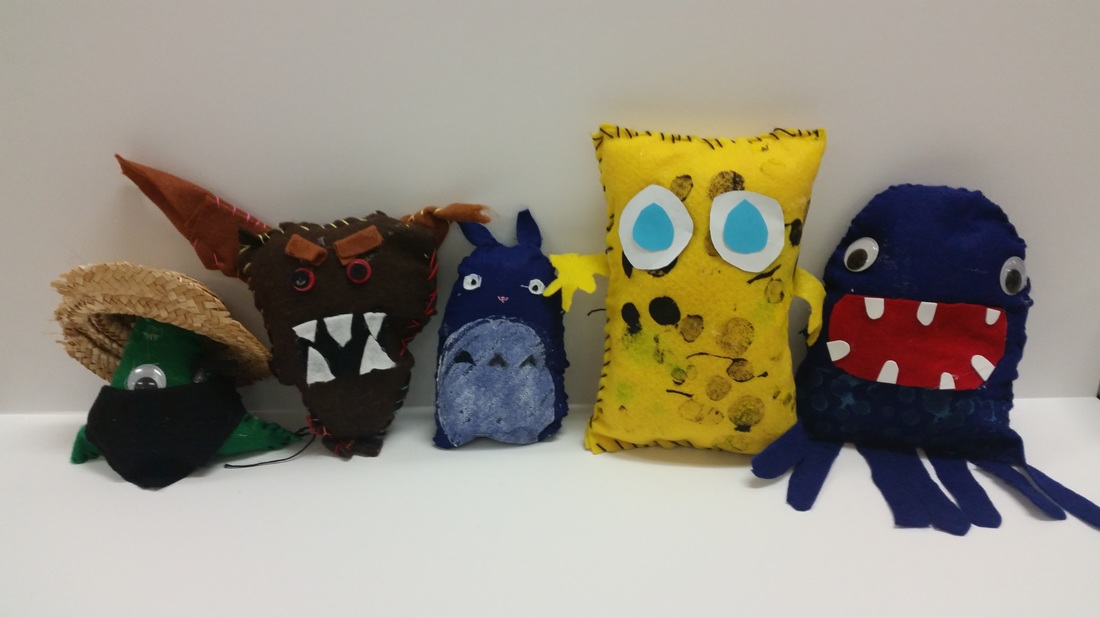 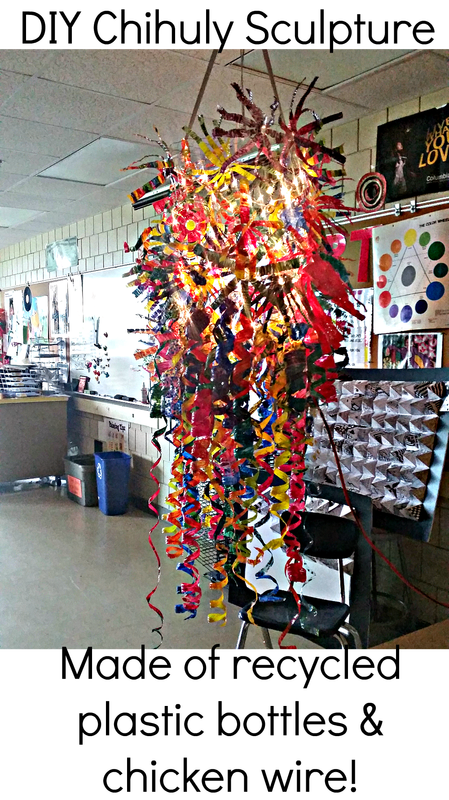 This has got to be one of my favorite projects to work on with my middle school art students. The project goes relatively quickly (2 class times) and my students love to learn about the glass artist Dale Chihuly. The sculpture in the picture above is made of 200 plastic bottles. Each bottle was donated by a student or staff member at our school. We started collecting bottles about 3 weeks before we started the project. Each student selected a bottle & painted it with acrylic. Acrylic paint works much better than tempera. Next, each student was assigned a style for cutting the bottle apart (star shape or spiral shape). Some students modified their styles slightly for a more unique design. 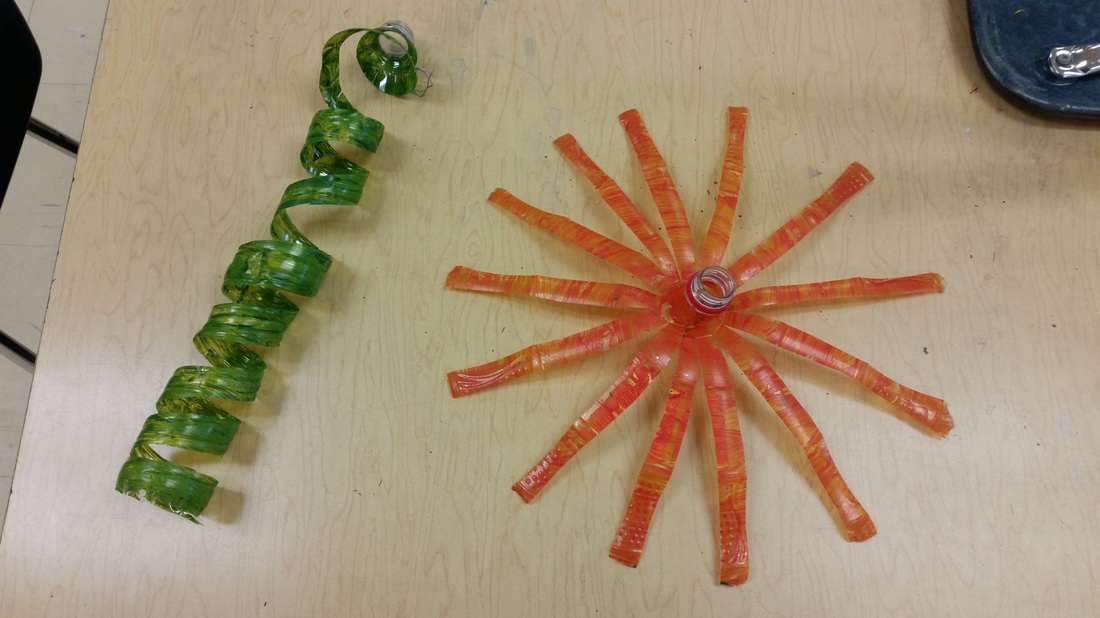 Star & Spiral designs
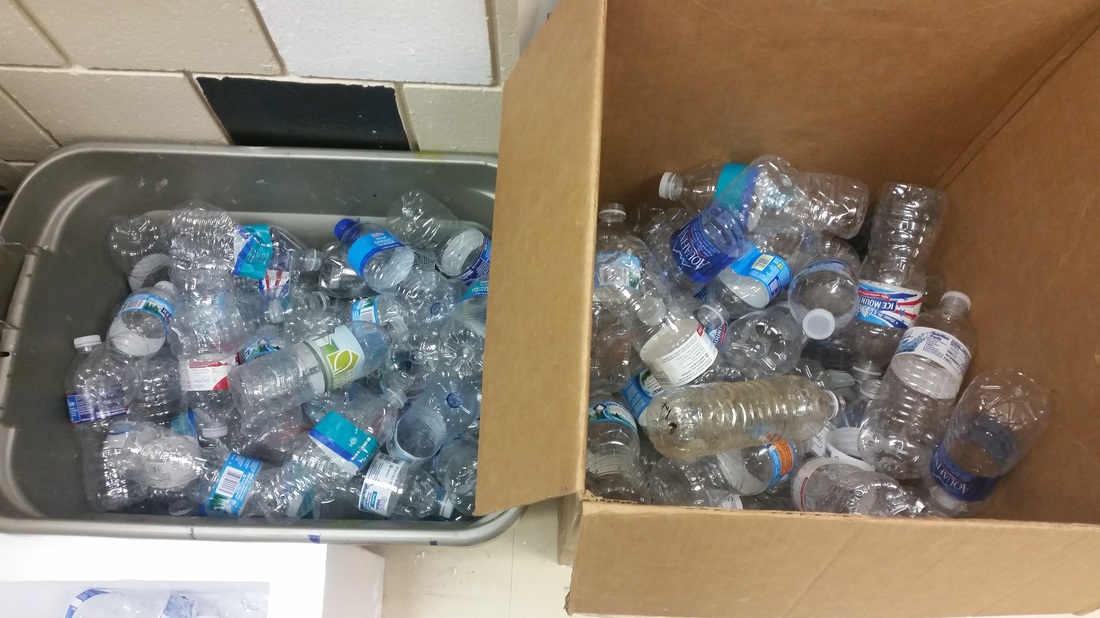 We collected over 270 plastic bottles! 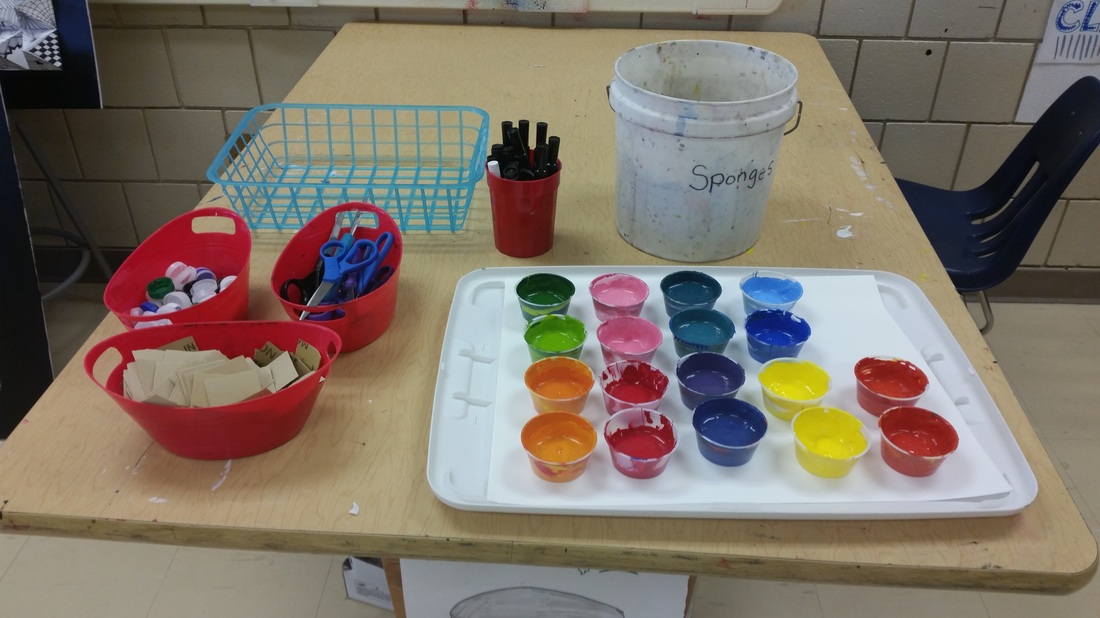 I premixed colors to save time, but you could have your own students mix their own colors!
    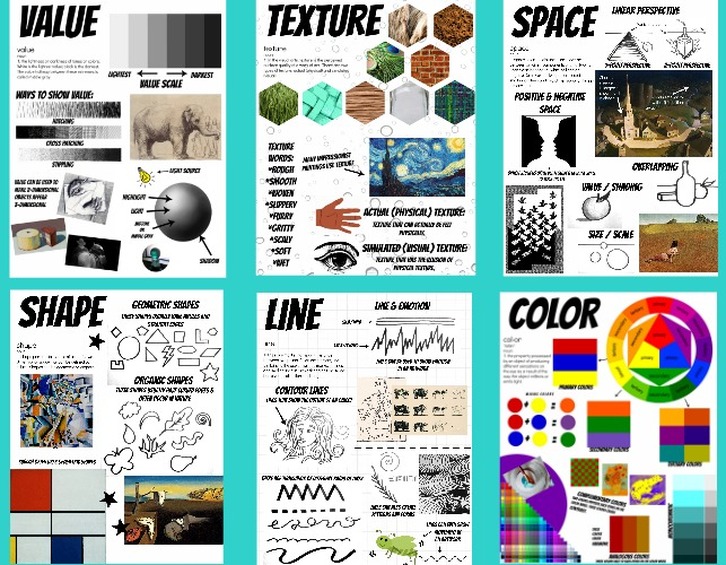
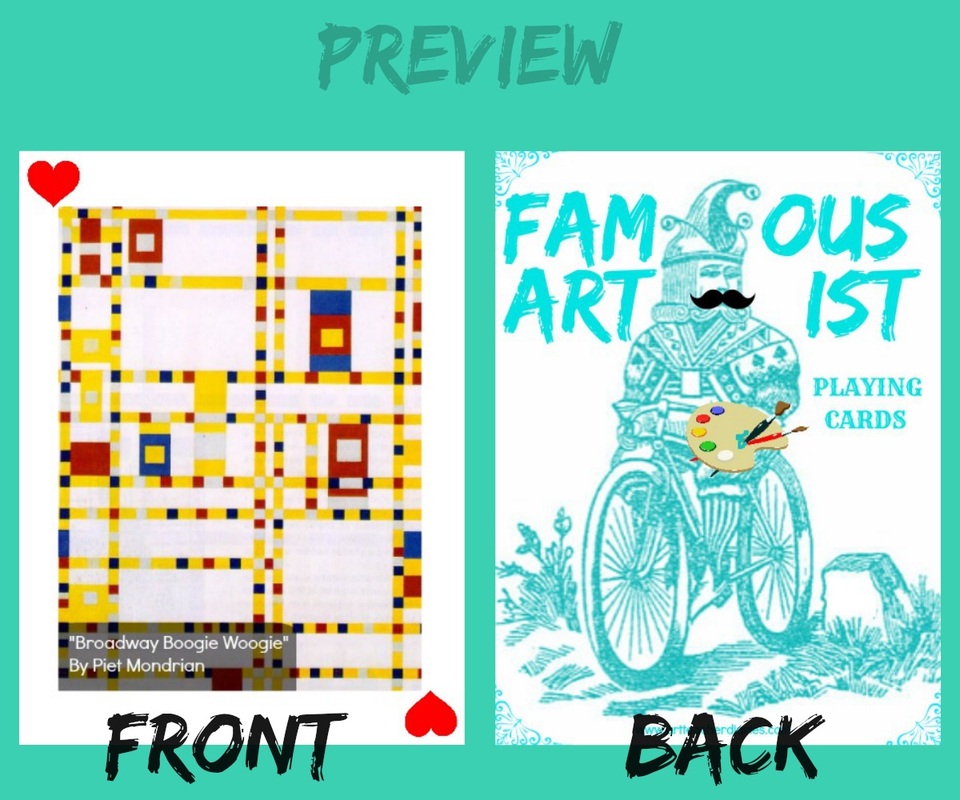
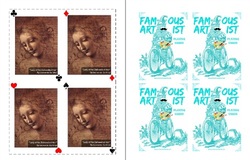
Today I spent the better part of the day creating my own Elements of Art posters. As a newer teacher, I've had some problems finding decent posters and decorations for my art room. I found one batch of posters that retailed for over $75.00 and they weren't all that attractive. I created these Elements of Art posters in a variety of formats depending on what you would like to use them for. They are exciting and really hone in on the key concepts of each element of art. I also wanted to expose students to a variety of different artworks on the posters such as works by Rembrandt, Salvador Dali, Andrew Wyeth, Picasso, Grant Wood, Mondrian, and Van Gogh.
Each poster includes the definition of the element and multiple examples for students to learn by. A .zip file containing 96 total pages of posters is available for sale in my Teachers Pay Teachers store. I offer them in a 24"x30" and 16"x20" block poster size as well as .jpg and .pdf formats for easy printing. Save money and assemble your own posters that will appeal to your students. These posters will appeal to students of all ages and abilities. You can also use the posters as printable handouts for students. Buy the set of 6 elements of art poster designs in a 96-page .zip file by clicking here. 
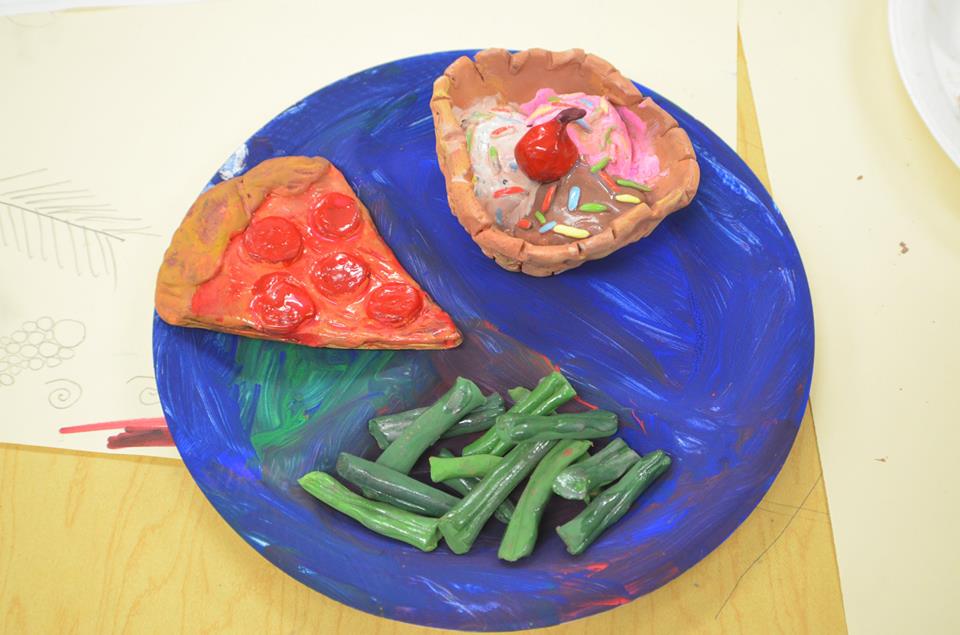
Air dry clay "food" that was painted to look realistic. This project focused on different construction techniques such as slab rolling, coil construction, pinch pot construction, and addition.
I decided to create two summer art classes that were each a week long through Community education in my district. The first class was called "Art Around the World" and featured projects such as a chinese lantern, making didgeridoos out of PVC pipe, and multicultural paper mache masks. The second class was called "Arts & Crafts Camp" and I definitely think this class was my favorite. The Arts & Crafts camp really let student's imaginations run wild and create some really cool art! Each class included students from the ages of 9 to 13. If you've never taught a community ed art class before, you should know it's a blast! No tests, no standards, just a room full of art supplies and enthusiastic students. For any other interested art teachers out there, I included the schedules for each class's days below for your reference. Art Around the World Day One- Mexican Folk Art terra cotta pots & Paper mache mask Day Two- Australian Didgeridoos made out of PVC pipe with a beeswax mouthpiece Day Three- African Adinkra printmaking on t-shirts Day Four- Ukrainian painted eggs & Russian architecture metal tooling Day Five- Chinese Calligraphy lantern & Free Art Time Arts & Crafts Camp Day One- Cardboard Challenge & Leather tooling/stamping Day Two- Travel Posters & Clay food Day Three- Dada-inspired lamp & Drawing to Music Day Four- Metal tooling & painting clay food to look realistic Day Five- Junk Sculptures & Hot glue fancy frames Check out the photos below to see all of the cool art we created & tips for doing the same! 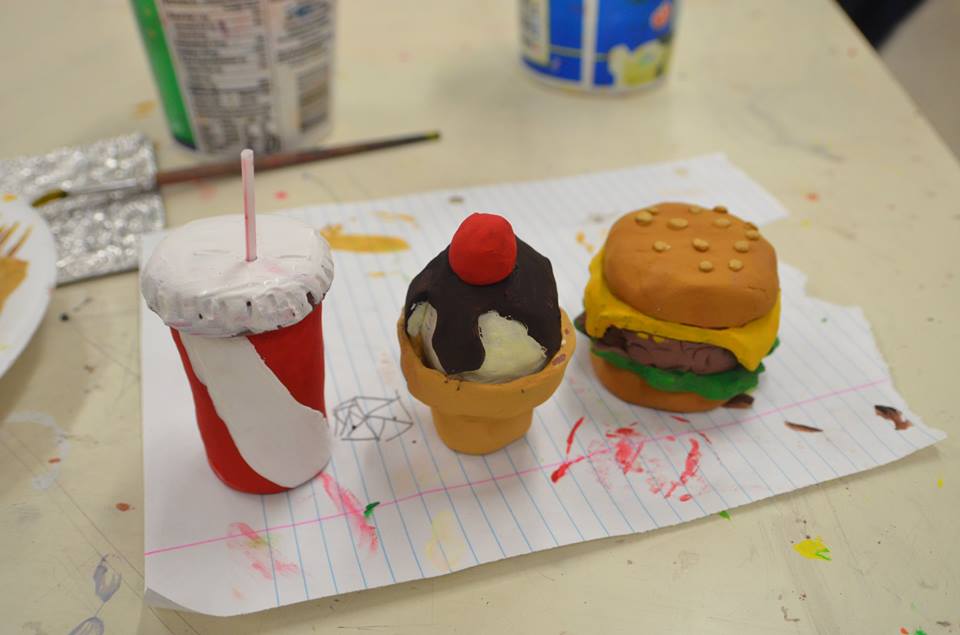
Clay food painted with tempera paint. The straw for the soft drink was cut from a q-tip. The student used a red sharpie to make the lines on the straw. Too cool!

Metal tooled tiles. Cut 38 gauge aluminum metal into 6"x6" squares. The foil I purchased was from Dick Blick and came in 12"x25 ft rolls for around $16. Fold a 1/2" over on each side to prevent injury. Use a blunt pencil to tool designs. I had students draw their design on scratch paper first and then put their paper over the metal and traced to transfer. Use colored sharpie to highlight the areas you tooled. You can also turn the metal over for an embossed effect.
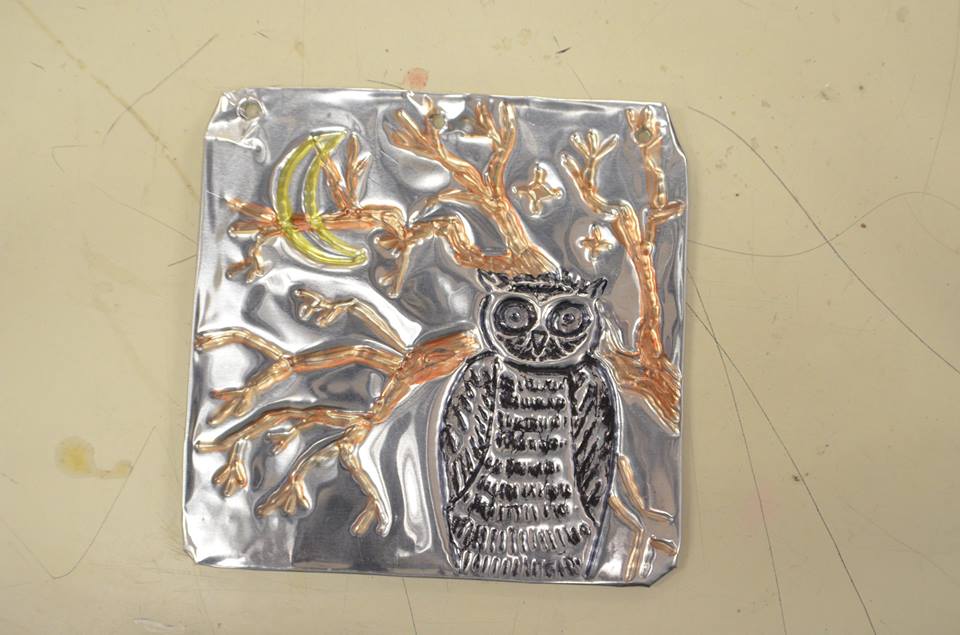
Metal tooled owl and tree. Hole punch holes in the top to add string or wire for hanging.
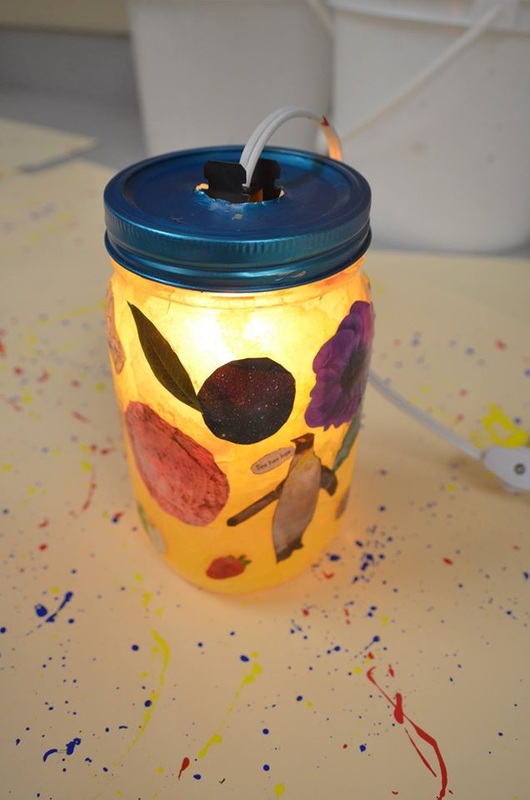
Dada-inspired mason jar lamps. We looked at a variety of different Dadaist artworks and I instructed students to choose a certain theme for the artwork. Some themes included, "Kids", "Save animals", "Be green", etc.
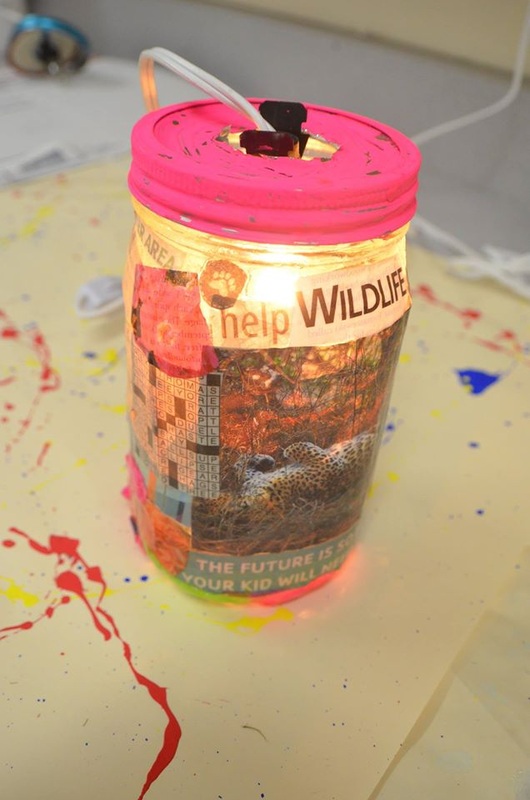
The lamps were created using pint size mason jars, socket light switch kit ($3.99 at Menards or other hardware store), modge podge, tacky glue, and an assortment of magazines and newspapers. Students decoupaged their cut outs onto the lamp using the tacky glue and modge podge. Some students used shredded up tissue paper and decoupaged the tissue paper to the inside of their lamp for a cool background. We used a nail to pound a hole into the lid and then used tin snips to cut a larger hole (this was mostly done by me due to sharp edges). Then the sock was inserted into the hole and a nightlight bulb placed inside that! The original project idea was for a hanging lamp, but some students designed their lamp to sit on a table. We simple cut a small notch in the lid for the cord, so the lamp could sit level. This was probably my student's favorite project!
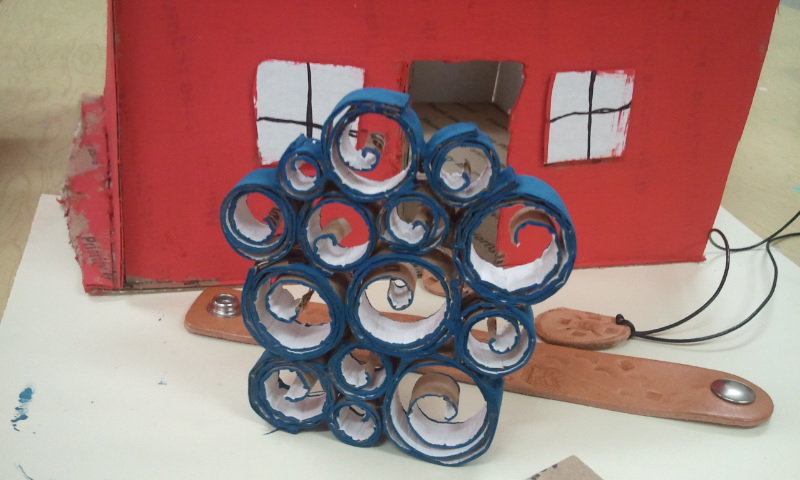
The first day we did the Cardboard Challenge. This was kind of a "get-to-know-you" activity for students. Students had to create ANYTHING out of cardboard using only scissors and glue (and later paint). This student spiraled cardboard strips and glued them together for a cool wall sculpture!
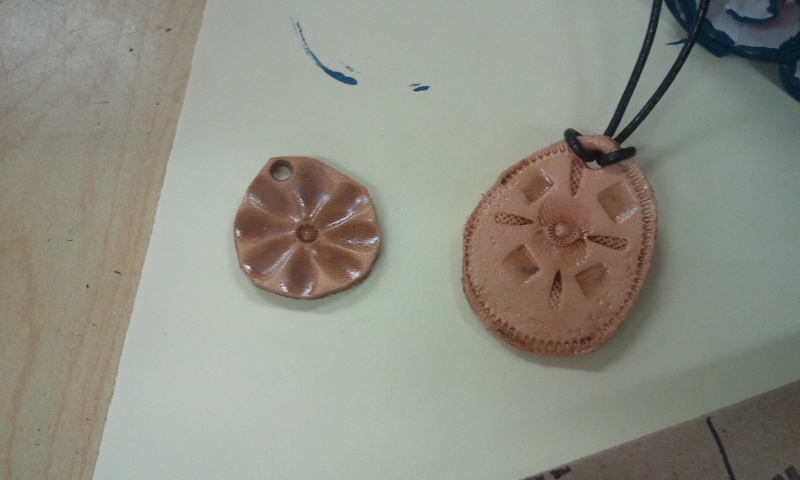
I had an assortment of different leather pieces and tons of tooling supplies for students to practice. Some students made necklaces and other students made key chains. I've never heard a class so quiet and focused on their work!
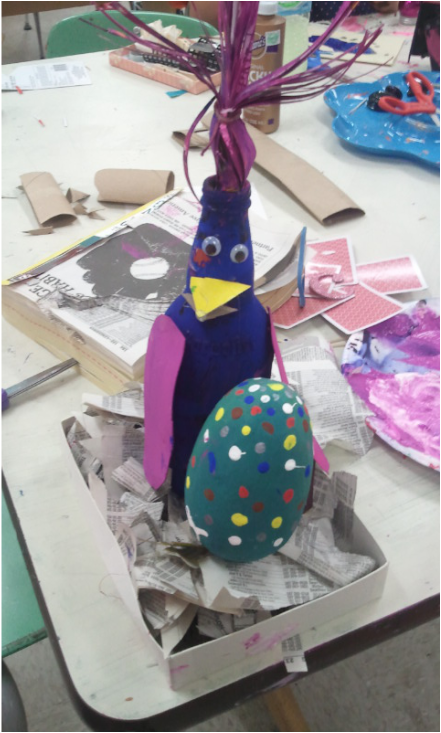
Junk sculpture bird with a leftover Ukrainian egg from the last class :)
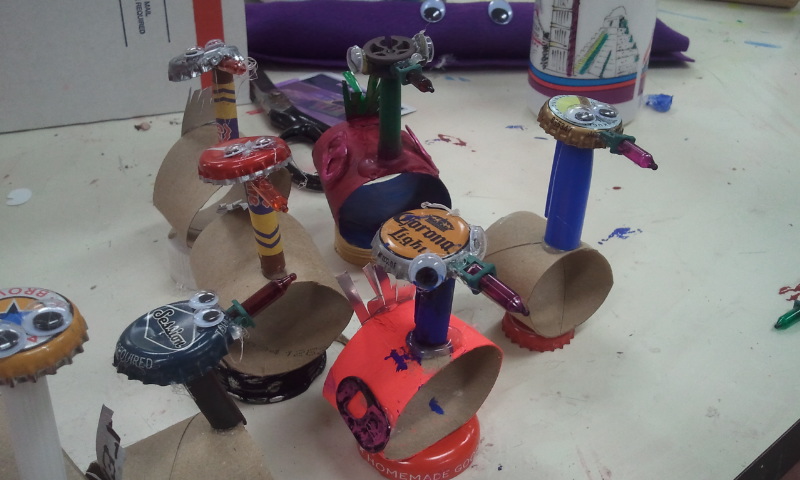
A flock of junk sculpture geese using old christmas lights, bottle caps, pen caps, crayons, and toilet paper tubes.
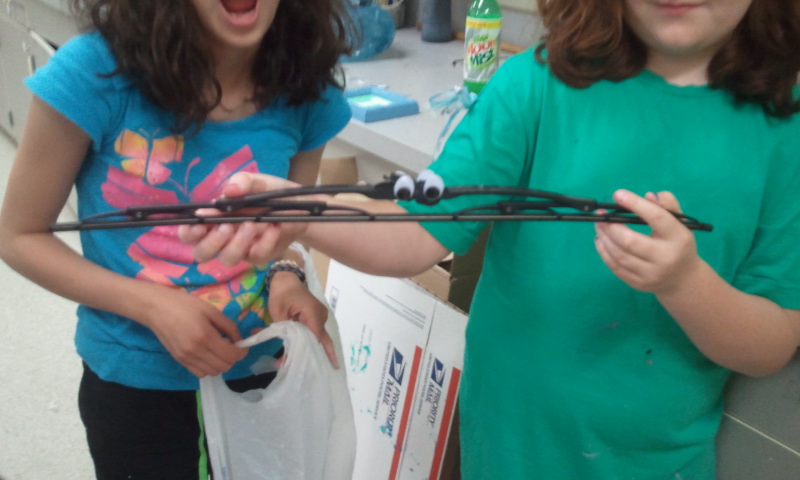
A wiper blade with google eyes. Fantastic.
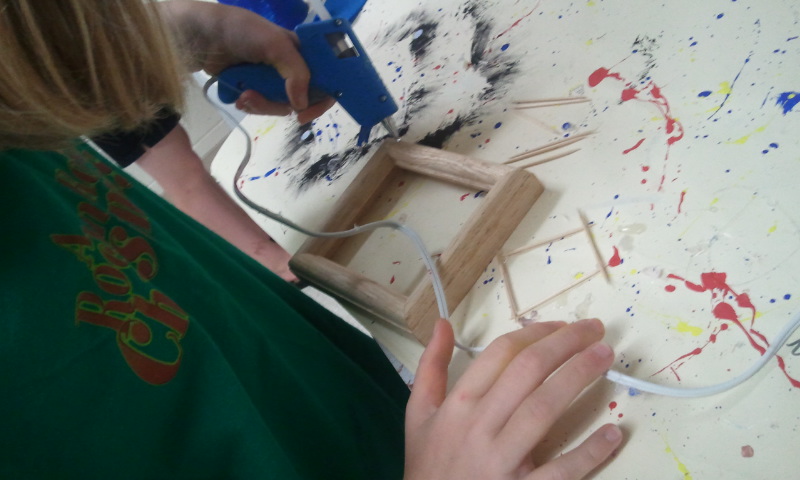
Hot glueing designs onto wooden frames. I won the 4x5" frames from an art conference!
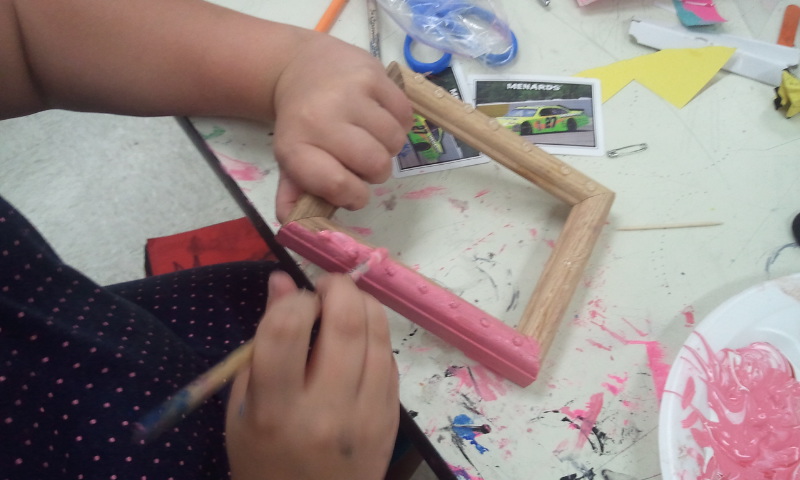
Painting the hot glued frames.
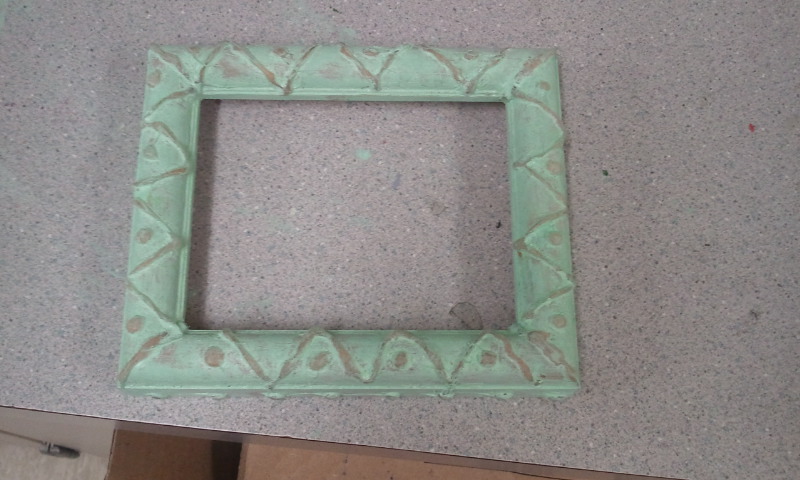
Finished hot glued frame that had been "distressed" with some of the paint rubbed off.
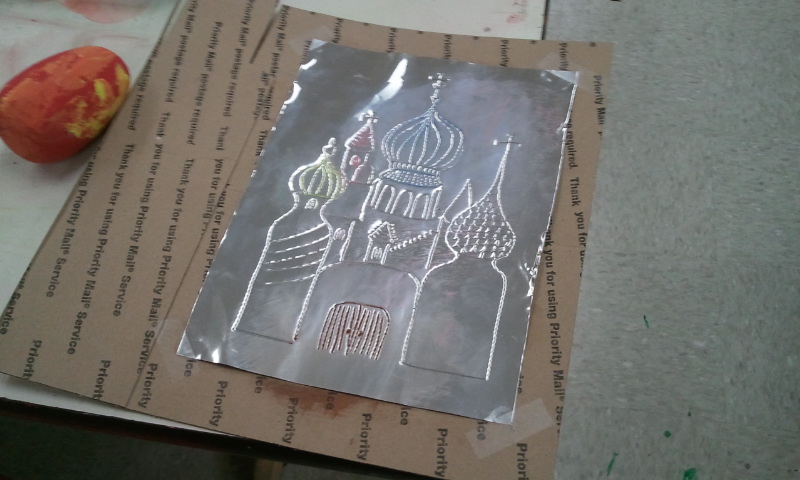
Metal tooling of Russian architecture for my Art Around the World class.
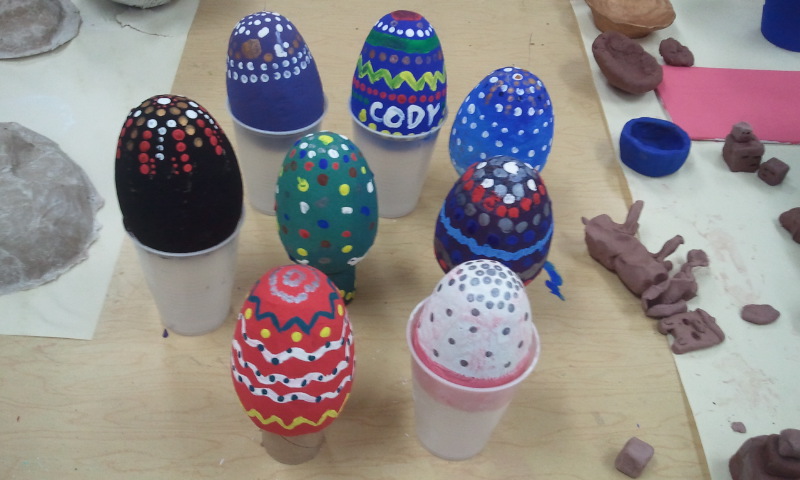
Ukrainian paper eggs. We discovered a cool way to hold the eggs was using a plastic cup, letting the paint dry, and then flipping it over. The eggs were 4" paper mache eggs purchased at Hobby Lobby for 99 cents each. We used q-tips for the dots.
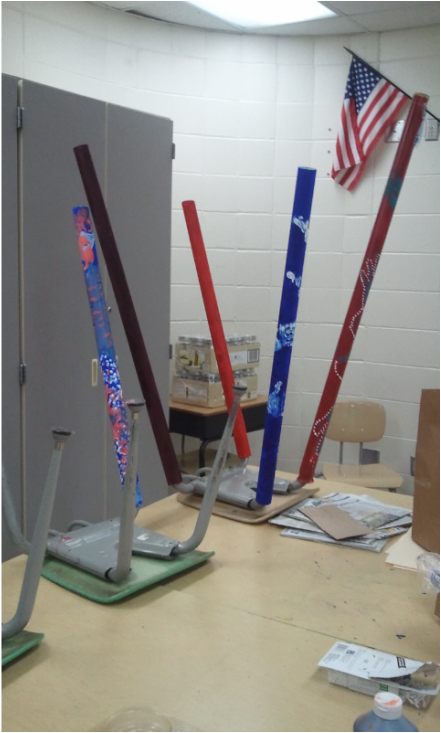
A cool way to work on the didgeridoo was actually discovered by accident! We placed didgeridoos on sturdy, over-turned chair legs so we didn't have to worry about smearing paint. 1 1/2" schedule 40 PVC was used and cut in a variety of lengths from 3.5 ft to 5.5 ft. Students sanded the PVC and then painted at least two coats of acrylic paint onto the PVC. Next, students took q-tips and paint to create aboriginal-inspired dot paintings on their didgeridoo. The last step was adding melted beeswax to the top to create a mouthpiece and a few beads/feathers for decoration. This project was student's favorite from the Art Around the World class!
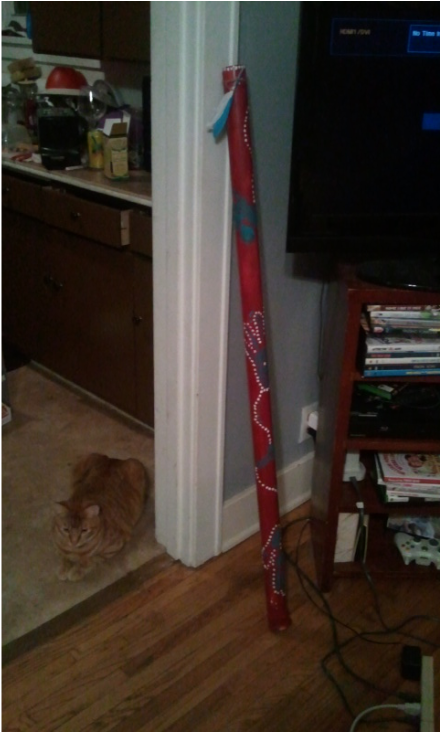
My own didgeridoo made out of PVC! Learning to play the didgeridoo wasn't too hard and I played some how-to videos for my students while we finished. Some students caught on really quick!
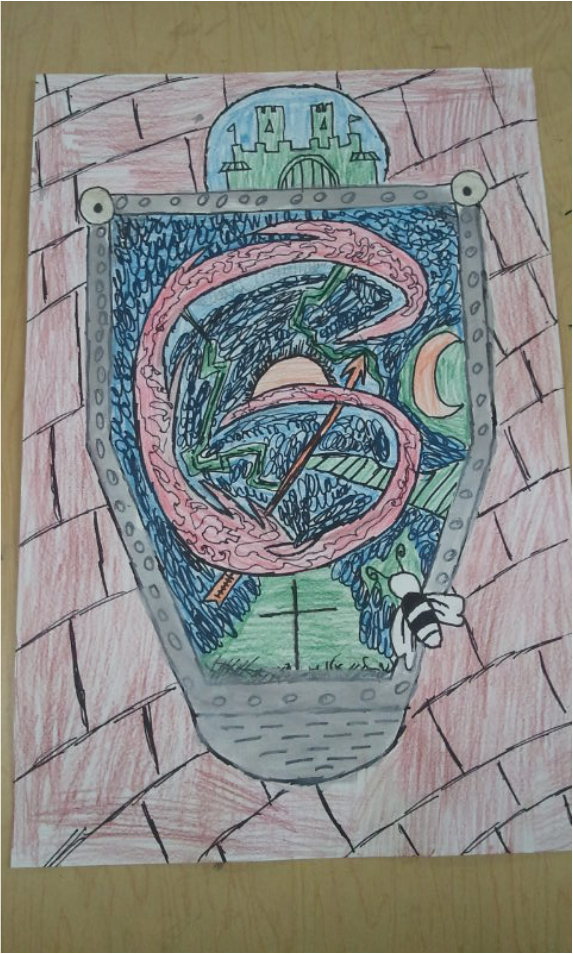
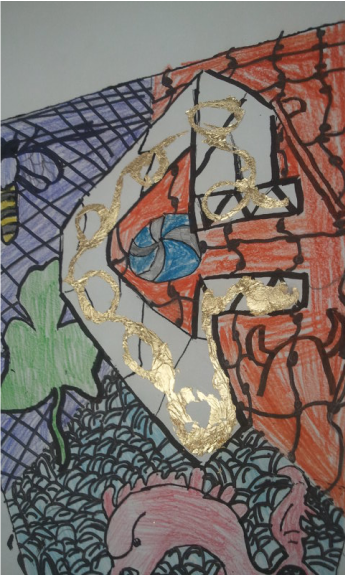
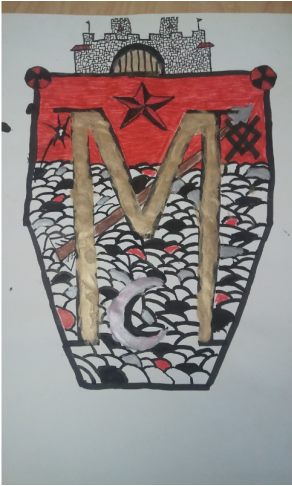
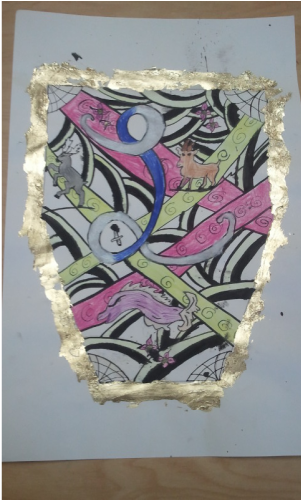
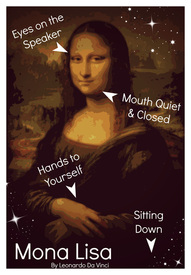 A while back, I wrote a small post on using the Mona Lisa as a means of Classroom management. I decided to take it a step further and design my own Mona Lisa poster with arrows and reminders for students. This poster can be printed quite large, up to 16"x20". I decided to create the posters in different colors too. I included all the posters and instructions in a product listing on my Teacher pay Teachers store website. The whole zip file costs $3.00 and all you have to do is print them out at home or school! You can also have them printed at office supply stores in poster format for around $5.00 for a large poster. If you use them, please let me know how they worked in your classroom! Remember, consistency is key when establishing the Mona Lisa rules in your classroom! 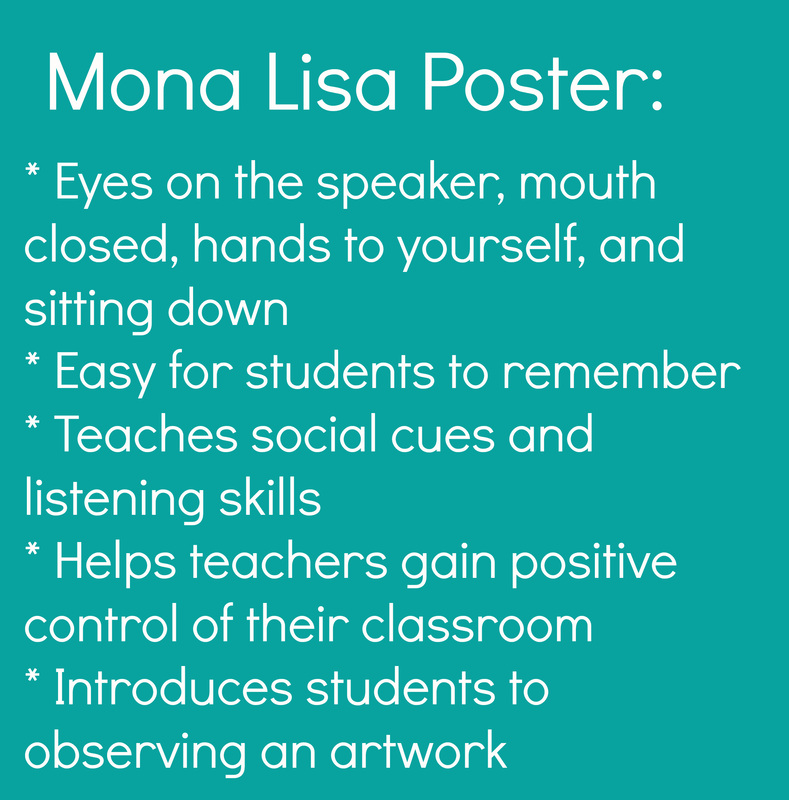 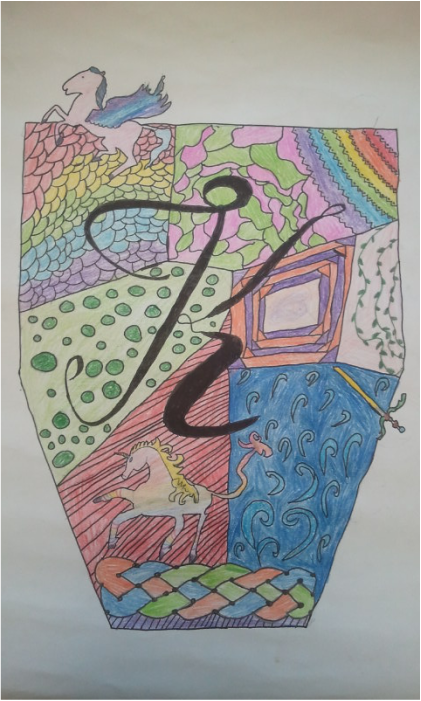 What a crazy project, but so much fun! The last project for my 6th graders involved creating a medieval art inspired coat of arms. We talked about illuminated letters, heraldry symbols, and characteristics of Medieval art. The kids really seemed to like this project. We focused on lines and patterns to create an interesting background for our coat of arms. Students were asked to add a letter to their coat of arms. Some students chose graffiti style letters, while others went the more traditional route. We started running out of time, so not all students got to color in their coat of arms. But even black and white looked cool! I had a huge pack of gold leaf laying in my craft room and allowed some students to add the gold leaf. It was pretty tricky (next time I would use a gold paint pen instead) but the kids were amazed. They were convinced the gold leaf would make their artwork very valuable. ;)
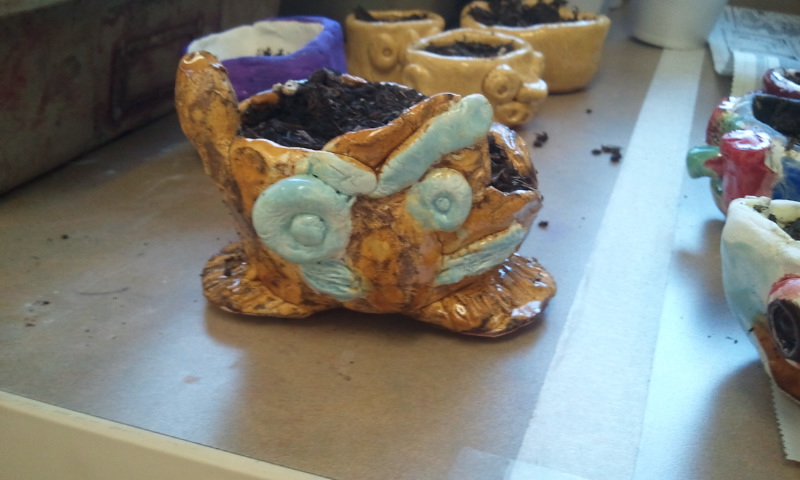
 The face pot lesson was a big hit! This lesson focused on so many different elements and techniques in using ceramics. Students learned about:
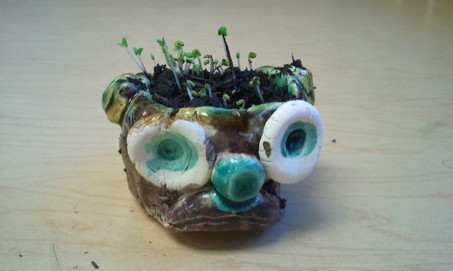
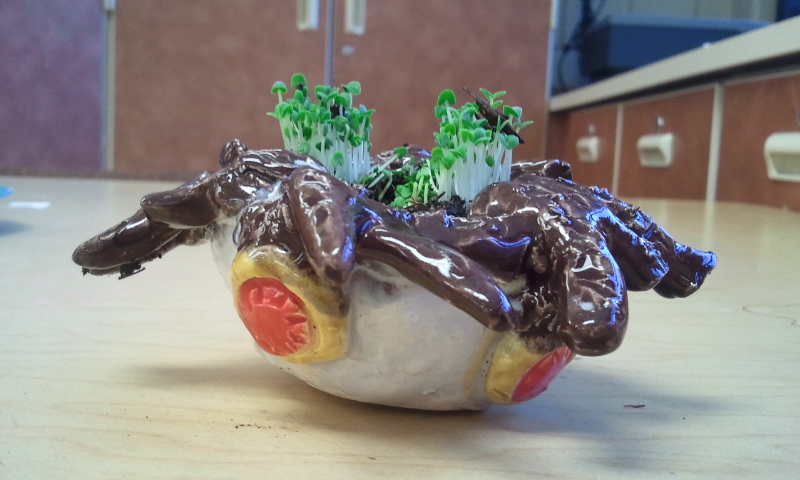
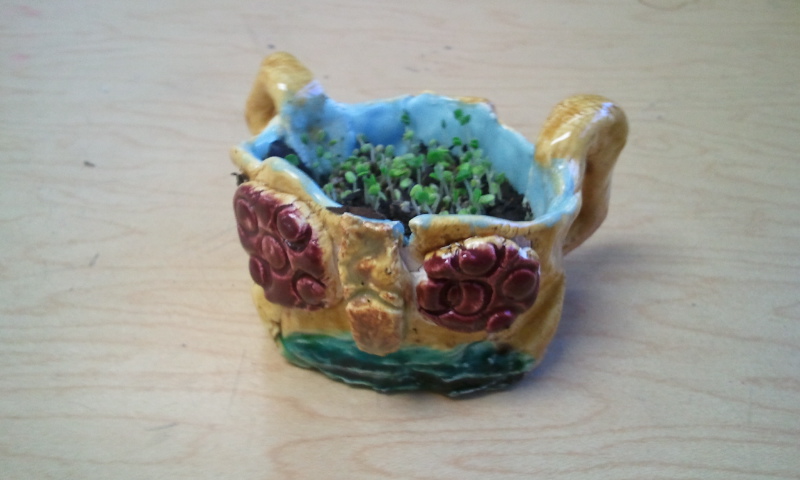
Videos created for this lesson . . .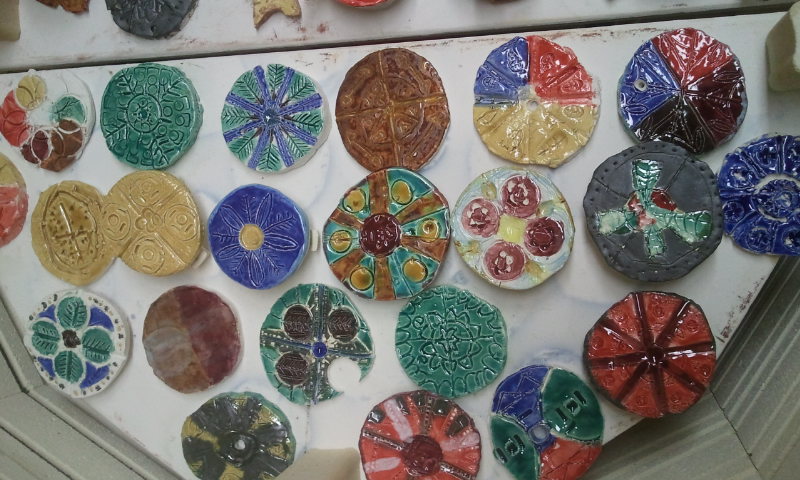 Well, my first glaze fire was a success! These Amaco F-series glazes sure are forgiving. We went through 10 bottles of glaze! Since we were so low on clay, my original plan for students to create a plate had to be sized down. Instead, I had students create a small 4-5" medallion and create a design using radial symmetry and texture. We looked at other Islamic tiles for inspiration and even took a virtual tour of the Blue Mosque in Turkey. The tour got a lot of enthusiasm! I gave students a choice on how they wanted to use their medallions. Some students chose to create a wind chime, others chose to make them into a necklace or to hang on the wall, and some students said they'd like to use their medallions as a coaster or candle holder. Some students even included Arabic writing in their designs! 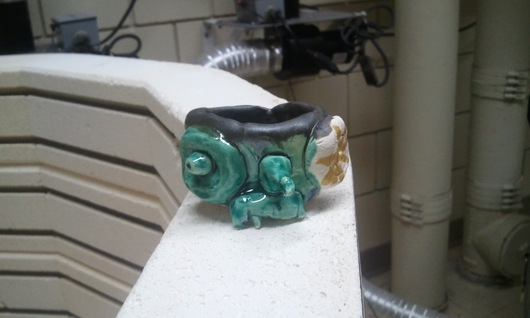 Students also had one day to create a simple pinch pot with a face using addition (slipping & scoring method). I had students poke a hole in the bottom to turn them into mini flower pots.
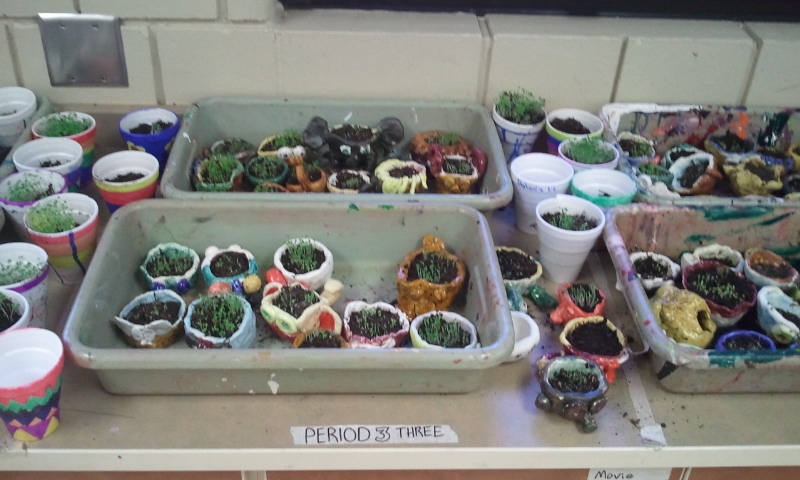
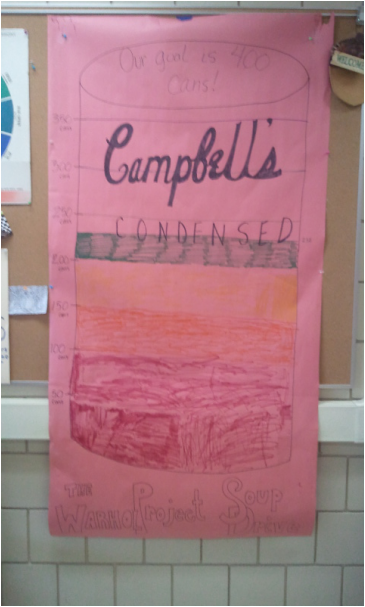
We are planting chia seeds in the pots when we come back from Spring Break. We'll let them grow in my window for a week, and then students get to take home a "living sculpture"!  A while back I had stumbled upon the website of a teacher who did a "soup drive" along with her Pop Art project. I thought this was such a cool way to get students involved with art history and their community! I took this teacher's (I have no idea who she is) idea and ran with it. I created what is now called, "The Warhol Project". For the last month, students have been bringing in cans of food where we will be donating them to Channel One Food Bank in Rochester, MN. Our goal is 400 cans by the end of May. We already have 238!
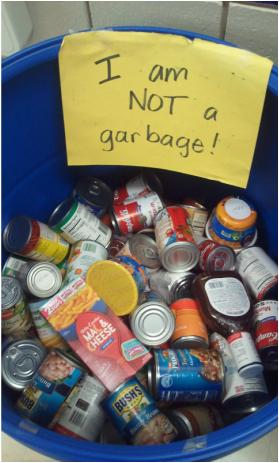 We are collecting our cans in two large barrels that Channel One kindly gave us. It's not a bad idea to put a sign on them that states they are not garbage (I encountered I few issues there...)
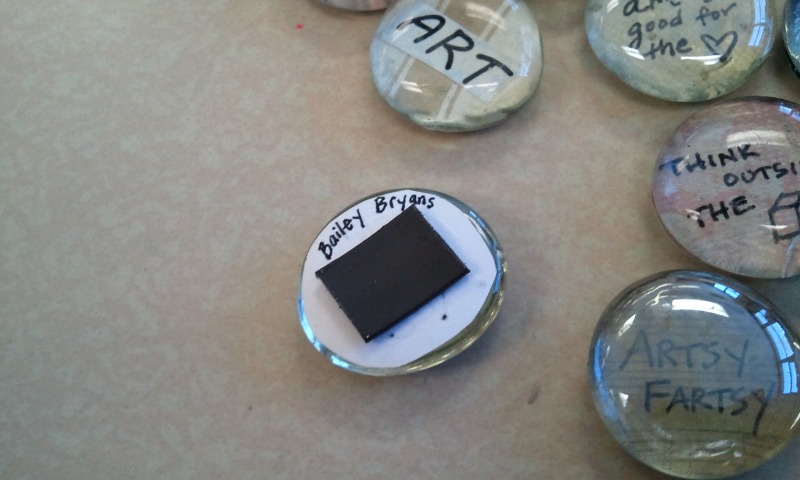
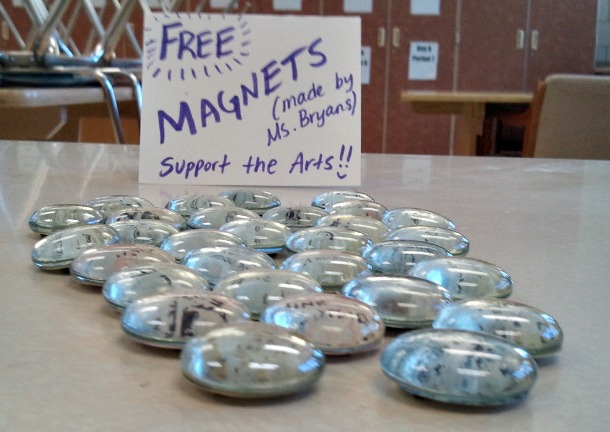
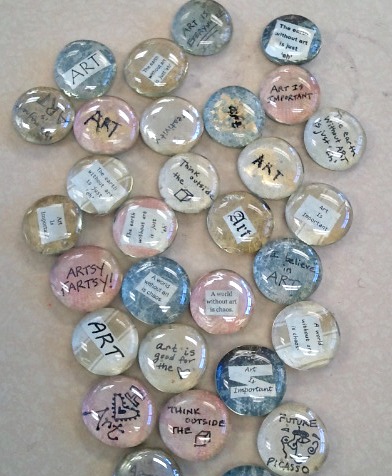
Last semester we made pop bottles (Pop Art...get it?) on the benday dots handout. We used markers and colored pencils for that project. This semester, I plan on having students draw soup cans in their table groups and use the benday dots handout I used last semester. I think I will teach students how to use watercolor pencils instead of using regular colored pencils and markers. I think it would be interesting for students to use complementary colors in this project as well. I just love how the students (and parents!) have shown so much enthusiasm and generosity by donating to our soup drive! Stay tuned for the next part of The Warhol Project: Drawing our soup cans! 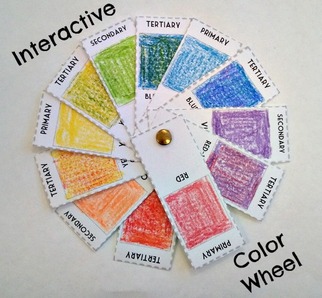 I was looking for a way to teach my 6th grade art students how to mix colors and create their own color wheel without using the old-fashioned (and somewhat boring) color wheel model. Unfortunately, my web search turned up few results. That's when I came up with the idea for a moveable and interactive color wheel that students could construct themselves. This is a great project for those kinesthetic learners who like to keep their hands busy! I created my own handout that could be printed off on regular or card stock paper. The handout includes all 12 colors on the color wheel (Primary, Secondary, and Tertiary). The project involves students coloring in each color card using colored pencils, crayons, paint, etc. Then students cut out the cards, hole punch in the designated circle, and secure them together using a brass brad or string. The final product is a color wheel that folds out like a fan and can be arranged into the traditional color wheel layout. Each card is labeled with it's color category and color name. This is a great tool for students when using color in their following projects. I've found it very handy for when students are struggling to choose a color scheme. It was also a great project for Special Ed learners to work on cutting/hole punching skills while also learning to mix the different colors. The lesson only takes two 50-minute class periods and students really enjoy "playing" with their color wheels. I've included the interactive color wheel handout (print as much as you want!), lesson plans, rubric, and example photos for sale. Check it out in my TeachersPayTeachers online store. 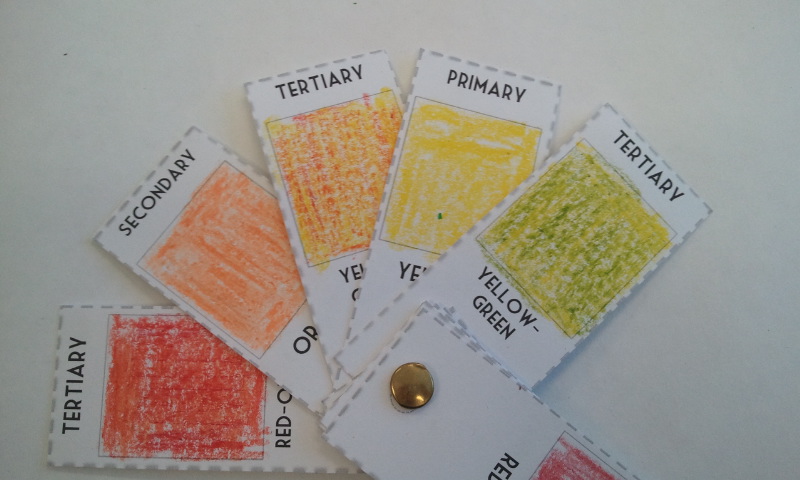 The interactive color wheel can help students see colors side by side while choosing color scheme. 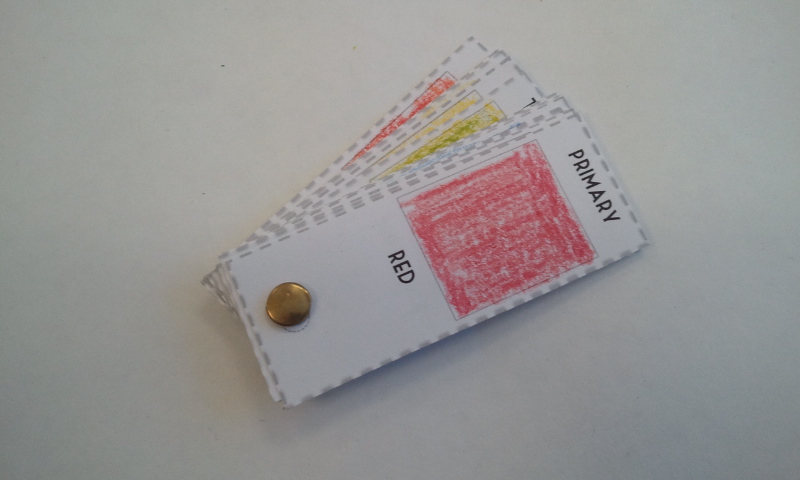 The color wheel folds up small and neat. Great for classrooms with limited storage space! 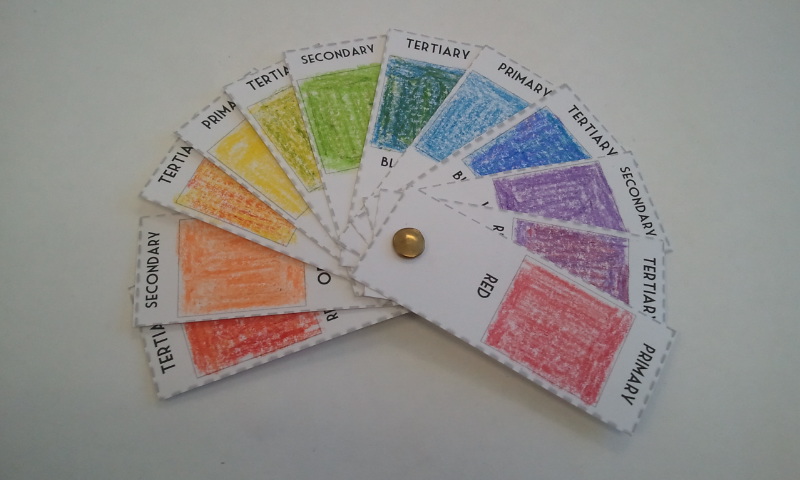 The interactive color wheel can be folded out in a variety of ways. Fold it out like a circle, fan, or by selecting certain colors. For example, students can fold out just the primary colors. 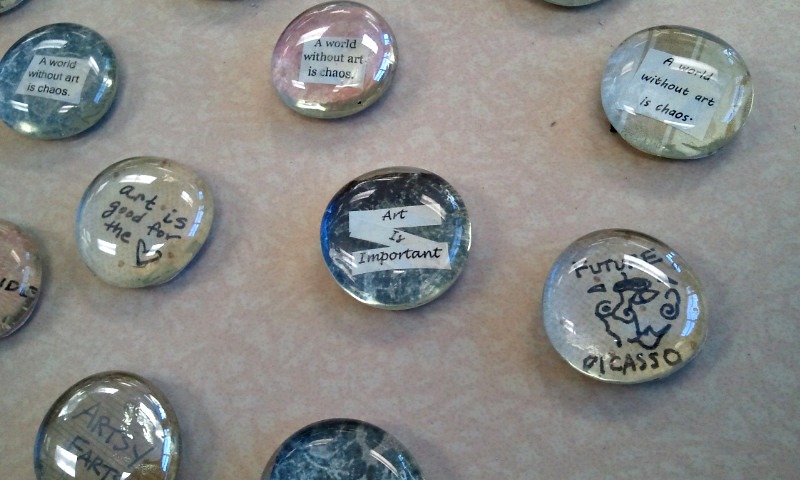 As an artist, I love art. Art class was the one class I looked forward to everyday. However, I've had some students who say they don't like art because they think they don't have the talent. Each lesson I like to talk about the real-world skills students can learn from art. We recently started a comic strip project. Students learned that a lot of art is used to tell stories. From advertisements to animated movies, images can often speak louder than words. I think it's important for students to understand that what they are learning is like an iceberg. The tip of the iceberg is the project itself, but what matters even more are the skills and knowledge students acquire beneath the surface. This semester I wanted to do something different for conferences. I wanted to stress the importance of art education to parents. I came up with the idea to create magnets with art-inspired sayings to give away as freebies to parents and students who stopped by. HOLY COW! They were a hit. I had some parents asking if they could take more than one. I hinted that these magnets would work really well holding student artworks on the fridge and this got a lot of enthusiasm. MAKING THE MAGNETS These magnets were extremely inexpensive and quick to make. I bought the large glass stones from the dollar tree. You get approx. 35 of the stones for a $1. I only bought one bag, but I probably should have bought two since I ran out. I used scrapbook paper and printed sayings such as:
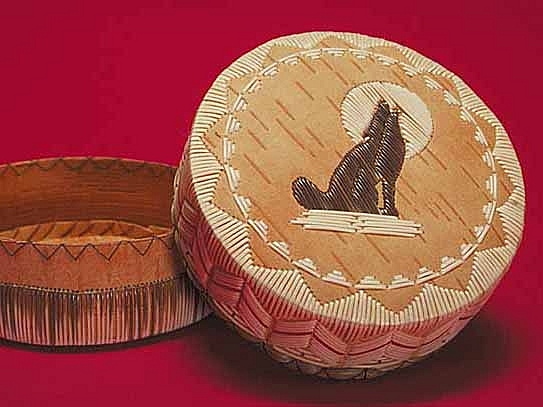
I cut the paper to fit the flat side of the stone and used a glue stick to adhere the paper. Then I bought a cheap roll of magnetic tape for $3 and cut those into small squares to glue to the back. Each magnet took only a minute or two to make and they looked so fun sitting out together! 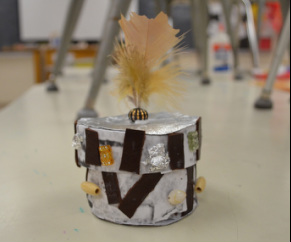 Well the American Indian art unit is complete! We made birchbark boxes from cardstock paper with printed birchbark textures. I had students use beads, feathers, and leather scraps to decorate their boxes. Some students got a bit over-excited with the decorations, but some boxes turned out so cool! We did a compare/contrast between the artist Bobby Wilson and traditional Ojibwe art. We also did a graffiti write on what they knew already about Ojibwe art. In total, the unit took about 5 (50 min.) class periods in total for most students to finish. Some students really struggled with assembling their boxes, but most seemed to get it. One thing I added to this lesson was a tooled metal lid. I had students do some beginner metal tooling in heavy duty aluminum foil. Students were asked to tool with a blunt pencil at least three Ojibwe symbols into their aluminum foil. We cut and glued the foil to the paper lid. We also talked about the differences between traditional and contemporary Native American art. This led to a great discussion on how stereotypes can hurt people and what kind of stereotypes we all experience on a daily basis. It was pretty powerful, and overall, a fun project! 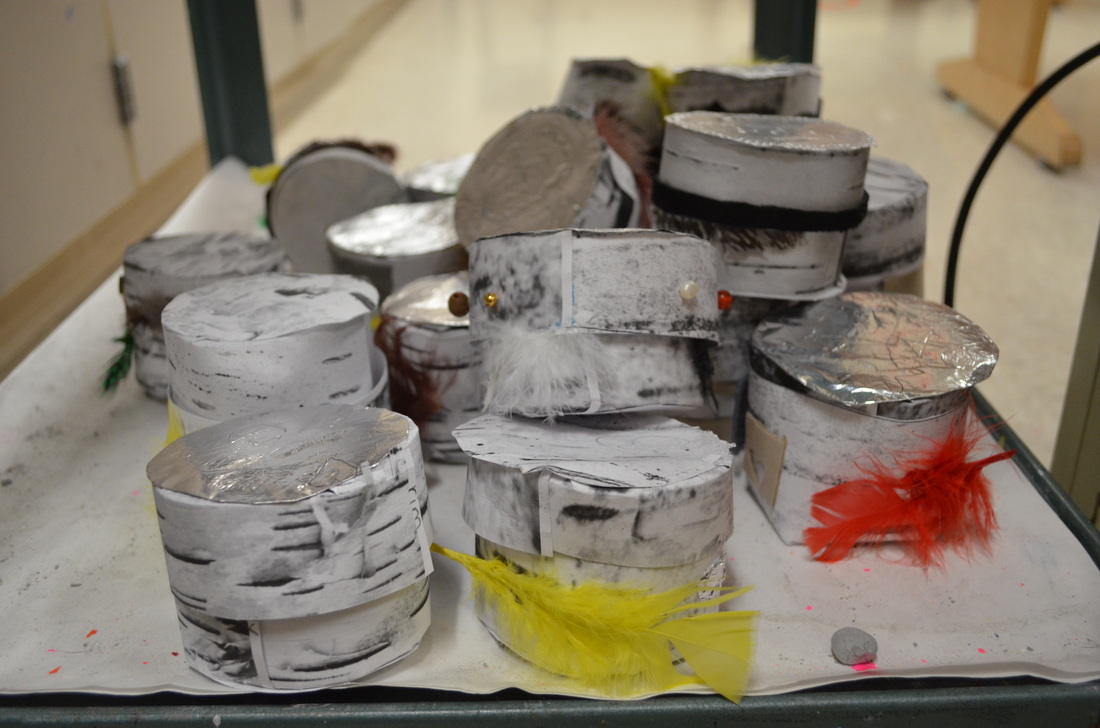 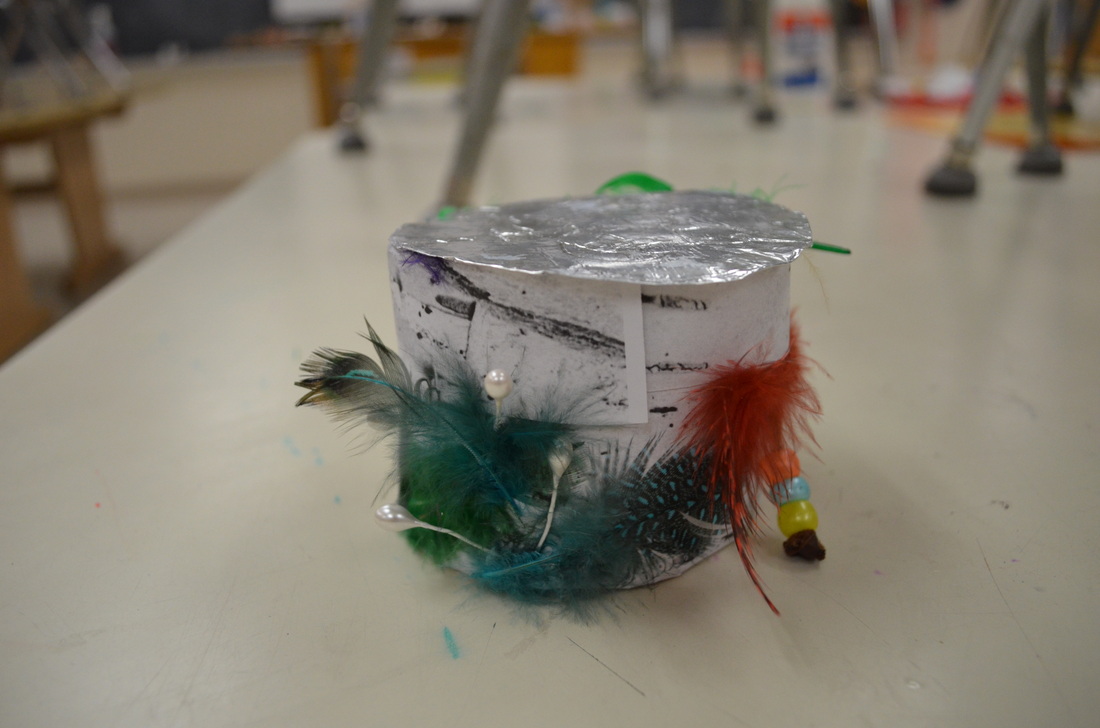 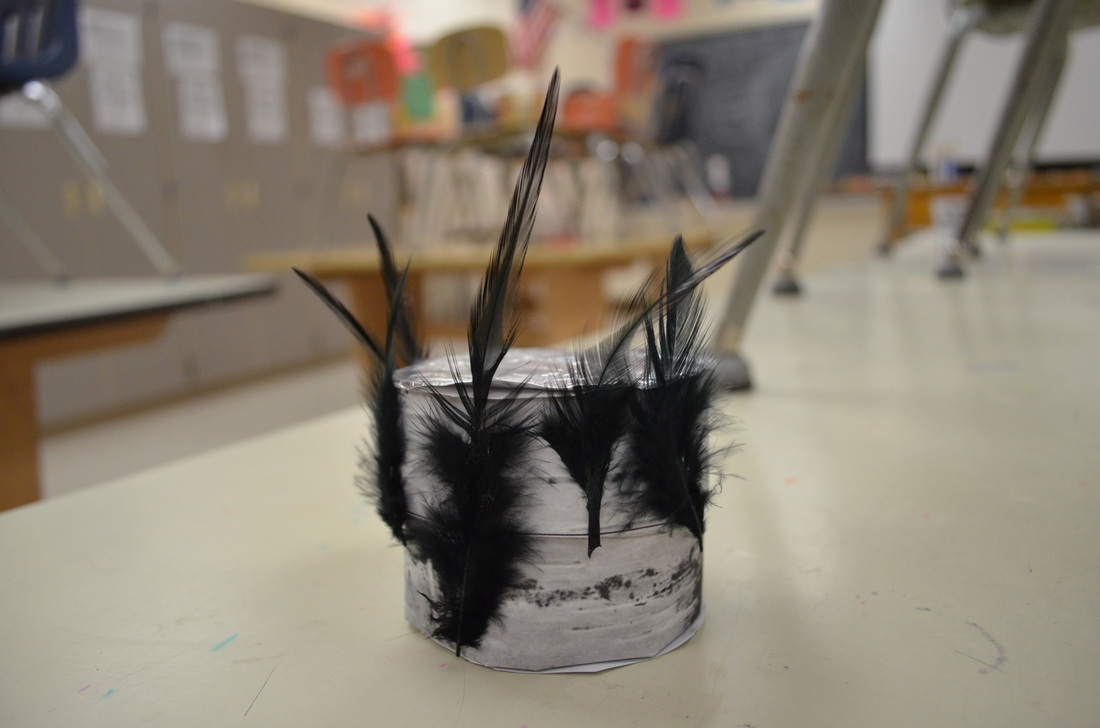 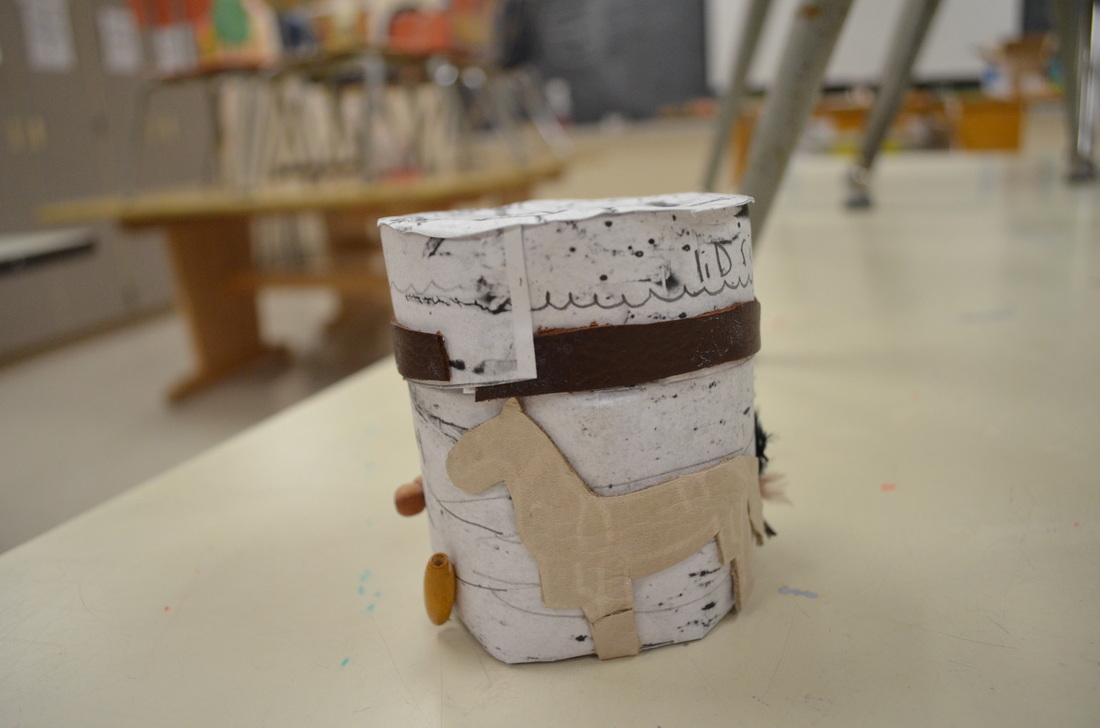 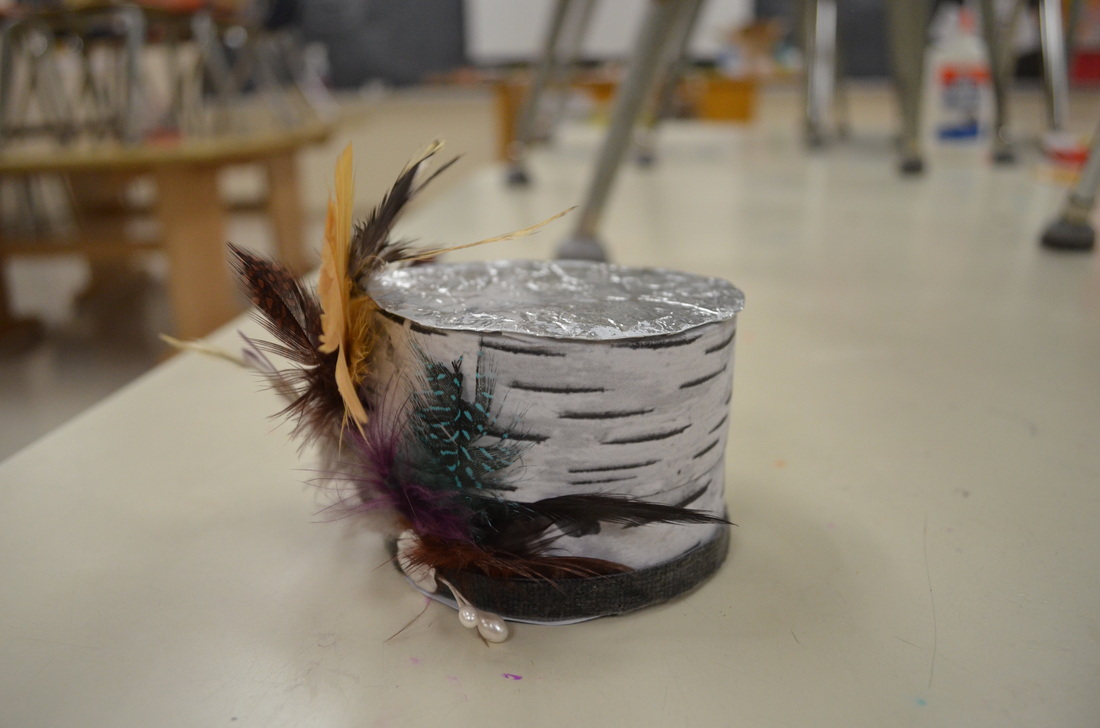 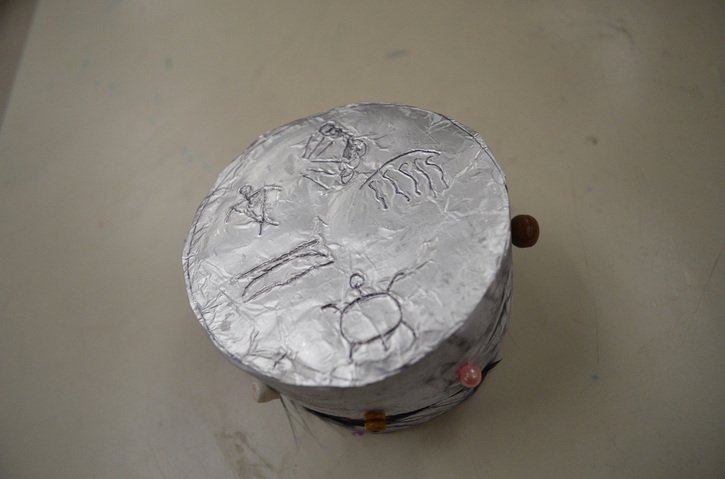
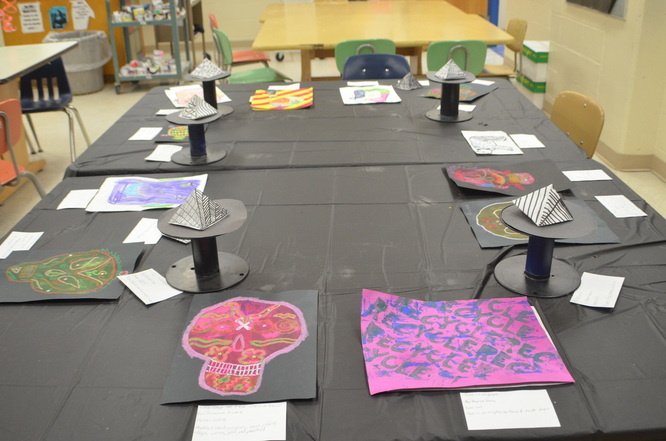
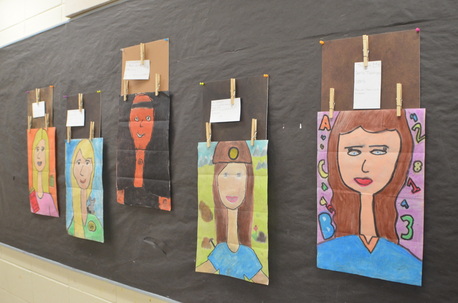
I used disposable black tablecloths on the tables and reused old wire/thread spools as pedestals for the 3-D work. The image above shows how I hung up the larger artworks using scrap mat boards and clothespins. Students were asked to fill out an "Art Sandwich" about the artwork created by the student to their left. We talked about writing respectful comments and using professional language. Since this was our last day, I brought snacks and pop for the kids to munch on while they looked at each other's work. Overall, I think it was a great success and such a great opportunity for students to experience an "art show". We had a few minutes of spare time, so I showed them this "Latte Art" video. Kids had a lot of fun trying to figure out how it's done.  When I first started teaching last year, I hunted the web in earnest looking for "first year teacher tips". I found some pretty depressing stuff. I remember seeing things like, "You will never have a life. Get ready to spend every waking moment worrying". Needless to say, I was a bit petrified with fear my first day of teaching. But in the last four months, I have survived and I definitely feel like I still have a life. However, I did find some tips that made being a brand new teacher easier to bear. My top 10 tips for new or first-year art teachers:
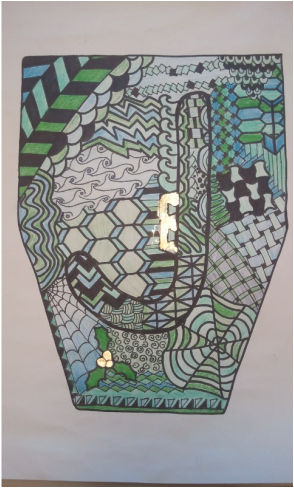
1) Caffeine. A cup of coffee after lunch is the perfect pick-me-up for afternoon classes. If you don't like coffee, pop or tea works well too. 2) Student help. Hanging artwork up around the school is great, but takes A LOT of time. I have several students who finish early on projects and volunteer to hang things up around the school. It's also great to have students go through supplies and help organize the last few minutes of class. 3) Snacks & Gum. Have some granola bars and Mentos on hand. I don't know how many times I got all the way to school and realized I forgot to eat breakfast. Having a snack in your desk drawer can keep you tided over until lunch time. Keep a stash of gum for when your breath starts going south. 4) PlanbookEdu.com. This website is basically a daily plan book, but entirely online. It is free to use and you can organize all your lesson plans by classes. I like the fact I can insert websites/URLs into the plan for easy access. You can even "bump" your schedule ahead if you have a snow day or unexpected day off. 5) Footwear. While those 4-inch black heels look fabulous on you, you'll probably be cursing them an hour into teaching class. Choose footwear that feels good and have more than one pair. If you wear the same pair everyday, your feet can still get achy. Switch up some ballet flats with some dressy tennis shoes. My favorite footwear is a pair of leather cowgirl boots I found at a thrift store. 6) Organization. Use folders or a binder to organize lesson plans, assessments, PGP stuff, etc. Use sticky labels on classroom drawers to organize art supplies. Keep each lesson and the handouts/resources needed together in separate boxes or folders. This makes packing up at the end of the year so much easier. 7) "Me Time". As soon as you come home from work, do something for yourself for at least 30 minutes. Take a bath, paint your nails, have a glass of wine, read a book, watch Downton Abbey, WHATEVER you enjoy. Whatever you choose, make sure it relaxes you and takes your mind off of teaching. 8) Go away. Go to a conference if you are able to. Visit an art museum on the weekend (and take a camera with you). Getting away not only leaves you feeling refreshed, it can give you ideas and resources for teaching new lessons. 9) Connect. I consider myself a bit of a loner when it comes to my personality. I like being independent and my own boss. However, connecting with other teachers and parents can mean a world of a difference. Having one person you can go to when you have any questions is extremely helpful, whether it's a receptionist, veteran teacher, or if you're lucky like me, another art teacher. Connect with parents by sending a monthly newsletter. It doesn't have to be anything fancy, just a quick note about what you're doing in the classroom and what is coming up. 10) Stay positive. Build positive relationships with students. We've all heard it, but I mean it. Some of my best students are the ones struggling in every other class. If you can be the one person that a student looks forward to seeing, your job is already half-done. Talk about what they like to do. Talk about yourself and what you did over the weekend. I like to tell my students about what I was like in middle school. Stay positive. Smile, even if you have a pounding headache. Kids can quickly sense if you're in a bad mood, and they will try to take advantage of it. Act positive and everything will be just fine. 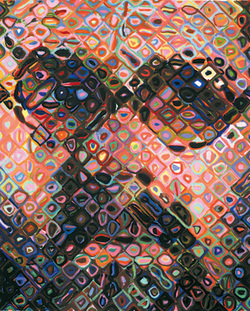 The end of this semester has proved to be quite busy. We are currently working on our birchbark boxes and will hopefully be finished by the end of this week. I will be moving schools for the second semester and that means an entirely new group of students. It also means that I am working on planning the curriculum for this second semester. As an artist who likes to work in a variety of mediums, I am definitely one who likes to try new things and experiment with different lesson plans. A few of the projects we did last semester (pop bottle drawings and zentangle pyramids) will be repeated but I will be teaching many new projects this second semester. One project I have been dying to have students try is a large-scale collaborative grid drawing. I think I will be doing this project instead of the Chihuly sculptures with this group of students. I took inspiration for the grid drawing lesson from Chuck Close's gridded portraits. This lesson is still in the works, but I think it will be a great lesson on drawing what we SEE, rather than what we think we see. This is something I know a lot of 6th grade students struggle with and breaking it down into 5"x5" square chunks should ease frustration. The 7th & 8th graders do their own personal grid drawings and this should be a nice precursor for building up background knowledge of grid drawing. I chose six artists and their portraits for this lesson. I copied and pasted their images into a word document and overlayed a 7"x9" grid over each image. I applied the artistic filter "pencil sketch" over each image to show contour lines more effectively. The Artists:
The hardest part was narrowing my choices down to six artists. These may not have been your own choices, but my criteria for selecting artists was based on the lessons I will be teaching throughout the semester and I wanted to represent different cultures and show a balance of both men and women artists. I plan on printing each gridded artist image twice. I will use my paper cutter to cut out each small 1"x1" square from the image. I will then label the back of each square with a number so we can keep track of which image goes where. Then I will give students a handout for the project with a 5"x5" square box to draw in. Each student gets a small 1"x1" square and will be asked to transfer the 1" box into the 5" box on the handout. I plan on showing students examples of what we are doing, but not what our final image will be. I like a little mystery! :) Once students have their drawing in pencil finished, I'll have them color with markers or colored pencils. I will be testing this project out myself to see how it works before teaching it. The worst case scenario is that it doesn't turn out to look like a portrait. Each final work will be a combination of two art classes (approx. 30 students in each class). The final work will be 35"x45" in size with a total of 63 5"x5" squares in each work. Time required: 2 (50 min.) class periods You can see the document I created with the six artist images below. I will keep you posted about how this project works out!
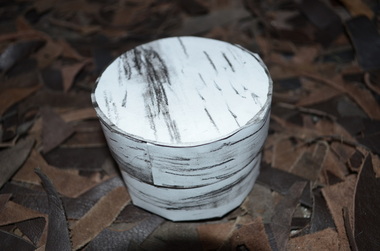
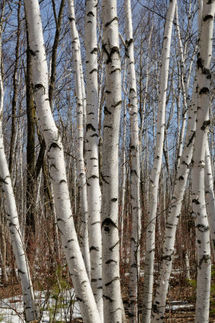 Minnesota Birch trees Minnesota Birch trees I have struggled and struggled to find a great lesson to meet the MN visual art standard: 6.1.3.5.1 1. Compare and contrast the connections among visual artworks, their purposes, and their personal, social, cultural and historical contexts, including the contributions of Minnesota American Indian tribes and communities. I think I've probably spent an entire week trying to figure out a lesson that wouldn't cost too much or wouldn't take a month to finish. I stumbled on a great instructable on how to construct a round box. I thought this would be a great activity for students to do out of birch bark and tie in with Ojibwe art and culture. Only downside, with 250 students, I'd need A LOT of birch bark. So that's when I came up with my faux birchbark. I used charcoal pencil on white paper and created my own birchbark texture. I added a little coffee stain and some smudging, and voila! "Birchbark" paper. I decided to make a template for the box in advance to prevent any issues with measuring or cutting....saving paper! The template isn't perfect, but it works pretty well. You can download my template below: Download the Birchbark box template for $3.00 from TPT
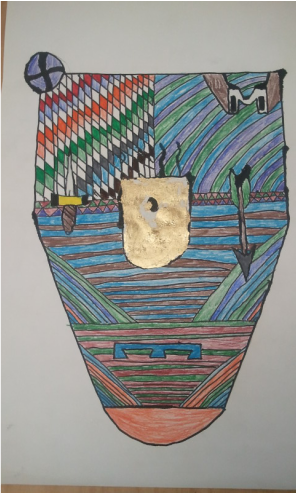
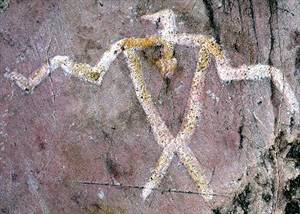
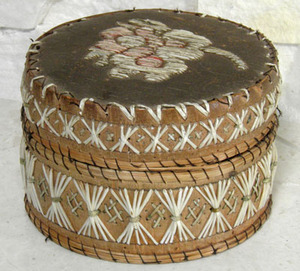
I haven't taught this lesson, as I plan to do so next week. I am hoping to start off by having students do a graffiti write of all they know about Native American art and culture. This will give me an idea of what we should cover (what students already know and what needs clarification). I am going to show students some images of the Jeffers Petroglyphs located in Minnesota and we might even compare/contrast with Egyptian hieroglyphics. Next I will have students create a design on the lid of their box using Ojibwe symbols. I might even have them do a glue resist-- so many choices! Once the design is done, we will construct the boxes. I am having my template printed on ivory cardstock paper to make it more sturdy, but printer paper seems like it works too. I will be sure to make an update post about how this lesson goes. I think this will make a great end of semester project. Examples of Ojibwe Birchbark Boxes |
Mrs. QuamThis is my 11th year teaching art & graphic design! I have taught middle school for 2 years and high school for almost 5 years. I truly enjoy working with students on a daily basis. I also enjoy teaching real-world skills such as problem solving, using technology, and the power of teamwork and collaboration. My joy is sharing my passion for art with others! Archives
March 2024
Categories
All
|
||||||||||||||||||||||||||


 RSS Feed
Photo from Rob Qld
